2
$\begingroup$

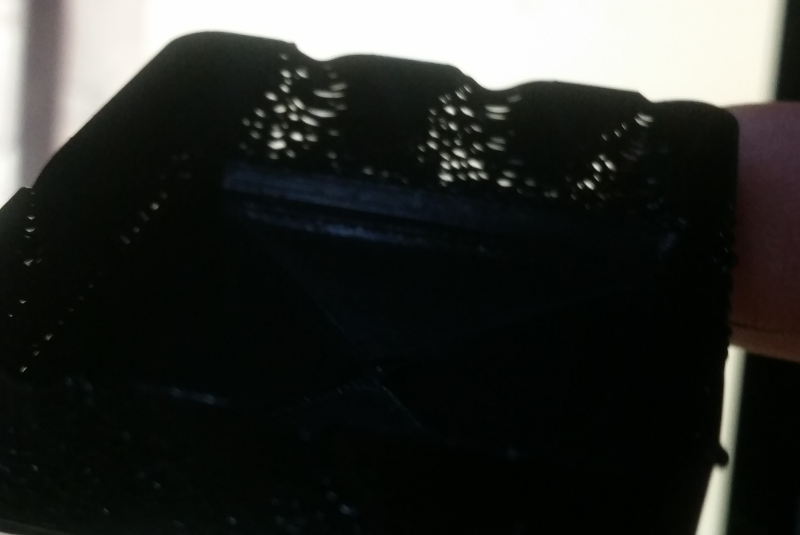
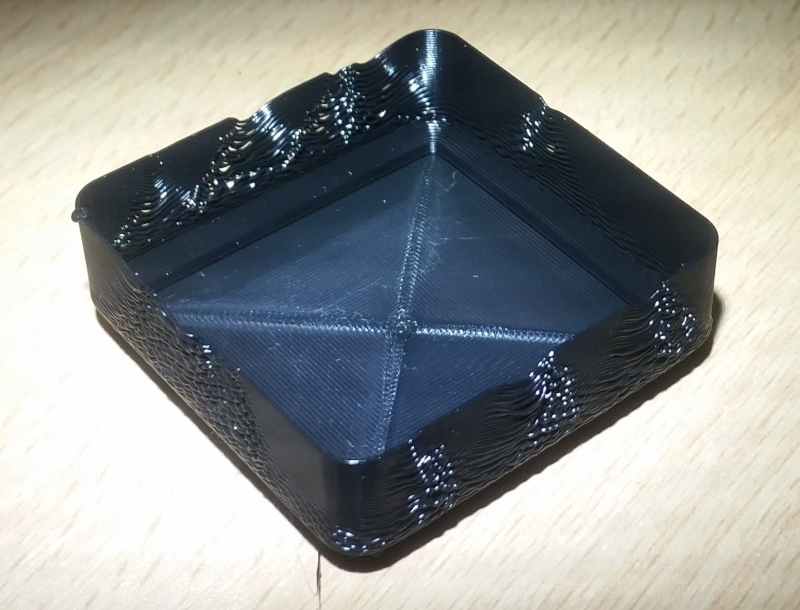
I've tried printing in vase mode (or "spiralise outer contour" in Cura) and while the floor looks fine, the vertical sides look "saggy"

I'm using a 0.4 mm nozzle, with eSUN PLA+ at 218 °C and a bed temp of 60 °C. This combination works fine for normal printing. Layer height is 0.28 mm (Low Quality mode in Cura) with a line width of 0.4 mm
enter image description here
Image is backlit by a monitor to show the laciness in the walls.

enter image description here

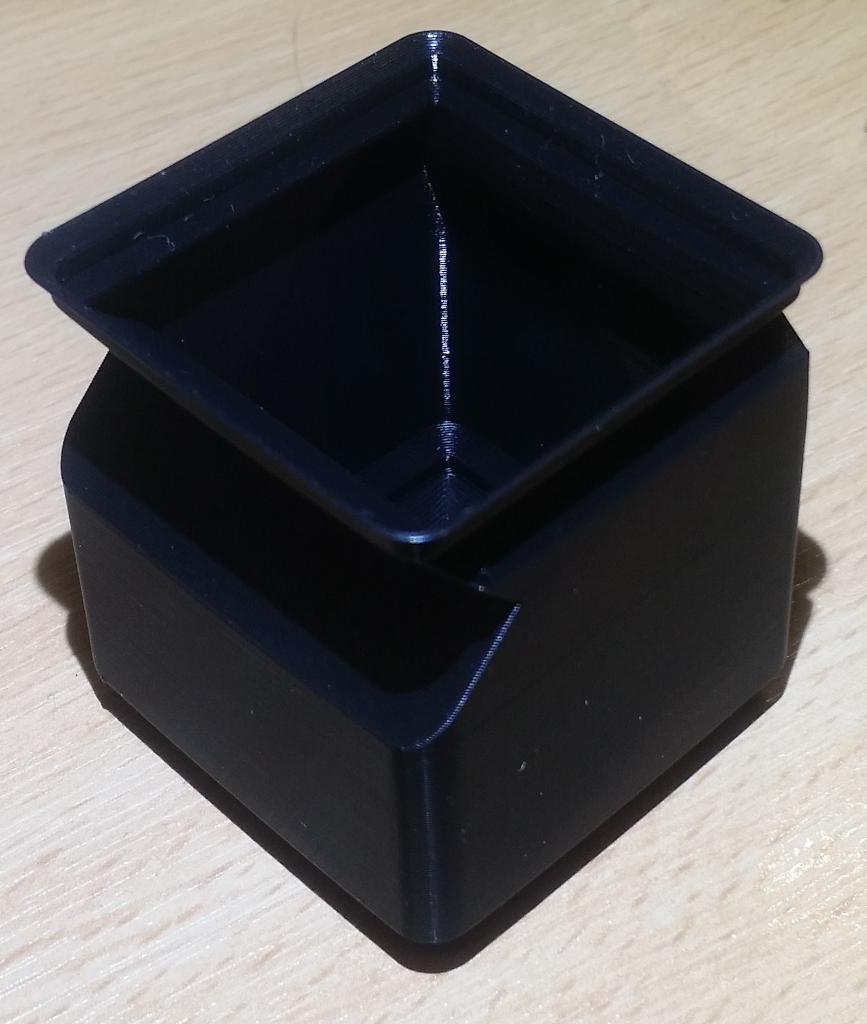
The original model was a 1x1x6 Gridfinity bin that uses less plastic than the original.

https://thangs.com/designer/LittleHobbyShop/3d-model/%23gridfinity%20Vase%20Mode%20Single%20Box-65828


Is this insufficient cooling, or too fast a print speed letting the filament sag under gravity before it cools? Or is a 0.4 mm nozzle too small?

This reminds me of brickwork where the mortar is too wet. The bits that work right look fine, but all four sides have bad parts.

What's the trick to vase mode printing?
$\endgroup$

2 Answers 2

1
$\begingroup$

You likely hav a mix of insufficient cooling and excessive layer height for the overhang angles in that model.

Cooling: The amount of heat you have to displace per unit of time is proportional to the amount of material you extrude per unit of time, which is the product of layer height, line width, and print speed. Going slower is one way to fix this, but not necessarily the best.

Overhangs: The model seems to have walls that tilt outward at 45°. This means, if the layer height were half the line with, only half of the extrusion line in the new layer would be over top of material from the layer below; the rest would be overhanging. But you're using 0.28 layer height. This means only 0.12 mm of the new line, less than 1/3 its width, even touches the line below. This is going to give you at best a very weak print, and likely troubles like what you're seeing.

I would go with thinner layers, and the same or wider line width, possibly at lower speed. Wider line width (note that you don't need a wider nozzle to do wider line widths) will improve the amount of overlap between layers, but it does increase the amount of material you need to cool. My preferred options for that print would be around 0.16-0.20 mm layer height, 0.5-0.6 mm line width, and whatever speed your cooling can handle.

$\endgroup$
1
$\begingroup$

The trick was to change a lot of settings and save as a separate set.

What works for "normal" prints does not work well for vase-mode work.

enter image description here

I had to:

  • Decrease layer height from 0.28 mm to 0.20 mm
  • Increase line width from 0.2 mm to 0.6 mm
  • Drop speed from 125 mm/s to 80 mm/s (though this could be tweaked upward I suspect)

Vase mode also cannot deal well with printing multiple parts at the same time, and if you use "one-at-a-time" mode in your slicer then the max height caps out at 25 mm for me, which is not a lot of use.

$\endgroup$

You must log in to answer this question.

Not the answer you're looking for? Browse other questions tagged .