12
$\begingroup$

Just started doing some design. First project was a replacement handle for my angle grinder, so basically a hollow cylinder. I want to reduce the amount of material used in the print. I could sit here and punch holes through the handle with a smaller cylinder, or some other shape etc., but is there an easier way to do this?

It must be a pretty common requirement, just like in the movies where the spies look at a photo and tell the tech to 'enhance ... enhance'. Ideally you could select a surface and overlay some sort of pattern to remove material.
$\endgroup$
4
  • 1
    $\begingroup$ So you are looking for something that is "just like in the movies" even though the movies make that stuff right up? $\endgroup$ Commented Dec 15, 2016 at 6:42
  • $\begingroup$ Great job improving the question. I'll update my answer tomorrow to reflect the changes. Though I'm not sure I can help with Hollywood sudo science but I know your meaning. $\endgroup$ Commented Dec 15, 2016 at 6:57
  • $\begingroup$ If you punch a lot of holes in a thin mesh, it will probably increase the cost. You then have to print lots of walls (expensive) instead of infill (cheap). $\endgroup$
    – Gunslinger
    Commented Dec 28, 2016 at 9:59
  • $\begingroup$ Hello @SleepyBoBos, I noticed your question has been up for a while now. Have any of the answers below been able to solve your question? If so, would you mind accepting the appropriate answer. If not, what is missing so that we may help you further? Also, if you have figured it out on your own, you can always answer and accept your own solution. Thank you. $\endgroup$ Commented Feb 7, 2017 at 19:17

2 Answers 2

11
$\begingroup$

Updated to match the improved question format.

There are a few ways to reduce material usage. First is what you have touched on. Which is to reduce the design by punching out holes, and removing all material that does not add anything to the structure. Even better is what you touched on, reducing it to the point where your print is more like a suspension bridge, where it is a the bare minimum scaffolding in a geometric pattern.

Most tools you will find for reduction are like this tutorial from Shapeways on Meshlab where you reduce the surface detail. It might be worth exploring these a bet, however probably not what you really need.

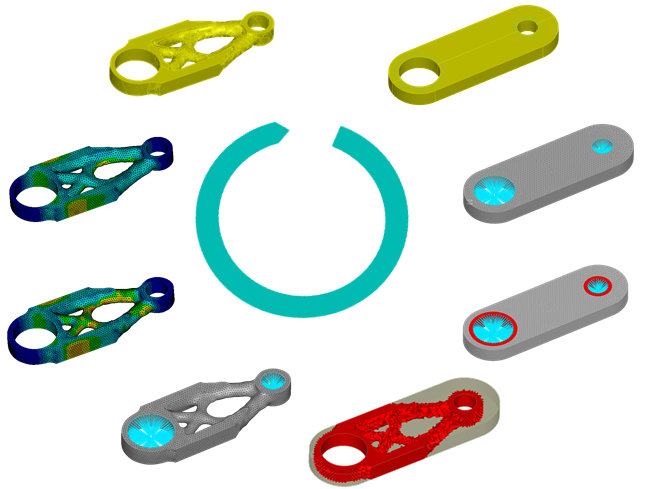
Next the more hard core cad tools such as solid works will allow you to preform Parametric optimizations and Topology Optimization. Topology Optimization. seems to be your real winner

Topology Optimization example

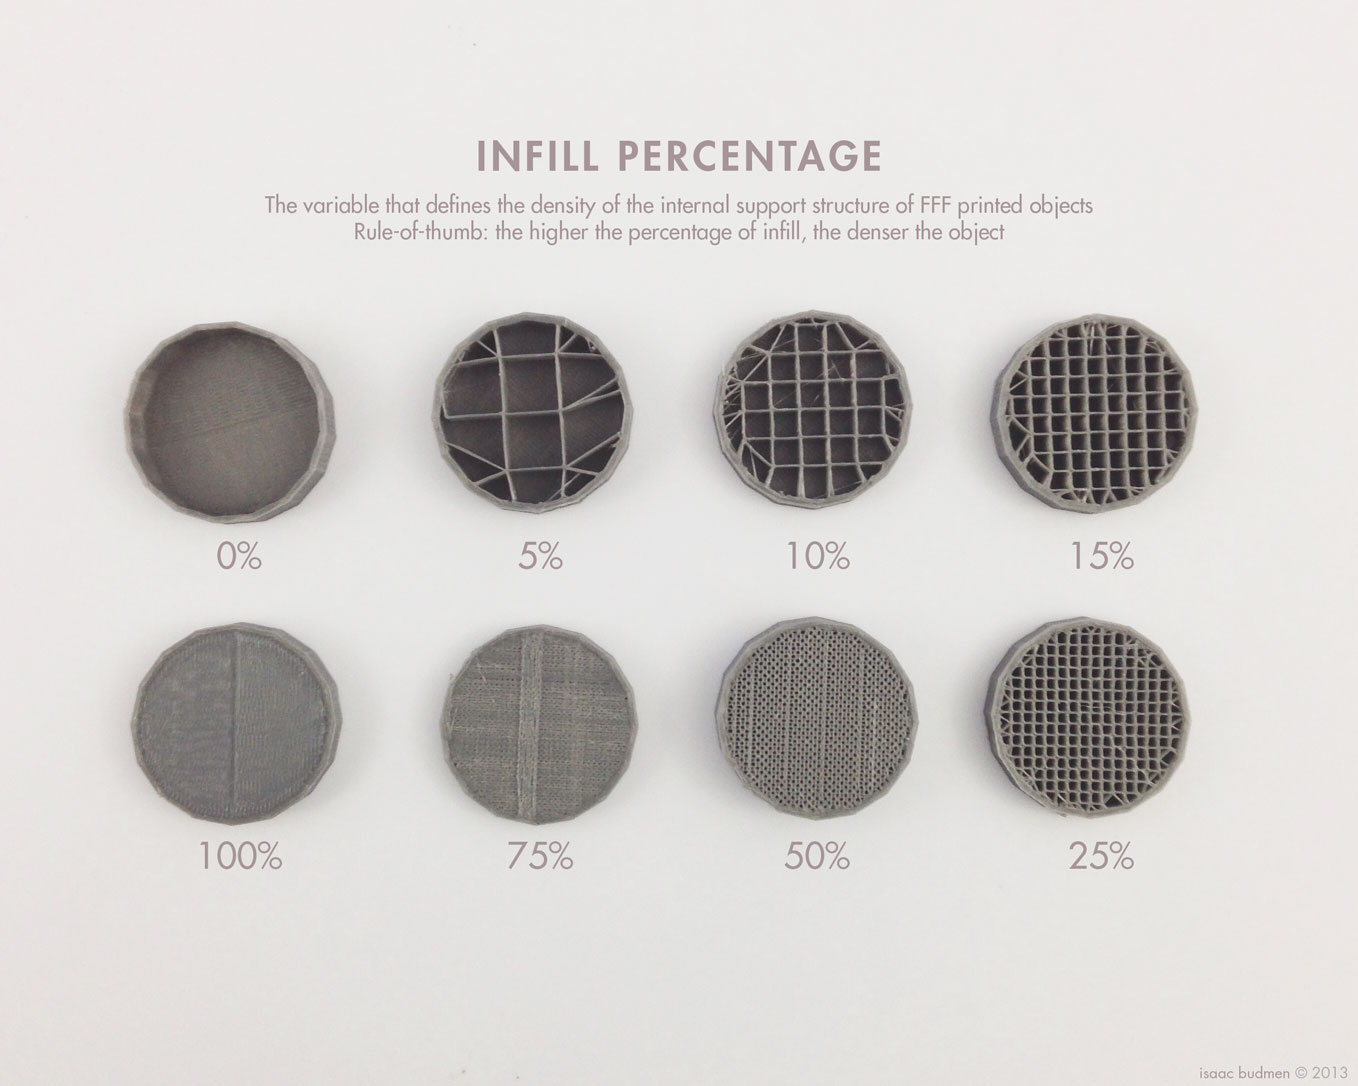
Now from the 3d printer standpoint we just simply tweak our slicer settings. There are entries for Infill. I usually print with 7% infill. AKA my print is 93% hollow inside. I then set a few solid shell layers. Think of solid shells as the skin. Usually that is enough to reduce my plastic usage. The only reason I don't make a part 100% hollow and a few solid skin / shell layers is that I need something to print on top of or if I need the part to be strong . Even low percent infill can be very strong if the correct geometric pattern is used (I.E. triangles).

Generally the reduced infill will be enough, unless you are making thousands of this item, though in that case you are probably not going to 3d print it anyways.

enter image description here

3dprintingforbeginners has a nice article on the relationship between infill, number of shells and part strength. A bit more information about the terminology (infill/shells/etc...) can be found on 3D printing blog.

$\endgroup$
3
  • $\begingroup$ An interesting question would be whether it is desirable to rely on certain infill patterns or to design recesses already in the CAD. $\endgroup$
    – Thomas S.
    Commented Dec 17, 2016 at 10:46
  • $\begingroup$ @ThomasS. That is why I always preview and tweak the infill. Though honestly I prefer thick shells and low infill. Rarely have I cracked a part doing this way. But all depends on what I am using it for. $\endgroup$ Commented Dec 28, 2016 at 3:28
  • $\begingroup$ I also preview the infill settings in Slic3r, but have seen a lot of things at thingiverse that have designed recesses. $\endgroup$
    – Thomas S.
    Commented Dec 28, 2016 at 7:33
5
$\begingroup$

"Just like the movies"-type tech typically means $$$.

For those who do not own (legally or otherwise) expensive CAD software, it may be difficult to find an out-of-the-box solution. That's not to say that it can't be done.

A close, readily available, solution would be to use a series of common CAD tools such as Shell and Scale. Between these functions, you should be able to scale a copy of your main solid object, then shell the new inner object. When sliced, the object should have a smaller "inner wall" and a hollow center. I would recommend this over 0% infill as a shell will not provide enough strength for the intended use you mentioned.

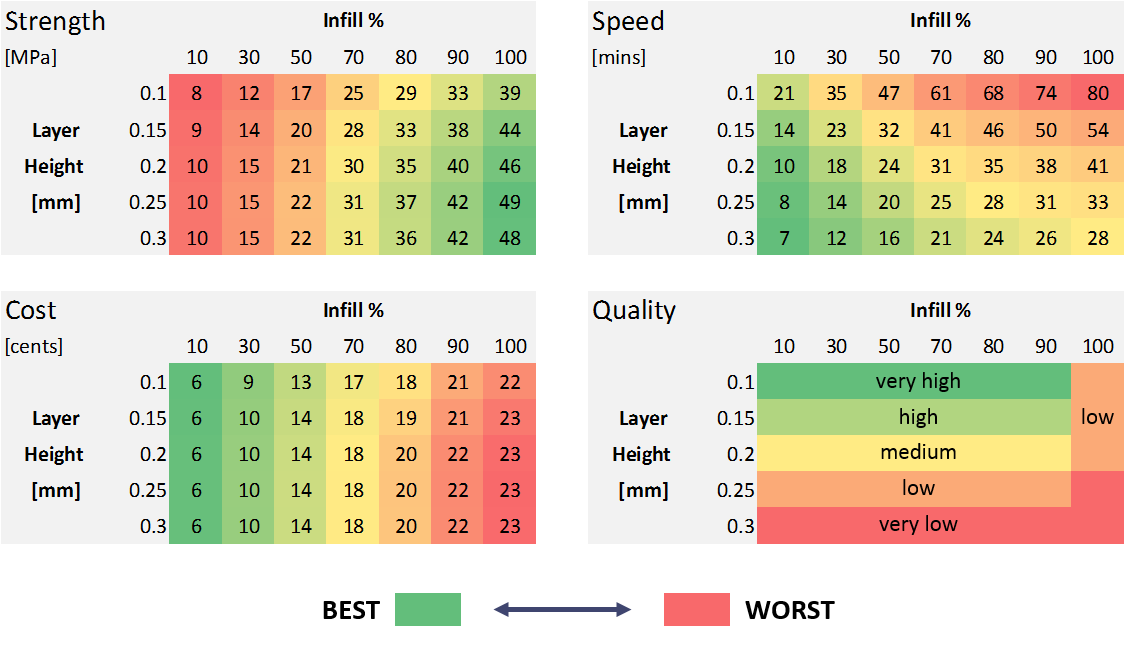
There is a great article on My3DMatter.com that provides details and a very interesting set of charts, outlining cost, speed, strength, and quality distributions at varying layer heights and infills.

Please Note: These results are going to differ between different material types, vendors, part shape, and infill pattern. These results were found printing from a MakerBot Replicator and presumably MakerBot-branded filament.

Infill vs. Layer Height Comparisons

$\endgroup$

You must log in to answer this question.

Not the answer you're looking for? Browse other questions tagged .