6
$\begingroup$

I specifically want to test

  • calibration
  • tolerances
  • precision
  • accuracy

I'm having trouble with Print in Place models and I'm trying to find out if there's something I can do to improve my print quality.

The printer I am using is a Kossel clone, specifically a FLSUN QQ and assume FDM printing.

$\endgroup$
2
  • $\begingroup$ Have you found and fixed the problem? If so, have the answers below led you to the solution? Please vote to accept an answer (using the tick button next to the answer) so this question is not bumped up once in a while and can be removed from the unanswered question list. You may even add your own solution and accept that after 48 hours! If you have not been able to address the problem please update your question. $\endgroup$
    – 0scar
    Commented Oct 7, 2018 at 13:03
  • $\begingroup$ I have not found a solution yet. Lots of great suggestions, but I haven't had time to try most of them. I think before I get around to calibration prints, I first need to deal with a minor bead leveling issue, and then need to dial in the temperature for my filament. $\endgroup$
    – linuxdan
    Commented Oct 8, 2018 at 22:03

3 Answers 3

4
$\begingroup$

Any print you make can be considered a test print! But, specific test prints are easily found on the internet and lend themselves better for specific tasks. In order to improve your printer / print quality, you need to follow a meticulous series of tests and record the parameters you use to slice the model. Each test should be broken down into several print process parameters (and recorded) and tested for their effects (e.g. speed and temperature).


A general accepted strategy is to calibrate the extrusion process first and that look into the general accuracy.

Filament deposition calibration

An important aspect of printing is deposition of just enough filament (if you deposit too much the lines become wider, and so are the dimensions). To calibrate the extruder deposition of filament you can easily heat up the hot end, mark the filament with respect to a certain reference point and extrude e.g. 100 mm. Now measure the filament mark again with respect to the reference point to verify you actually extruded that same demanded amount.

Accuracy

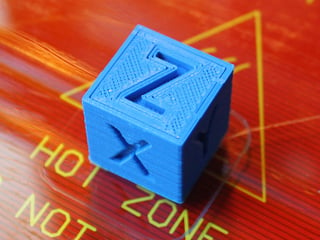
For general accuracy printing of 20x20x20 mm cubes is usually fine. Note that the print accuracy is generally determined by the printer (construction) itself, but can be influenced by print speed. Large speeds in combination with a large mass of the printer head can lead to positioning inaccuracies (like overshoot). That said, you should also look into the printer itself. Does it have play? Are the belts tight enough, but not over-tightened? Is the bed skew, or are XYZ perpendicular?

This cube is frequently used to calibrate the dimensions:
20 mm XYZ test cube
Please do note that the poster of this picture probably produced a dimensional accurate print, but still faces under extrusion (as seen from the gaps between the lines)

If dimensions seem to be off reasonably, e.g. more than 0.2 mm (depending on the printer construction) you could change the amount of steps per mm in the firmware. Do note that the steps per mm is mechanically determined by the belt and pulleys.

More tests?

Even more tests can done to make specific filament adjustments. E.g. "temperature towers" can be printed to test the optimal parameters for filament flow and / or bridging (printing in air between two parts), or overhang (unsupported parts of the print). But, these last tests are not specifically designed for the issues you mentioned.

Tolerance test

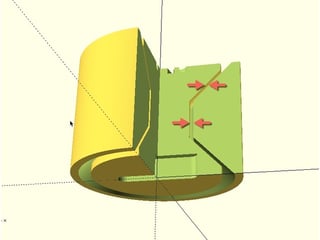
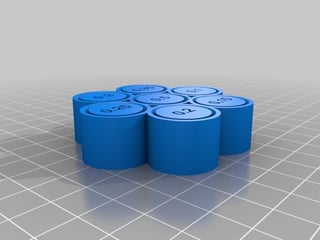
Once you have calibrated the printer to the ability of yourself and to the capacity of the printer itself you could try to print a dimensional printing tolerance test. Such tests are usually constructed by cylinder shaped (or diabolic shaped) objects in a housing that is slightly larger that the shape.

Tolerance testDiabolic shaped tolerance test part

$\endgroup$
2
  • $\begingroup$ You left out Benchy?? :-) $\endgroup$ Commented Jul 27, 2018 at 13:23
  • $\begingroup$ @CarlWitthoft :) yes, tolerance wise it is not needed although Benchy is a good test for the printer itself. I like this Benchy more! :) $\endgroup$
    – 0scar
    Commented Jul 27, 2018 at 13:27
2
$\begingroup$

This is a fairly open ended subject, but the different calibration/test models can be broken down into a few different groups. Although there are a few common 'standards', as soon as you get to looking at a specific parameter, you will need to look for something that is a good match for your problem (not everything on thingiverse is really 'useful), and work out how to use it for your adjustments. Ultimately, the specific model you're working on is the best test - and it may also be that this model is not optimal in some way.

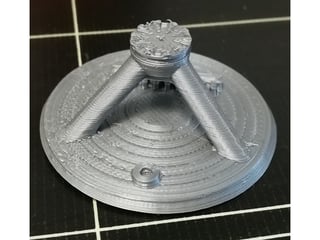
Here is a print from my own test model which shows the slicer not handling my model very well, partly because the model doesn't respect the filament dimensions. It also shows how a variety of print details can be captured in a small (20 min) print. Small Tower Tester by tsh2
Basic Calibration

This is a step that you might be tempted to skip on a non-diy printer, since it mainly focuses on the construction. The basic 20mm calibration cube (just a square) can be used to test that your printer is dimensionally accurate, and is also one way to check your extruder steps/mm (extrusion is variable, x/y steps generally only change when the belt skips). You can also use bigger shapes if you suspect that there are drive problems, and bed leveling might come into this group too, where you could use a one or two layer print.

Test Parts

These are small parts that might once have been considered hard to print, but now seem to be a standard reference for a 'good' print. Most people who have been printing for a while have a collection of benchie and marvin prints. You might use these to quickly test a new filament, although the benchie is borderline large.
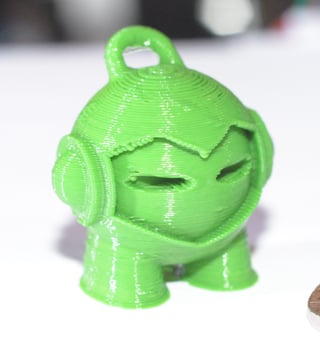
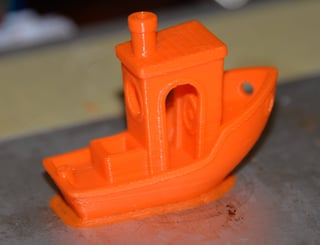
Marvin Benchie

Detail calibration

Depending what you want to focus on, there will be different things you can use. Temperature calibration towers, overhang and bridging tests, ripple tests (for acceleration), fan tests, etc. This is an area where finding a 'good' test part can be hard. You would want to make sure that the previous two classes of test show good all round performance (or have identified a specific problem) first, before trying this sort of test.

For the print-in-place example, you might need to check extrusion/ooze/coasting, as well as checking linearity and orthogonality (it's no use if a circular part turns out to be more like a diamond with rounded corners). You also need to make sure your first layer is good, without a rim or warping.

Torture tests

I put this in a group on it's own because it may not be as useful for tuning a printer as some of the others. This is a little bit more about showing off how good your printer is tuned - and is the origin of the benchie and marvin type models, just with the difficulty turned up a notch or two. Some print-in-place models might fit into this category.
$\endgroup$
1
$\begingroup$

The best place to start looking is to go to Thingiverse and search on 'benchmark'. There are a great many models there intended to test various aspects of printing. In fact you could search for example 'calibration benchmark' or 'calibration test' and get more specific examples.

Actually, here is a collection I just made today of the benchmarks I thought most promising. Disclaimer: I haven't tried them yet!

$\endgroup$
1
  • $\begingroup$ Note that some 'benchmark' items on thingiverse look more useful than they turn out to be... $\endgroup$ Commented Jul 27, 2018 at 8:02

You must log in to answer this question.

Not the answer you're looking for? Browse other questions tagged .