I recently got myself a prusa i3, that I needed to assemble and adjust myself. As expected, the first prints was of quite poor quality. After better adjustment, I improved a bit the print, but I am not quite there yet. I was hoping to get some advices on how to improve the print based on few pictures of the 3dbenchy boat I printed.
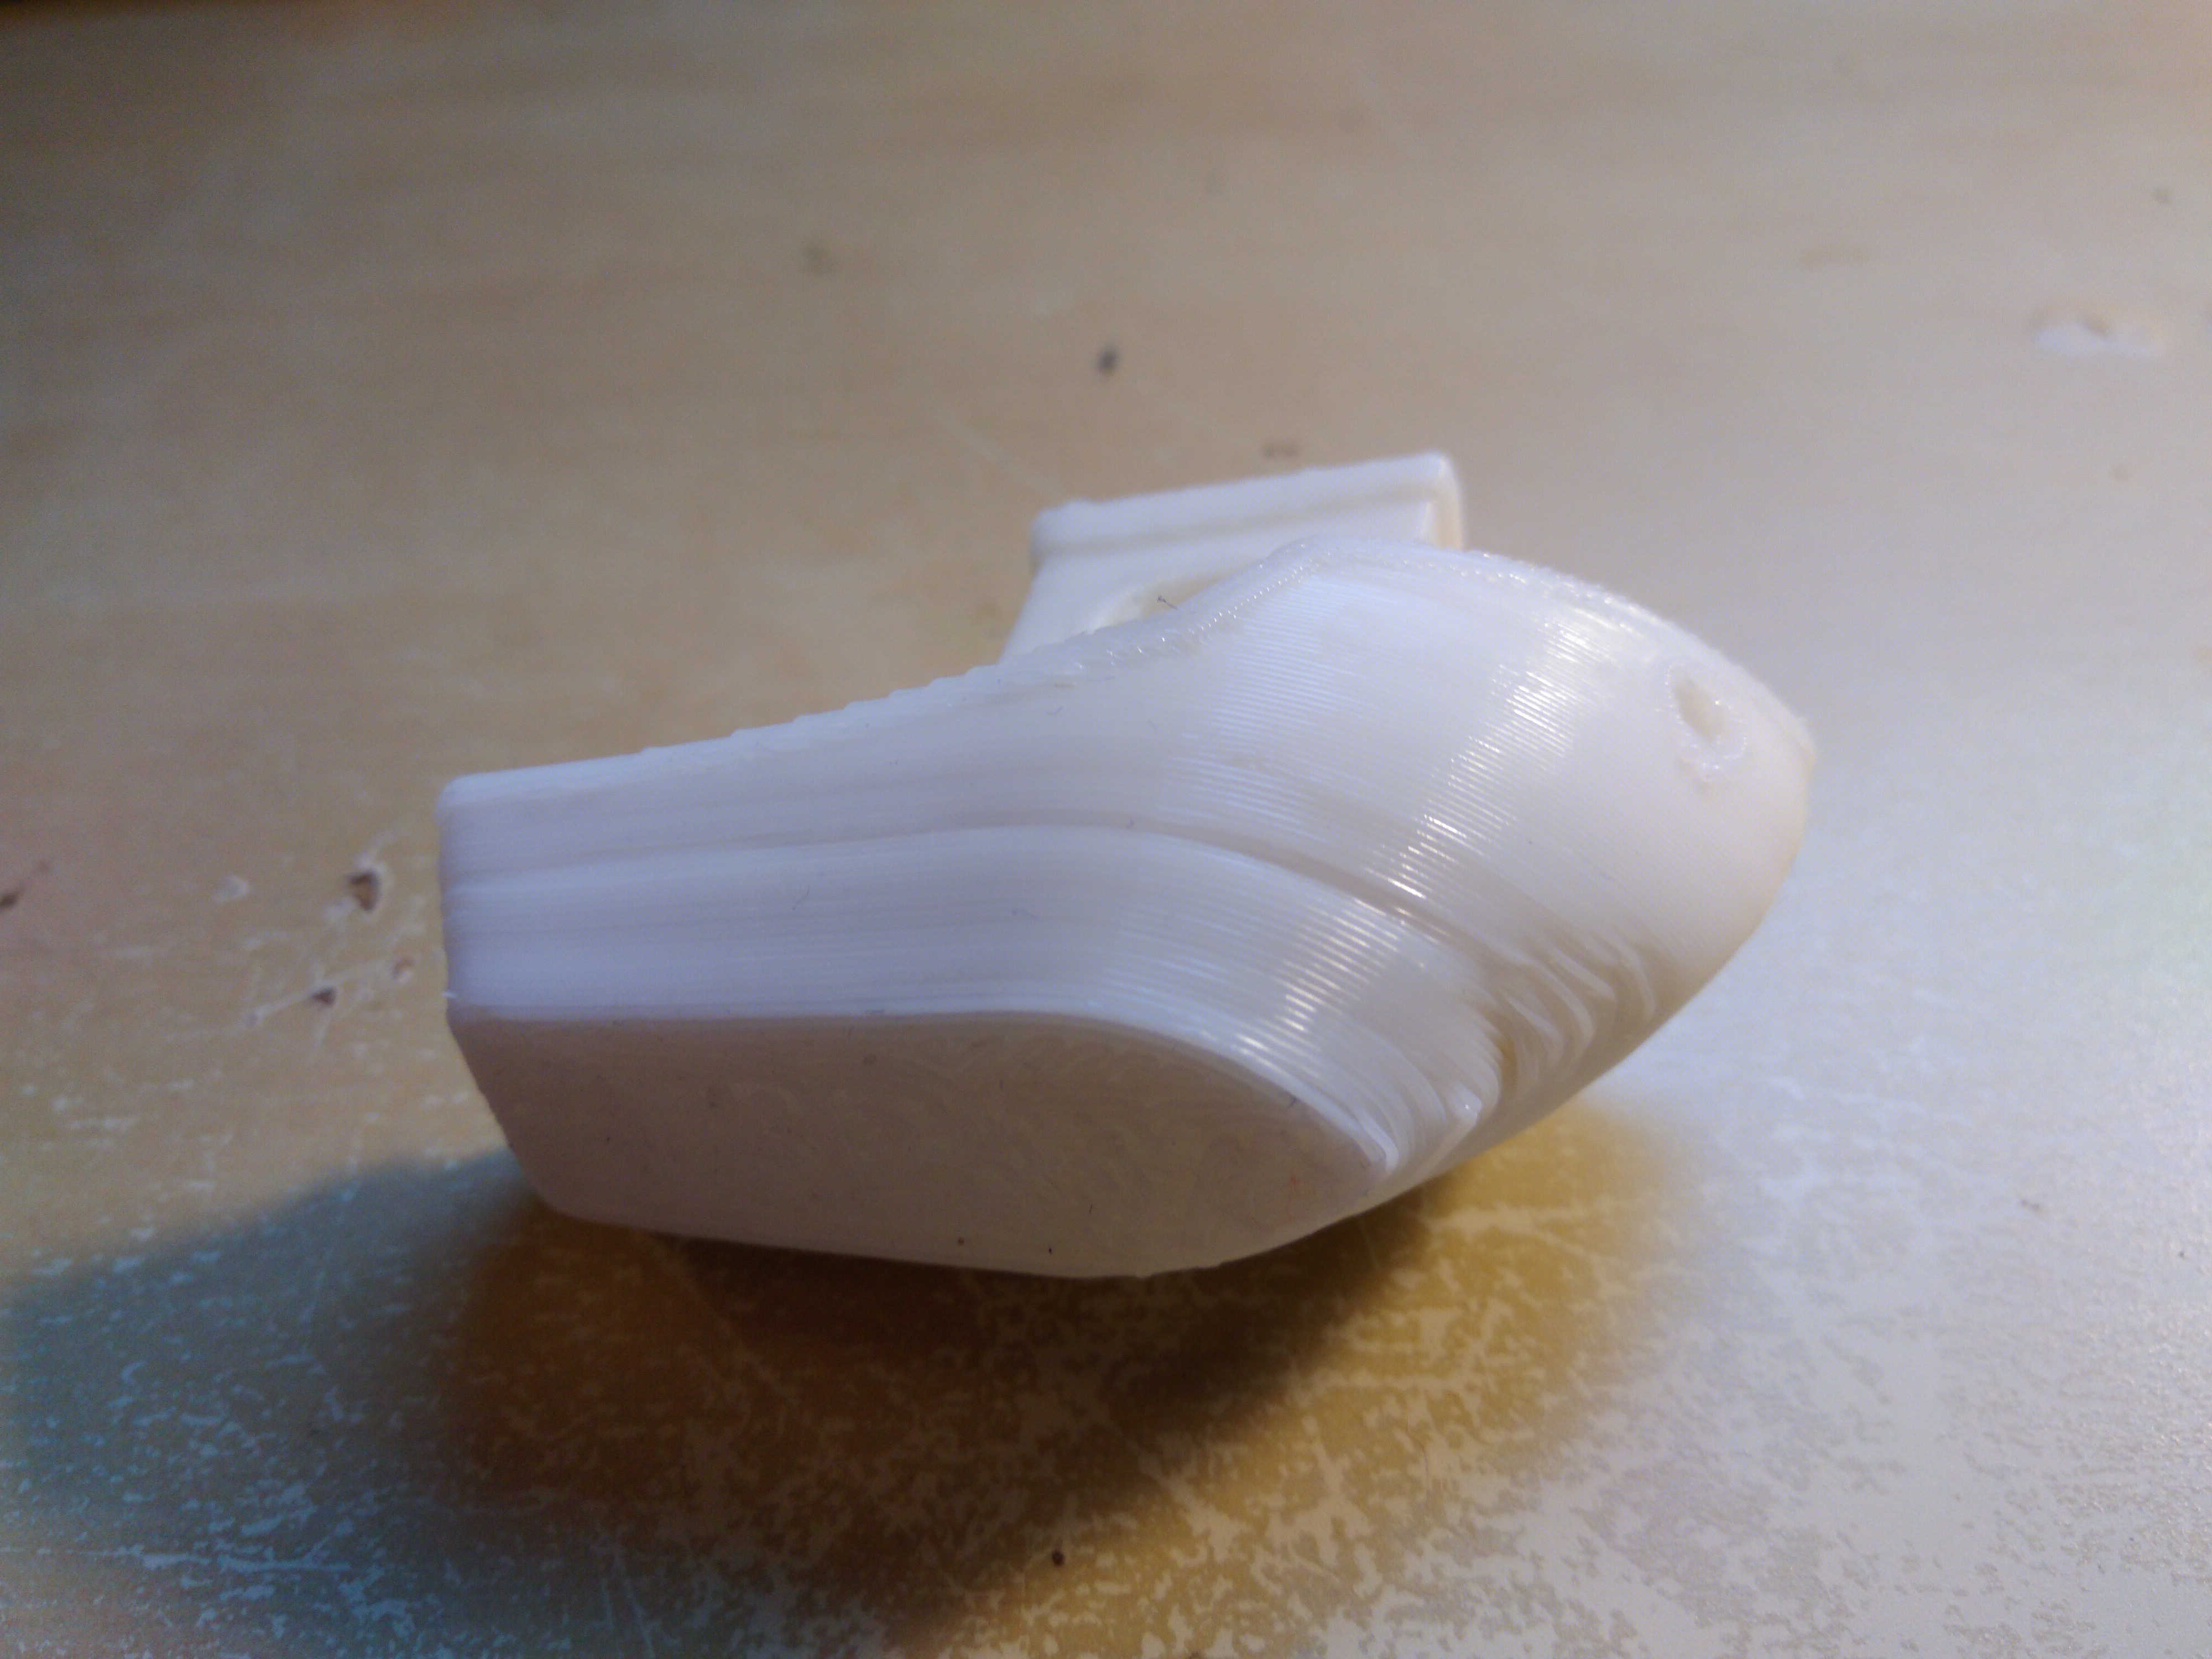
The most annoying point, on the following image, is the dent that I have in the hull, on the front of the boat. And one layer appears to be missing or close. And I have another one just like it in the top cabin.
I also think that my specific settings on the first layers shouldn't be there, because they don't improve anything, but that is another topic.

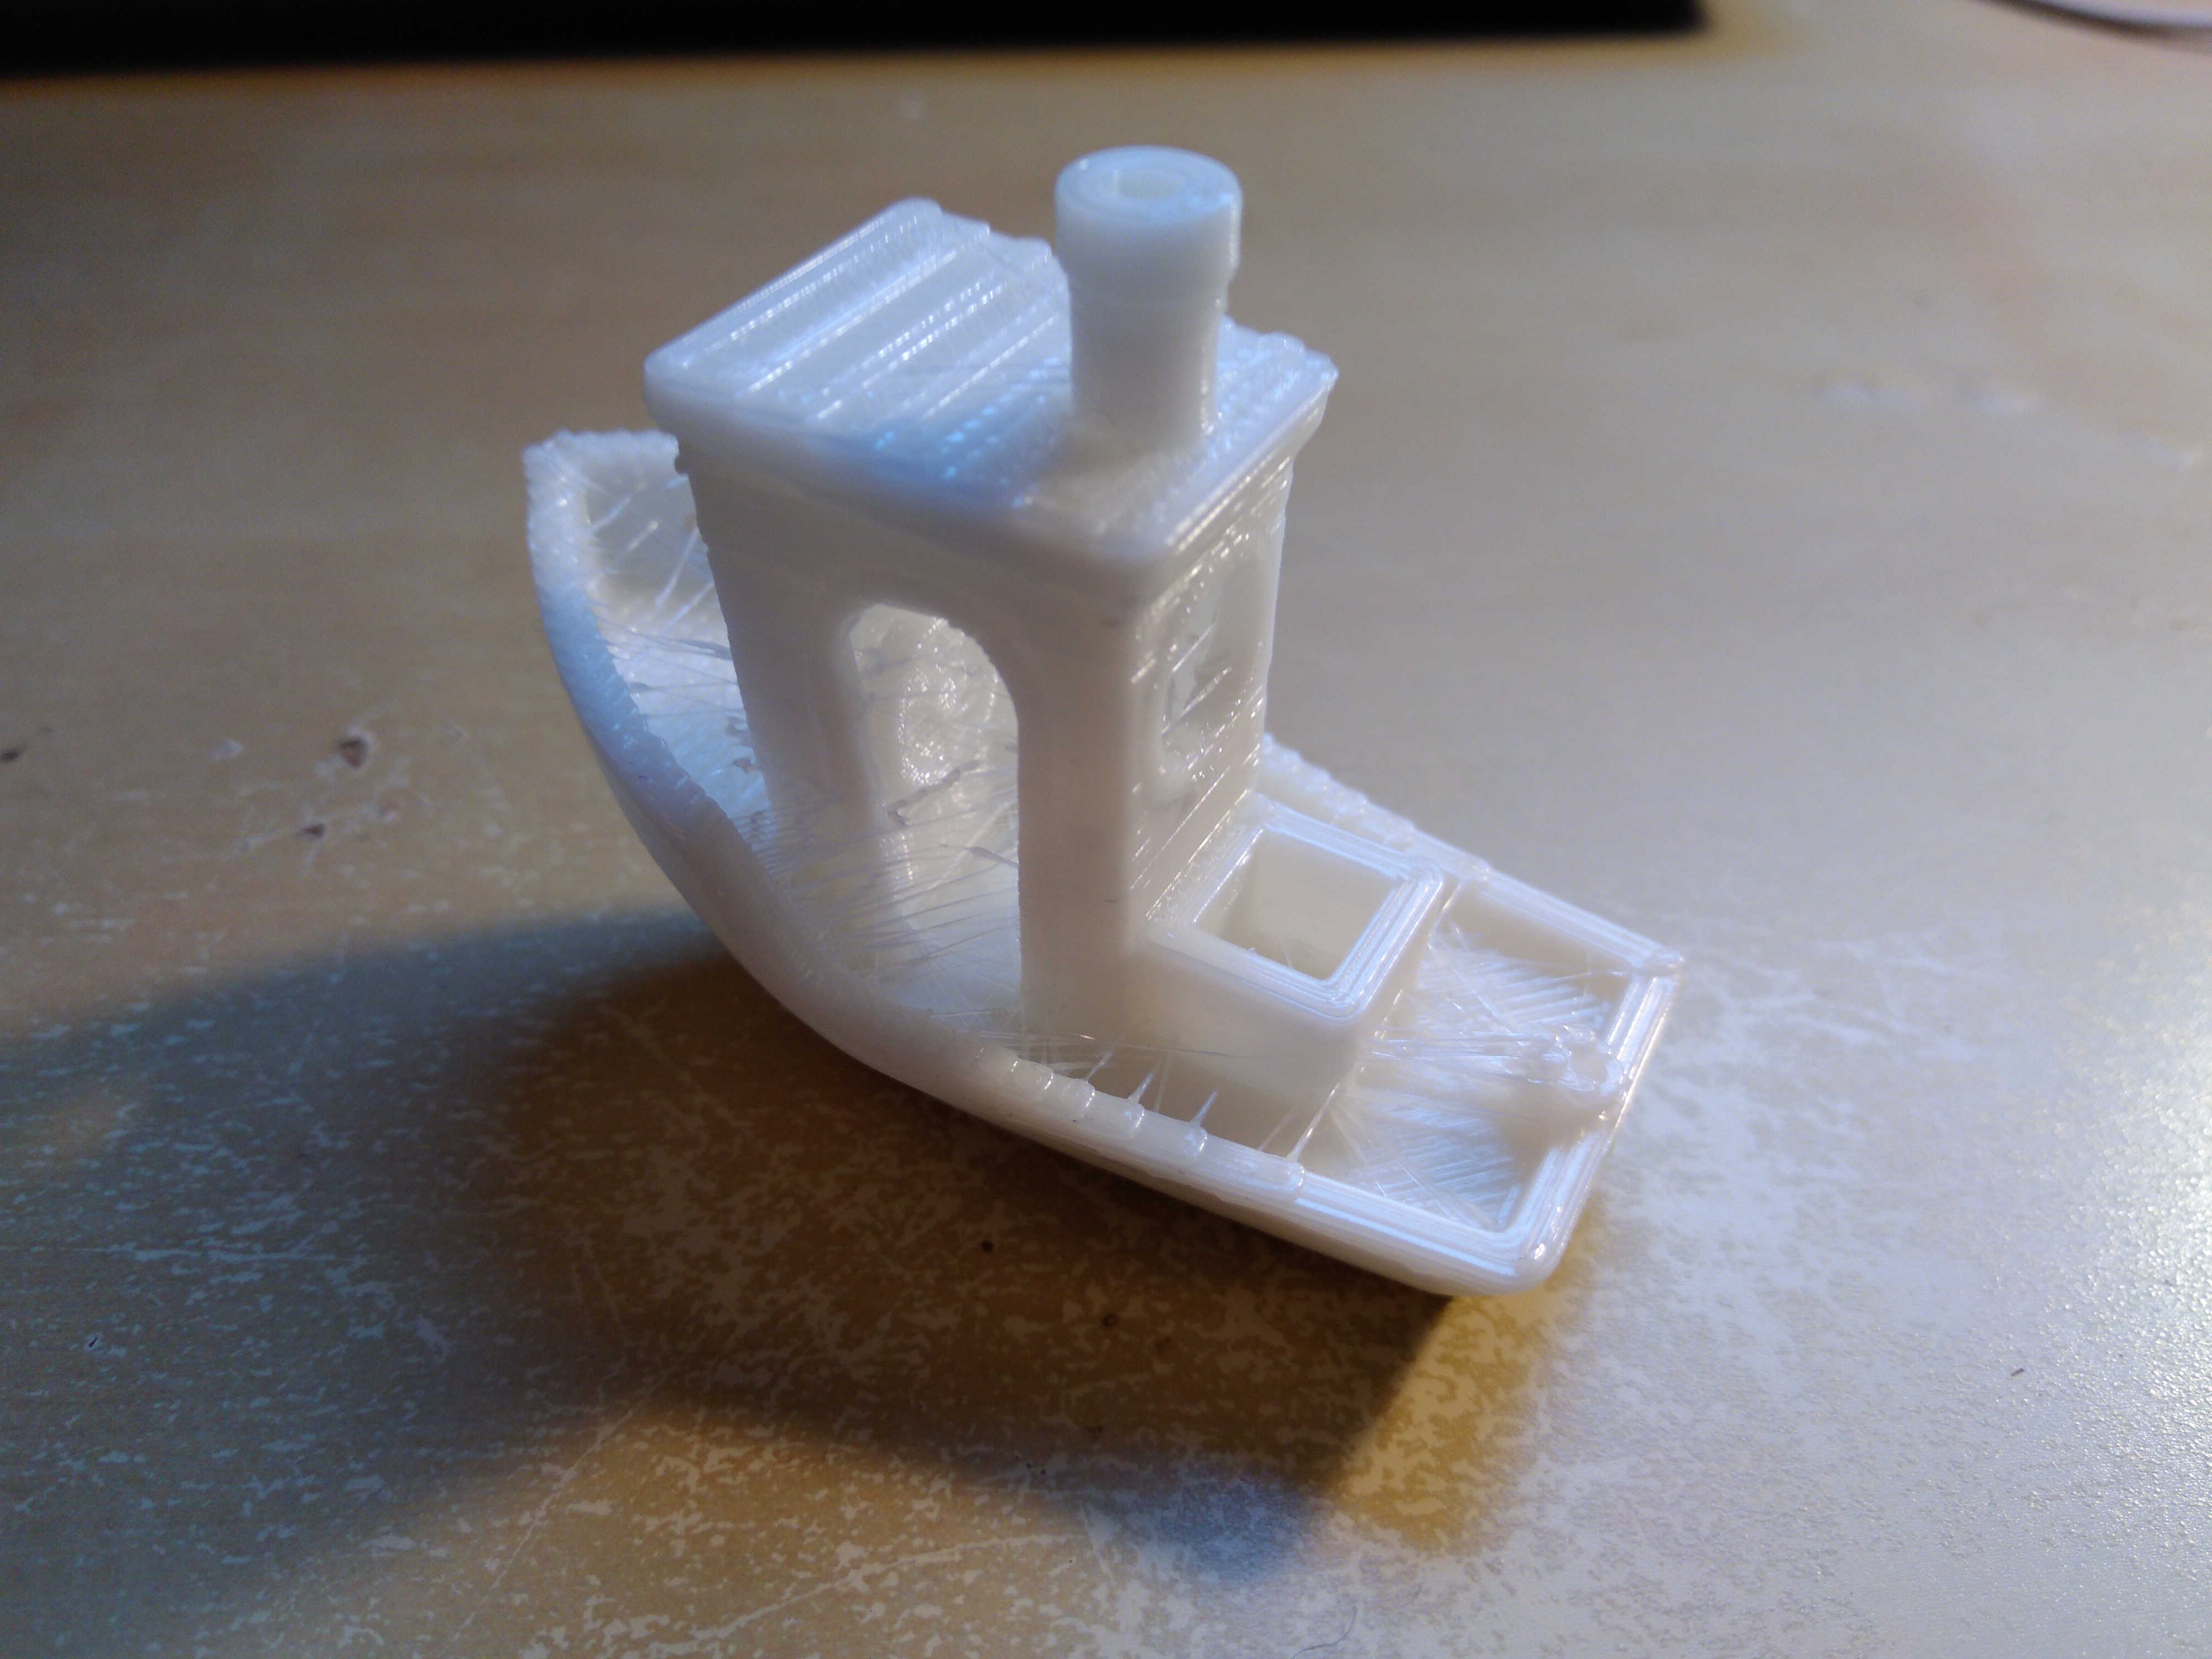
Also, when I look on the top, I have a lot of filament strings getting here and there, the path of the tip of the printer is quite visible on the roof and floor, the steering wheel is not to clear, etc.

Also, at the end of the boat, I am supposed to have some letters, but I cannot read them because of the poor definition of the print...
How can I improve the quality of the print? What settings should be looked at?
-- EDIT --
To answer 0scar questions: the material used for printing is PLA. The hotend temperature was set to 215°C for the first layer, 210°C for the rest. The bed at 65°C for the first, then 60°C. The setting in Slic3r for the fan is between 35% to 100%. If I understand the rule correctly, under 5s for a layer, it is 100%, then it decreases proportionally up to 35% if the layer is done in 60s. And off otherwise.
The diameter of the filament is set to 1.75, with a nozzle of 0.4mm. I wonder if I should put it to 0.375 mm.
I otherwise think that it is a genuine prusa, but clearly not from the first iteration. I don't have an arduino on it, but the makerbase chip. (That comes from a kit I bought online.) I would wait to be a bit more confident before attempting any modifications.
The speed for perimeters is 60mm/s, 30mm/s for external perimeters. Infill 80mm/s. Bridges 600mm/s. Support material 60mm/s. Non print move: 130mm/s. There are a couple of other print speed, but I don't think they are that relevant for the case. Don't hesitate it you want more precisions.