3
$\begingroup$

I currently have a print job that is about 50% done, been running for 2 hours with 2 hours remaining. One side is curling/warping pretty bad, and I'm afraid there's no possible way this is going to finish without serious problems if I don't intervene.

So what I'm doing is either brilliant or idiotic, I'm not sure which: I've paused the print job, stuck some elmers glue below the curling part (with toothpicks, careful not to budge anything else), added a couple degrees to the heatbed (for pliability hopefully), put a small book on top of it to smash it on the glue and let it rest for a little bit (I'll report back if this was a horrible idea or not).

So my main quesiton: Is there any other techniques that you folks can recommend for a scenario like this? McGuyver'y techniques to repair your in-progress print jobs? Has anyone tried this technique I'm attempting and if so how successful was it?

In case it matters, I have an ANET A8 and generally send my print jobs to Octoprint (Raspi) from Cura with a Octoprint plugin (Windows). Printing with PLA filament. I've done quite a few successful prints recently, but this is the first one that goes from corner-to-corner on the heatbed (this specifically). Printing at 207c with 60c heatbed (bumped up to 64 while glue settles). It's in a cooler room of the house, and doesn't have an enclosure so I'm afraid the cool temp is affecting it.

Thanks

Edit, last maybe significant (or maybe not) details: printing on glass with glue stick applied to it - been doing it for weeks and works quite well for the most part. Also, printing on a raft.

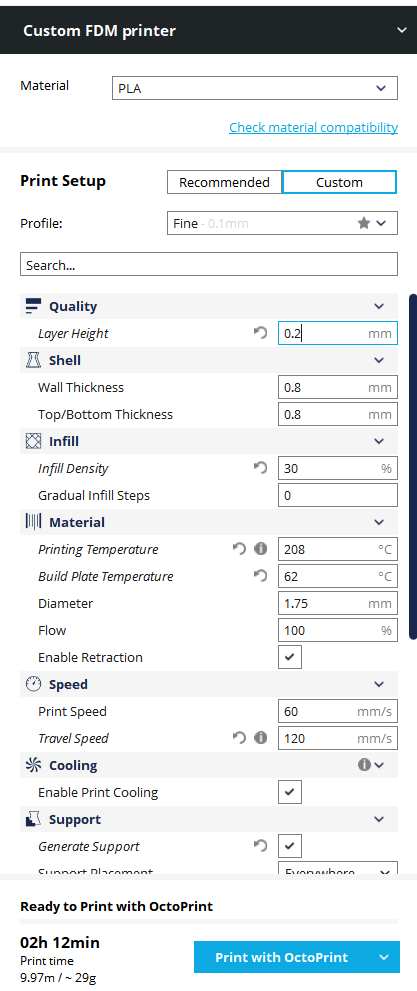
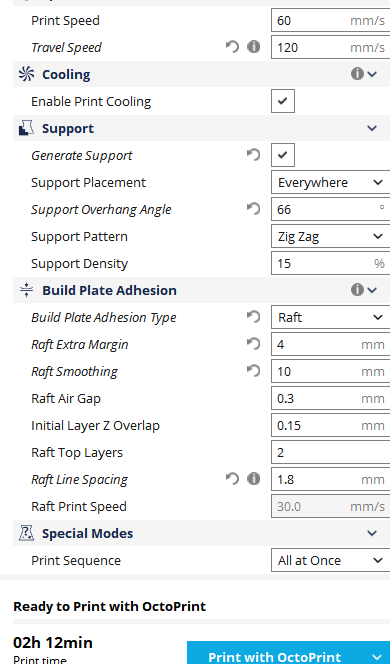
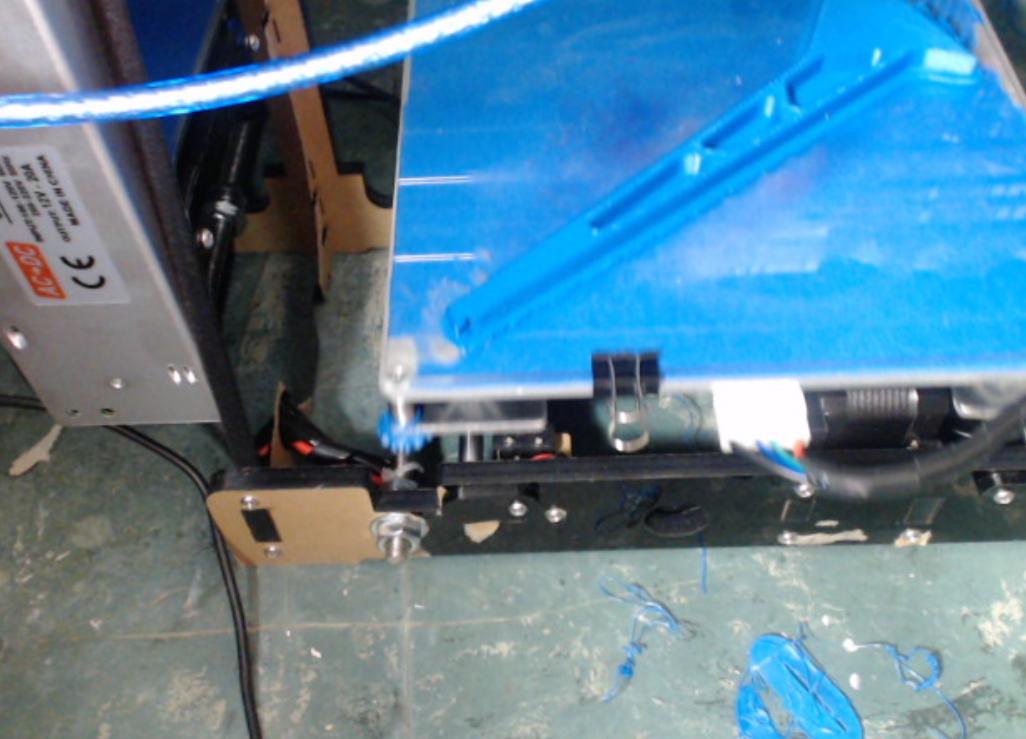
Edit, here are a few pics. Both are from the back of the printer looking forward. I have one cam almost exactly level with the glass so I can see the hot-end extrude filament and another one slightly above it. Sorry for the bad lighting. Also included screenshots of my slicer settings for this print.

Btw, I've since resumed printing after glueing it down, so far so good - but as you can see in the first pic it may have some possible structural defects and still has a slight curl:
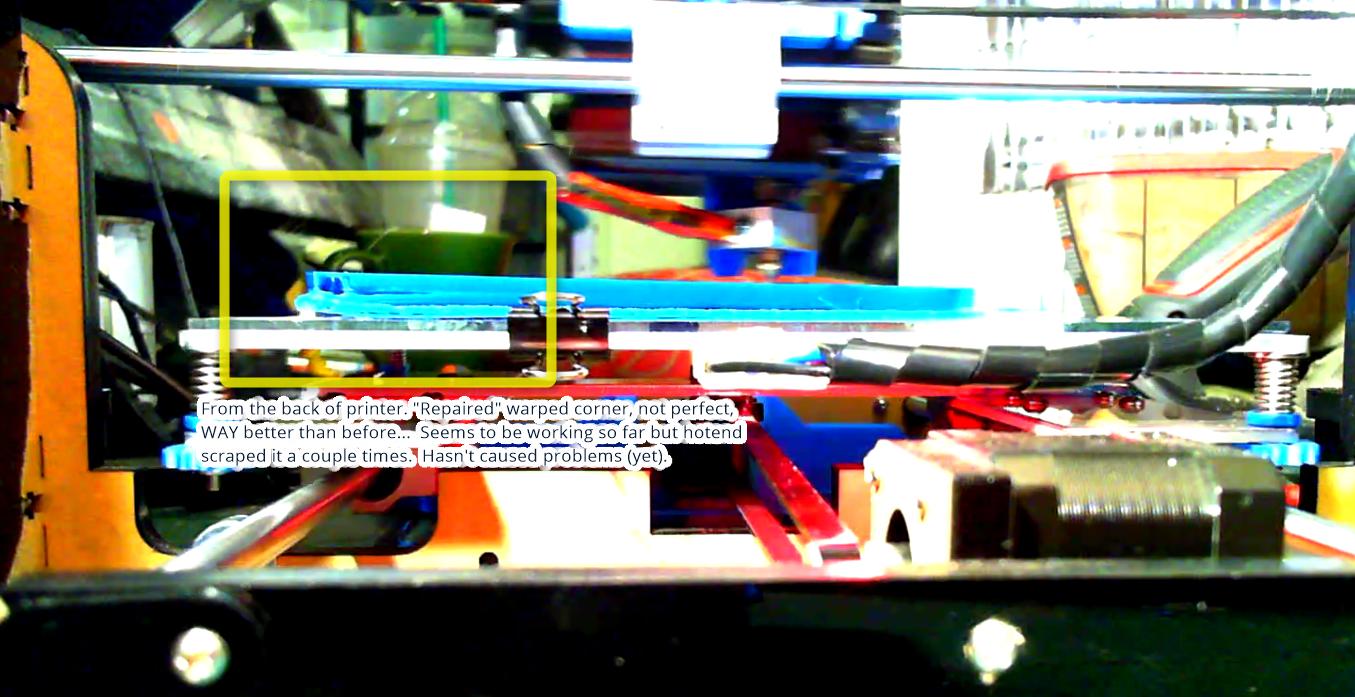
enter image description here

enter image description here

Slicer Settings

Slicer Settings (pt2)

$\endgroup$
4
  • $\begingroup$ you gotta share some pictures $\endgroup$ Commented Oct 31, 2017 at 9:44
  • 3
    $\begingroup$ IMO there is no way to rescue your current printout. it's better to start new one with some extra preparation. #1 - put more paper glue - don't be shy - put thick layer - make your HB white from this glue. #2 - increase HB temperature to 70C. #3 - change raft inot brim/skirt. #4 - turn off fan for 1st layer. #5 - decrease print speed of 1st layer to 30%. #6 - overextrude 1st layer by 3% $\endgroup$ Commented Oct 31, 2017 at 10:37
  • $\begingroup$ I agree with @darthpixel - saving this print as-is seems unlikely. I had a similar issue recently with a broader print than I'd typically done before. Three angled "feet" of the model warped up and caused some issues further up as well. I ended up going with blue painters tape that I rubbed down with isopropyl alcohol. In the end, I still had two slight curls, but the print as a whole was usable (and still looked good despite the curling). I tried to rescue one of these prints in a similar fashion and ended up spending a ton of time on it for nothing. FWIW, it was a 26 hour print. $\endgroup$ Commented Oct 31, 2017 at 13:43
  • $\begingroup$ What brand filament? There are some brands which do not supply decent material. I've found Solutech to be one of the better ones. The other thing to check is that your bed is perfectly aligned to the print head, i.e. z=0 is the same everywhere. That curling could be an indicator that the bed in that region is lower than elsewhere, leading to poor first-layer adhesion. $\endgroup$ Commented Oct 31, 2017 at 19:18

4 Answers 4

5
$\begingroup$

Putting a large brim on it can help, I've seen people rescue prints with larger brims by literally adding weights to the brim around the areas that are peeling up. I've done it by taping brim edges down carefully as the print goes.

$\endgroup$
2
$\begingroup$

Three thoughts:

  1. bed temperature
  2. rim width
  3. bonding agent

Bed Temperature:

Often the edges of a heated bed are not as hot as the center. Making the heat pass through an insulator (the glass) makes the temperature profile on the corners more relatively cool compared to the center than if you were printing directly on the aluminum bed.

To offset that, you could:

  1. Increase the overall heated bed temperature.
  2. Wrap some insulation (such as ceramic felt) around the edge, keeping it out of the way of the print.
  3. Add insulation to the underside corners of the bed, to reduce heat loss.

Rim Thickness:

I see that you are using a rim. Since the rim was also pulling up, rather than the print pulling out of the rim, you might benefit from making the rim broader.

Bonding Agent:

It looks as if you are printing on blue tape, but that might be the picture. IME, gluestick and blue tape aren't often used together. If you are using only blue tape, the condition of the tape is critical. Any grease or rubbing of the tape (such as by resting your hand on the bed when making other prints) can reduce the holding power.

If you haven't tried it yet, you might try printing PLA with the PVA (polyvinyl alcohol) gluestick. I use the "purple until dry" Elmers gluesticks with good results.

$\endgroup$
0
$\begingroup$

I have on occasion resorted to using adhesive putty (eg Blu-Tack) to secure prints that look like they might come adrift. eg, around the edges, jammed between a lifting corner and the bed.

With a fixed bed, this can be done without pausing the printer (eg with tweezers); I might have slowed down the print rate, but I don't recall ever pausing the print.

Of course, there's no way of knowing what might of happened if I had left it alone, but I remember it being successful enough that I've done it a few times.

$\endgroup$
-1
$\begingroup$

More glue to hold it down and lower in-fill percentage will reduce the warping. Or adding more cut-outs to the design like you have further up the shaft.

$\endgroup$
1
  • $\begingroup$ This is not particularly accurate, and changing part design is not allowable in any case. $\endgroup$ Commented Oct 31, 2017 at 19:15

You must log in to answer this question.

Not the answer you're looking for? Browse other questions tagged .