18
$\begingroup$

I have a 3d printer that uses ABS filament. The software I use will generate vertical supports for my objects before printing that can be easily broken off after they have been used during print to hold sharp angles up that would normally fall.

After breaking off the stints, the print is far from smooth. Is there a material that is best suited for "sanding" down prints without damaging the print?

$\endgroup$
0

7 Answers 7

15
$\begingroup$

I have a bunch of solutions to this problem but I'm always looking for additional ideas. I usually start by slicing as much as possible off with a hobby knife. The more than can be removed before sanding the better.

For big prints I like big generic sandpaper sheets from the hardware store. Starting with the highest grit and moving down. Make sure you're discarding your sheets when they get totally gunked up (which can happen pretty fast) or you won't get much done.

For smaller nooks and crannies I have a set of needle files. They do a pretty good job clearing out screw holes and smaller features on printed sculptures.

I've also had some success sanding with my Dremel when it comes to annoying stuck on supports or other imperfections. Having some horsepower behind your sanding can be a nice break. I've also seen the wire brush attachments used for finishing Bronze and Copper-fill prints. Just keep an eye on your speed or you'll sand a hole in your print.

Lastly (and one I haven't tried) are these sanding sticks They were recommended by a friend and look like they would be pretty easy to use/swap out used sandpaper.

$\endgroup$
1
  • 1
    $\begingroup$ Addition to the Dremel: don't overdo the speed, as it might melt the plastic instead. $\endgroup$
    – Trish
    Commented Nov 28, 2018 at 16:05
7
$\begingroup$

I use normal wet/dry sandpaper and it works just fine. If I remember correctly, I usually start with 220 and then work my way up to 400, 600, and 800.

There are also foam or rubber sanding pads available that work really well when you're sanding something organically shaped.

The grits you start and finish with will depend on how rough your surface is.

$\endgroup$
7
$\begingroup$

I use nail files. They're easy to get, cheap and have different grits on either side. You can lay them flat or hold them in your hand and they have some stability making it fairly easy to sand something that is or should become flat.

Plus, you can fix any nails you damage while removing support structures.

$\endgroup$
4
$\begingroup$

Another method that you could try is an acetone vapor bath.

(All credit to them, by the way)

Just so you know, this is a very risky method, but the outcome is very nice. Remember that I warned you... And please, please watch cautionary videos and practice extreme caution. I cannot stress that enough.

All you have to do is get a heating pad (or anything that can heat up to the necessary temperatures) out into a well-ventilated environment. Then, get a large glass jar that you probably won't need in the future that can fit the 3D Model and pour some acetone inside. Afterward, you should place a small platform inside, just as in the video. Place the jar onto the heating pad. Now, place the 3D Model inside onto the platform.

Now, remember that acetone is a solvent. That means that it basically melts off the details off of the 3D Model. So, if your model is moreover detailed, you should leave the 3D Model in the jar for a small amount of time (i.e. about 30 seconds at most). If your model is not as detailed, you can put it in for a much longer amount of time, such as five minutes. Remember, the longer it is inside, the less the details!

Also, make sure to take the model out without using your hands, as it could possibly be harmful. You could use a wire hanger attached to a piece of tin foil to take it out, just as in the video.

I hope this helps; be safe!

Seriously, exercise EXTREME caution while handling the vapor, as it is incredibly flammable, and can build up in poorly ventilated areas!
$\endgroup$
3
  • $\begingroup$ This answer overstates the risk of acetone vapor. It's not that bad. $\endgroup$ Commented Jul 28, 2016 at 7:12
  • $\begingroup$ Yeah... But still - better safe than sorry! $\endgroup$
    – Dimitry M
    Commented Jul 29, 2016 at 11:11
  • 1
    $\begingroup$ There can be problems with acetone dissolving into the ABS object. I acetone treated a coffee mug (came out nice and smooth!), let it sit for a couple of weeks until it no longer smelled of acetone, and then filled it with hot water. The inside bubbled as retained acetone boiled away, bubbling out through the ABS. $\endgroup$
    – cmm
    Commented Nov 30, 2018 at 20:20
2
$\begingroup$

It should be noted that the suggested methods in other answers all have the following disadvantages:

  • The vapor just seems to weaken the print to much faster than print smooths.
  • Sanding melts the plastic pretty easily and just rips the print apart.
  • Filing helps but leaves blemishes that require the whole print to be sanded and/or painted.
$\endgroup$
4
  • 1
    $\begingroup$ Hi, I flagged this as a comment since it isn't quite an answer in it's own right. There may be other questions on vapour smoothing which this could be an answer to though. $\endgroup$ Commented Sep 26, 2018 at 9:18
  • $\begingroup$ @SeanHoulihane - I've edited it to clarify that this answer is pointing out the disadvantages associated with each of the other solutions provided in the other answers - which I believe was the author's intent (although I might be wrong). $\endgroup$
    – Greenonline
    Commented Sep 26, 2018 at 10:09
  • $\begingroup$ agreed. The formatting makes a difference. $\endgroup$ Commented Sep 26, 2018 at 10:39
  • $\begingroup$ If sanding rips the print apart, you need to fix your layer adhesion. $\endgroup$
    – Dan Hulme
    Commented Nov 26, 2018 at 11:09
2
$\begingroup$

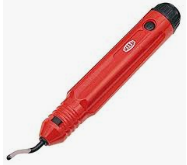
I normally deburr with a deburring tool:

deburring tool

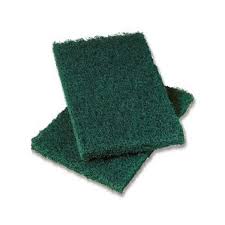
Then I file if needed, then I hit it with a scotch brite pad:

scotch brite pad

And then I give it a quick pass with a heat gun to darken all the areas that have turned lighter from the abrasion.

Video showing heat gun (but not scotch brite): https://www.youtube.com/watch?v=0Aj9WCabPgw

$\endgroup$
1
  • 1
    $\begingroup$ Why not add some images of the deburring tool and a scotch brite pad (instead of a link to the manufacturer) to give more body to your answer. I really like the heat gun solution! I do the same with the ABS parasol stand to get rid of the pale oxide color, only I use a weed killer gas fired heat gun :) $\endgroup$
    – 0scar
    Commented Nov 28, 2018 at 14:47
1
$\begingroup$

I've noticed if I'm printing too close too the bed or if the bed isn't level to nozzle across the whole bed the supports will leave marks on the print where the print was 'smushed' by the nozzle being slightly closer on that side. Also, in Simplify3d you can increase the vertical and horizontal distance between the part and the support, which makes a big difference as far as cleanup, too far though and the support doesn't support. I also increase the speed of support printing, since it directly affects layer adhesion. The faster the speed the less likely to bond to the model.

I use small files for small quick imperfections, and sometimes small knives for stubborn brims. For smoothing I now use a quick acetone dip on my parts. Usually 10-30 seconds completely submerged at most. Then without touching the print (it's very mushy) place it down or hang (outside) to dry out the acetone for about two hours for every hour printed or so. You can handle small parts within 10 minutes if you dipped less than 15 seconds. The acetone evaporates over time and the abs print regains its strength completely once all the acetone is gone. This can take days if it's a big part (maybe 9" x 9") and was dipped in acetone for longer than 30 seconds. If the part smells like acetone, it's still evaporating.

Don't over dip the part in acetone, you can't go back. You don't want to lose the form of your print. You can always dip again. Forget the heat acetone method or cool acetone vapor method that takes hours. Recommend doing it OUTDOORS and perhaps a gas mask and eye protection, acetone is very thin and splashes no matter how careful you are. I tried brushing it on but the results were not very consistent. ABS floats in acetone so consider how your going to get the part submerged and then subsequently out without leaving huge finger prints. Practice on a few small prints or even scrap models and failed prints. Strangely, nobody suggests this method in forums. It's much faster and easier than the other vapor methods. The dry out time isn't fast but you don't have to watch it the whole time.

Always be safe and keep acetone away from any ignition source such as an open flame and ensure proper ventilation. 100% Acetone is used in millions of salons every day, safely. Heating acetone up in an enclosed space has severely injured people so I don't recommend adding any heat source.

Acetone evaporates in water at the same rate as not in water (open air) so I'm going to try mixing water and acetone to slow the smoothing for better control and a larger bath. Even medium sized parts need a good deal of acetone to completely submerge them. Also, you can try doing one side and recording the seconds submerged. Then when it's dried out, dip the other side the same amount of time.

Edit:

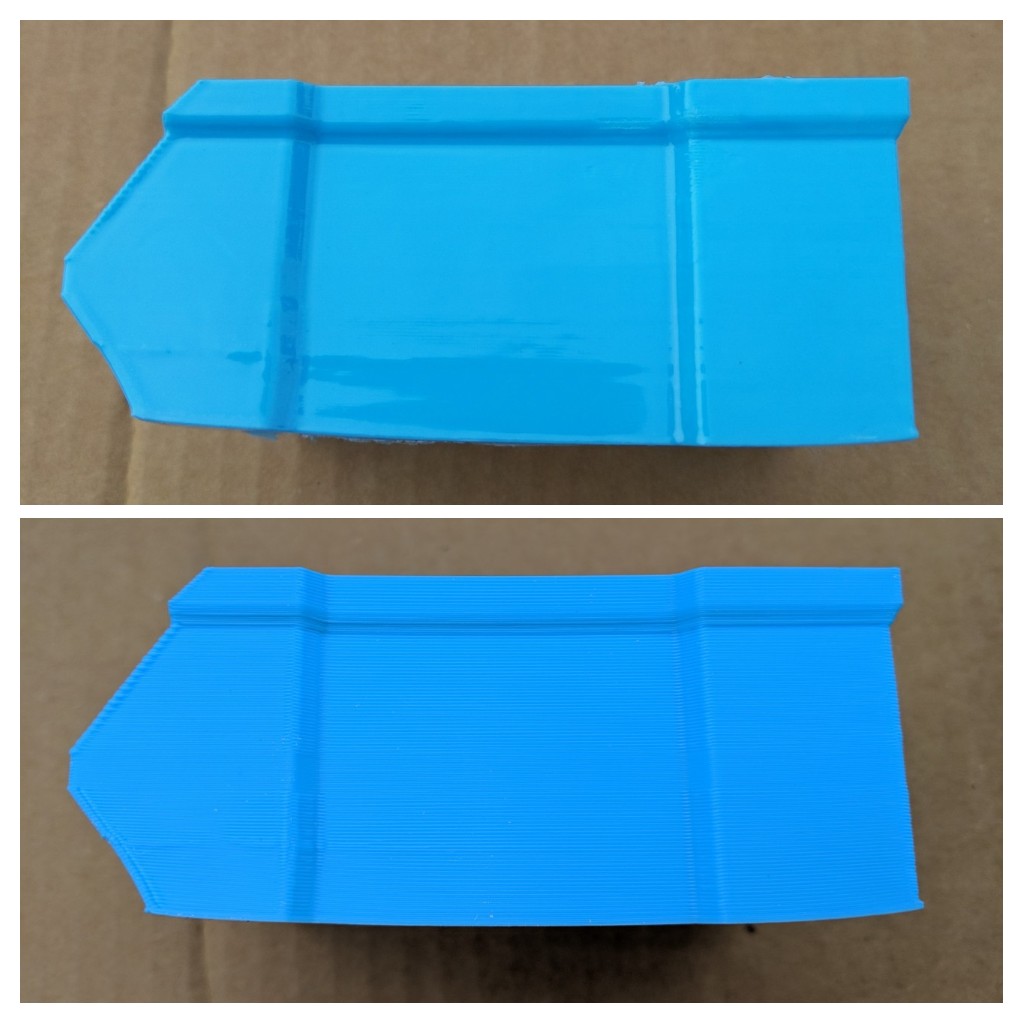
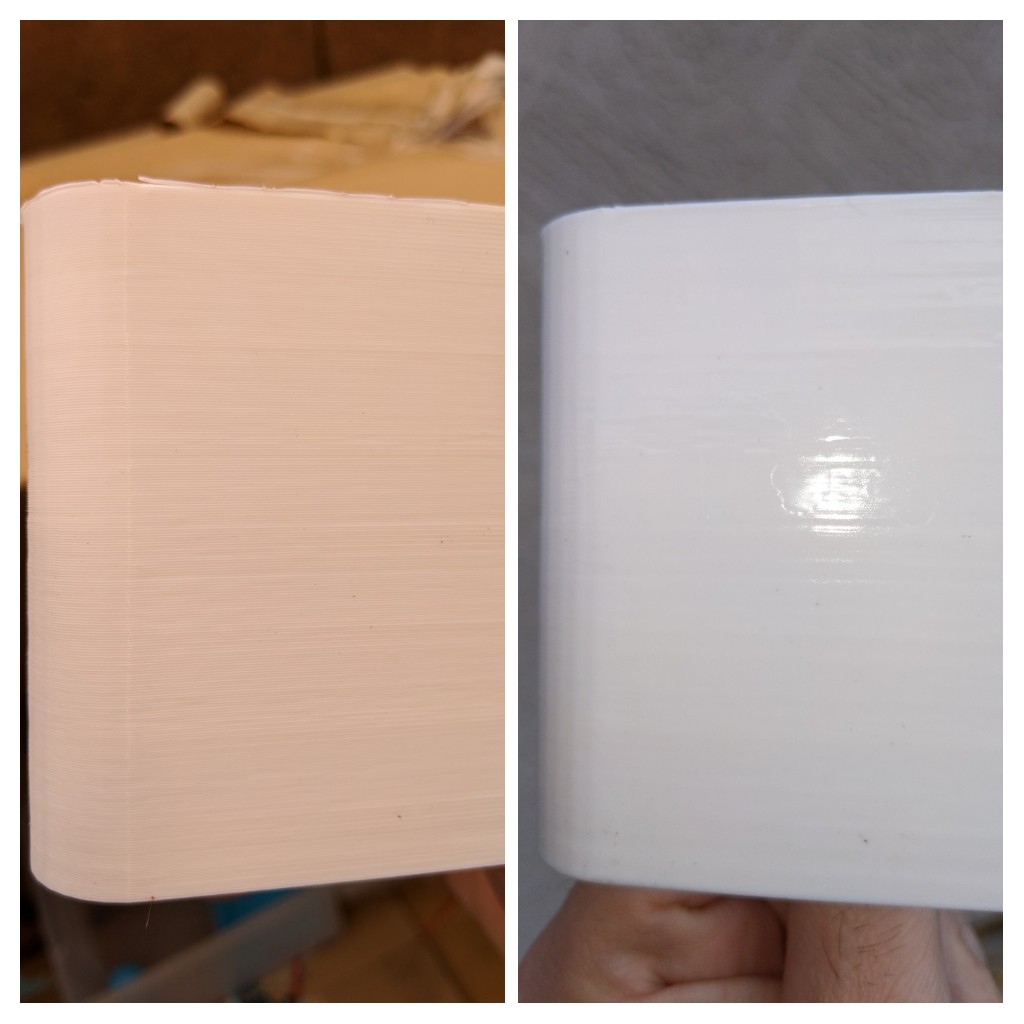
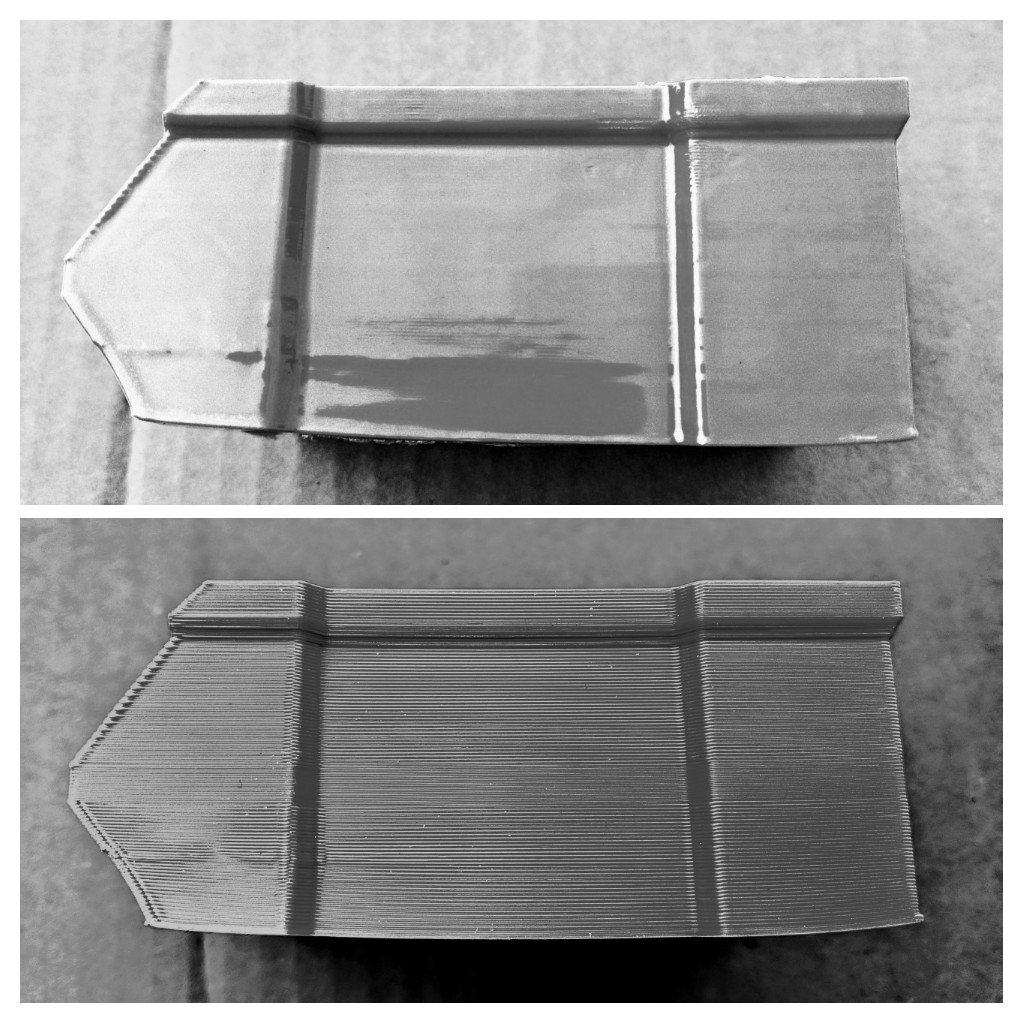
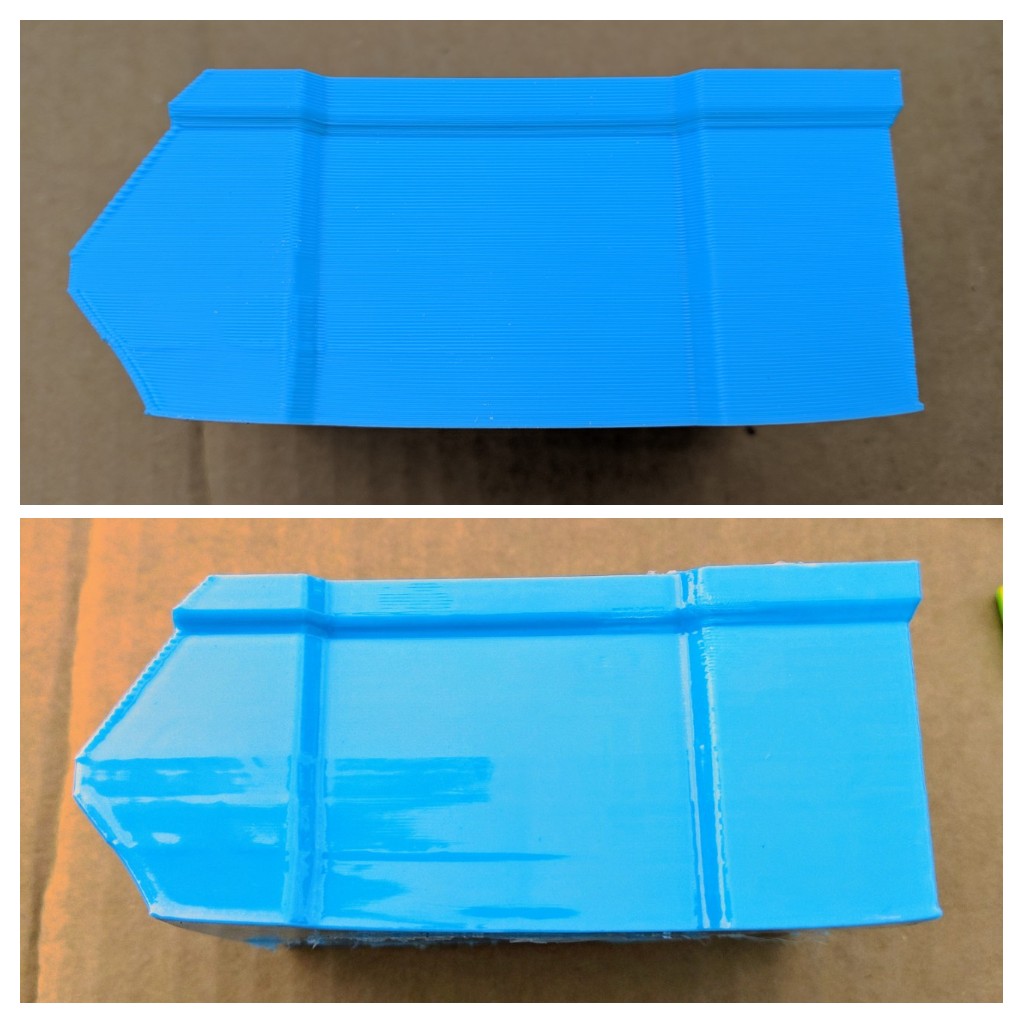
Sure! I just did two scrap pieces since you asked. It's very difficult to capture gloss. These were about 15 seconds in acetone rotating them to get even coverage in acetone since the bath wasn't large enough to fully submerge them. This method can leave blemishes but these are warped or failed prints anyway. I enhanced one picture to try to show layer detail. enter image description hereenter image description hereenter image description hereenter image description here

$\endgroup$
2
  • $\begingroup$ Maybe you could add some "before" and "after" photo's? (of the same object) $\endgroup$
    – 0scar
    Commented Nov 28, 2018 at 7:20
  • $\begingroup$ Ok added a few examples $\endgroup$
    – user50220
    Commented Nov 29, 2018 at 23:58

You must log in to answer this question.

Not the answer you're looking for? Browse other questions tagged .