5
$\begingroup$

I am quite new to 3D printing, and having difficulty printing first layer of an object with support. The object has a few curved surfaces that touch the print bed, so not a big starting foot print.

I am printing on a genuine Prusa i3 mk2s, using PLA, 210 °C (clean from what I can tell) nozzle, 60 °C (clean, good condition) heat bed. My model is an STL from Thingiverse, and I sliced it with Prusa Control. Settings: 0.3 mm layers, 30 % infill, Support from build plate, brim on. I have run the printer calibration, z-axis calibration, etc. Only thing that might be a bit out is my z-axis might be a fraction too low. I have no issues when printing objects without support, and usually don't have issues printing objects with support (although typically these have a larger contact area of the object to the print bed as well)

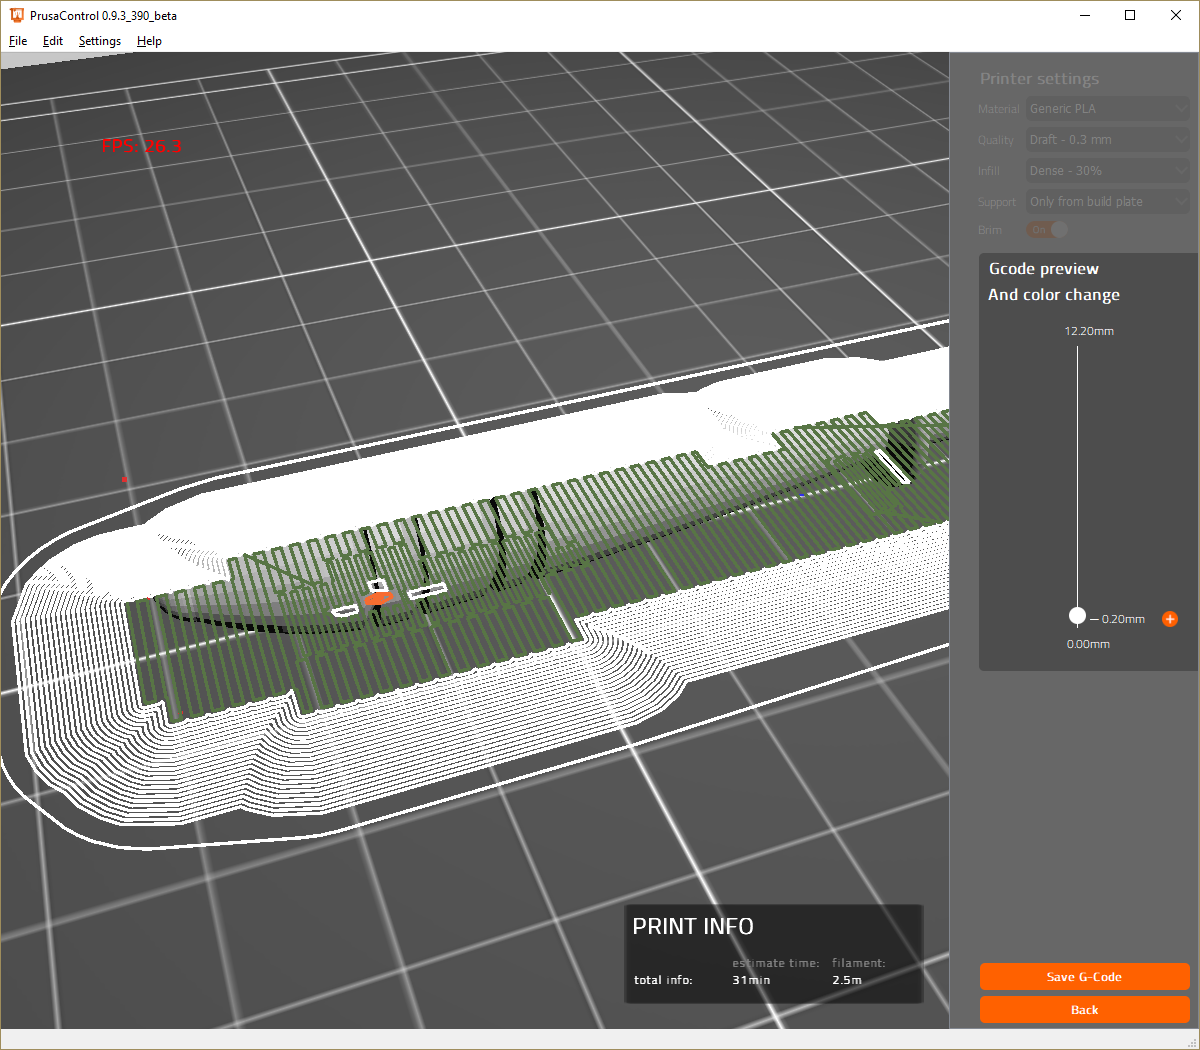
After it prints the brim (which adheres well), it tries to print the support layers for the "actual" layers that will get printed first. These layers do not touch the outer brim. They go down with a little bit of "squeeze out" when the printer does a 180-degree turn. (this can be seen on the right hand end of first picture).

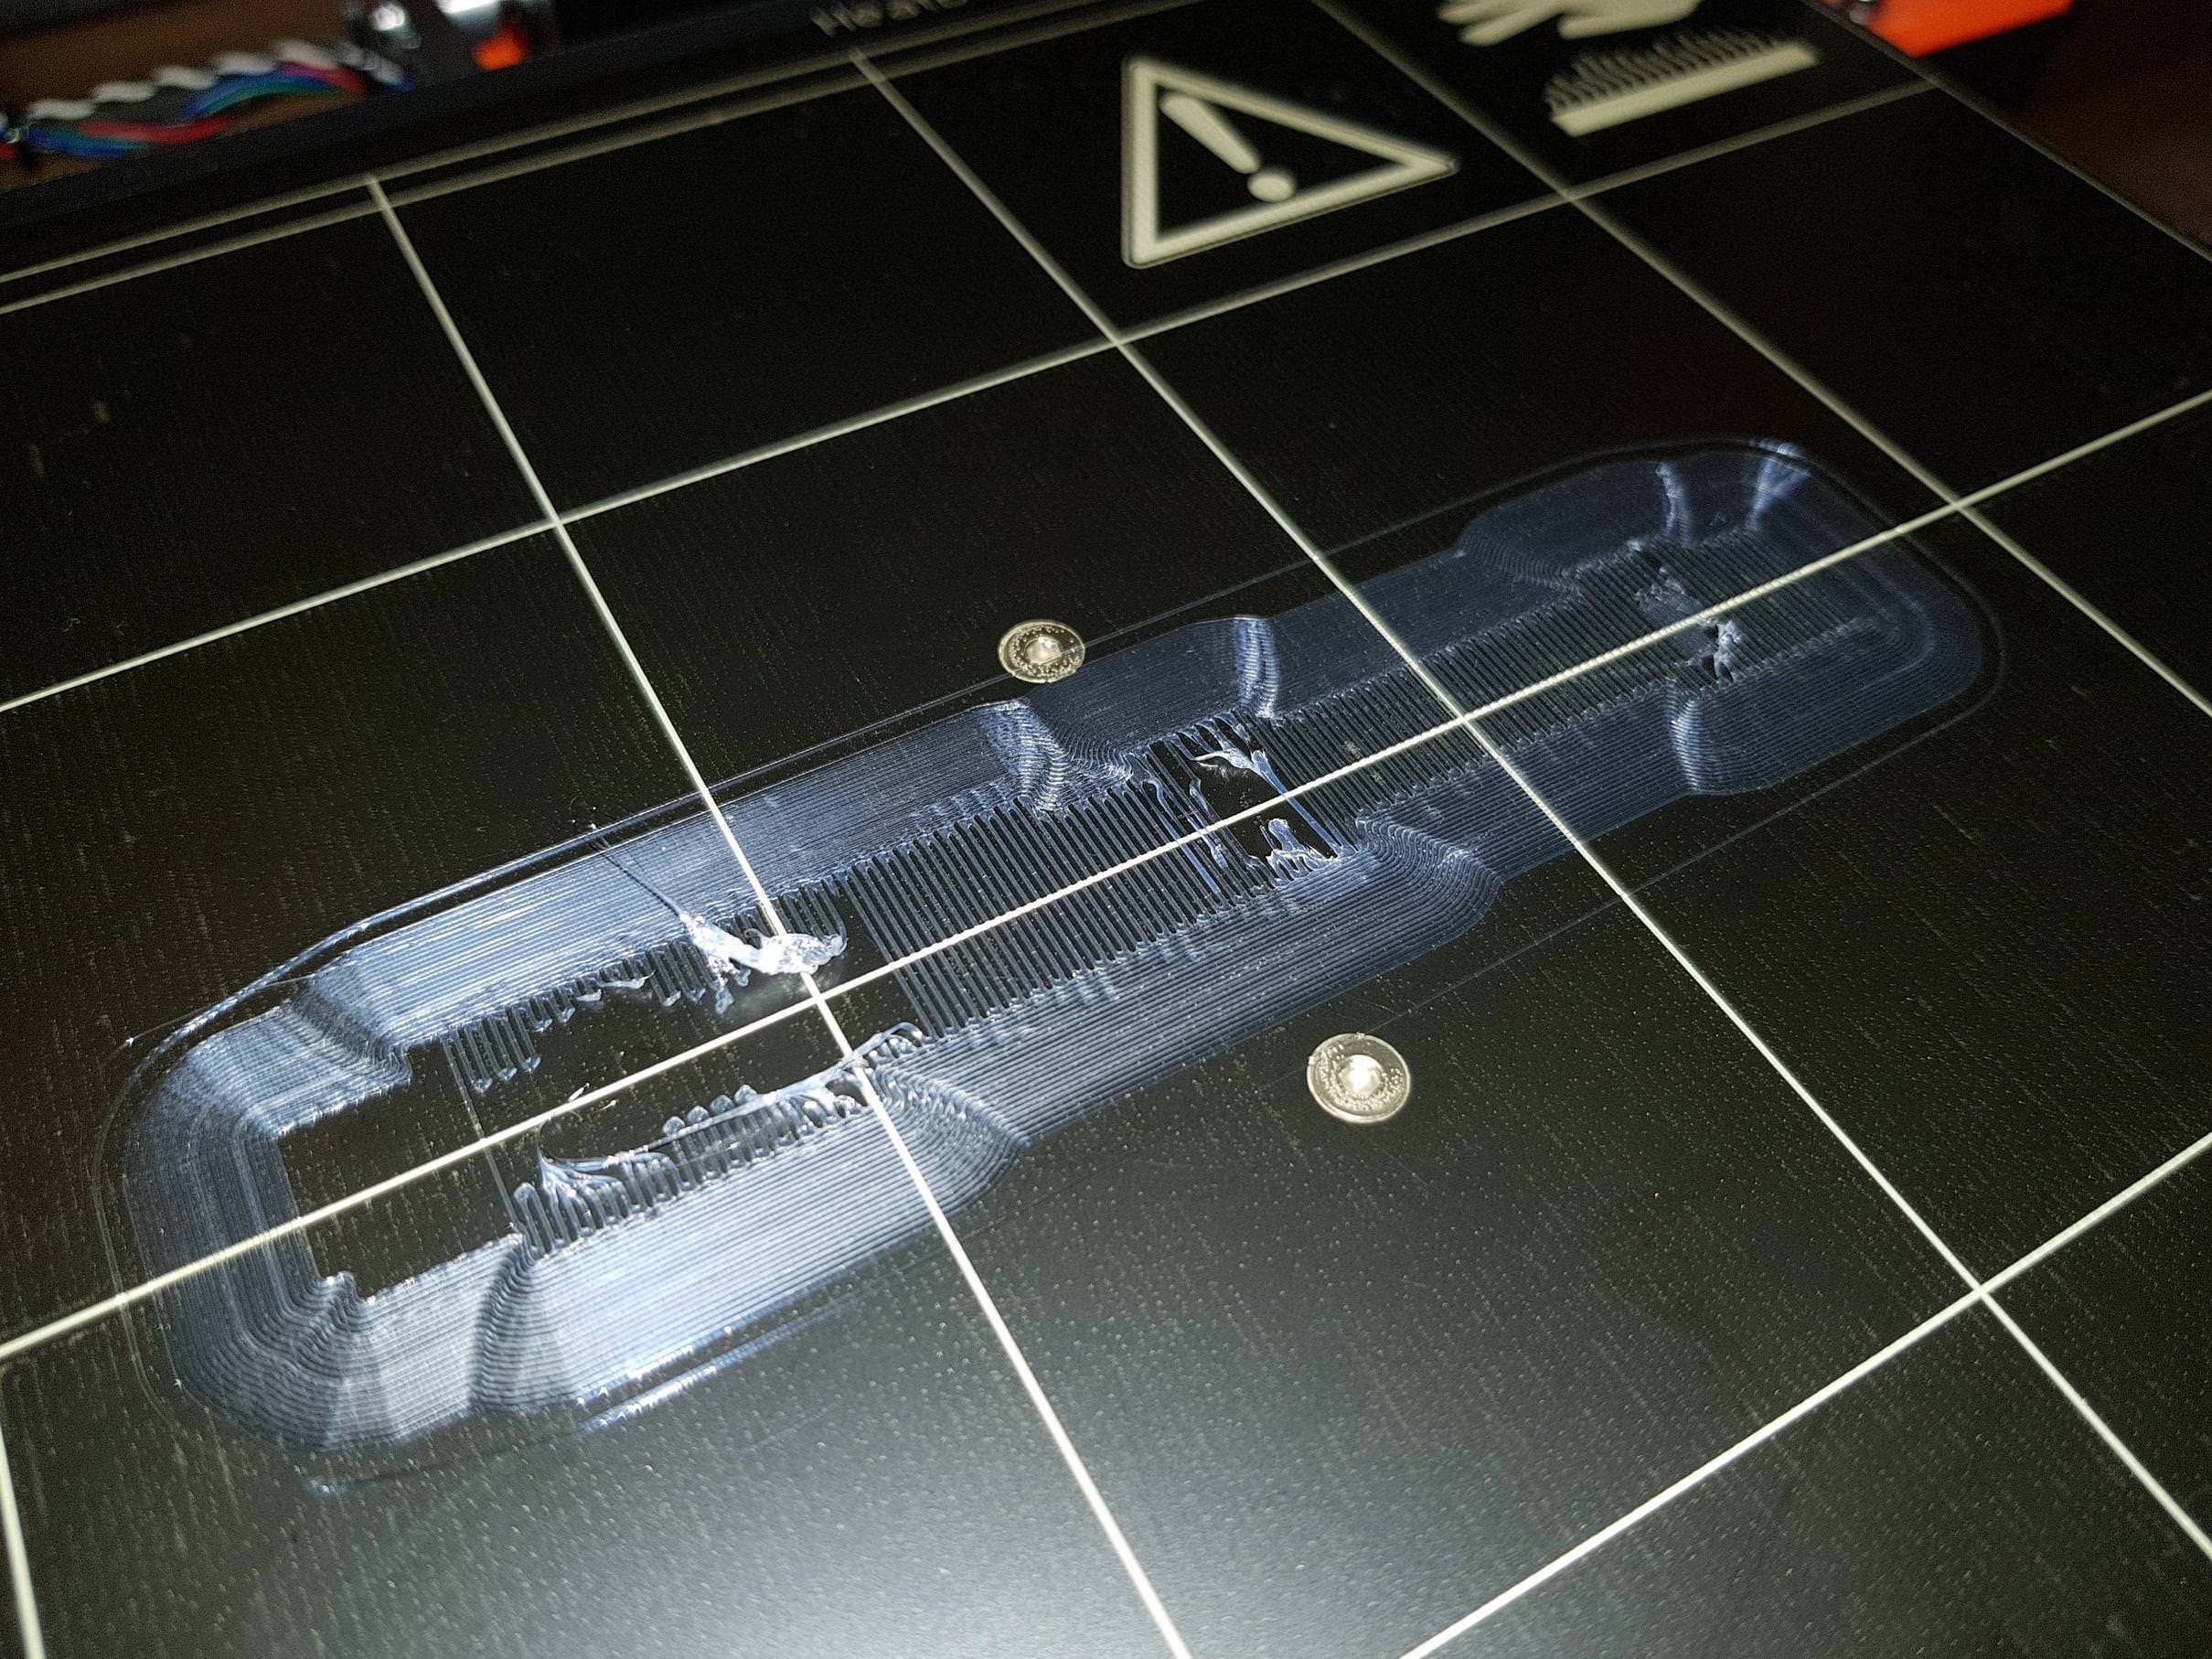
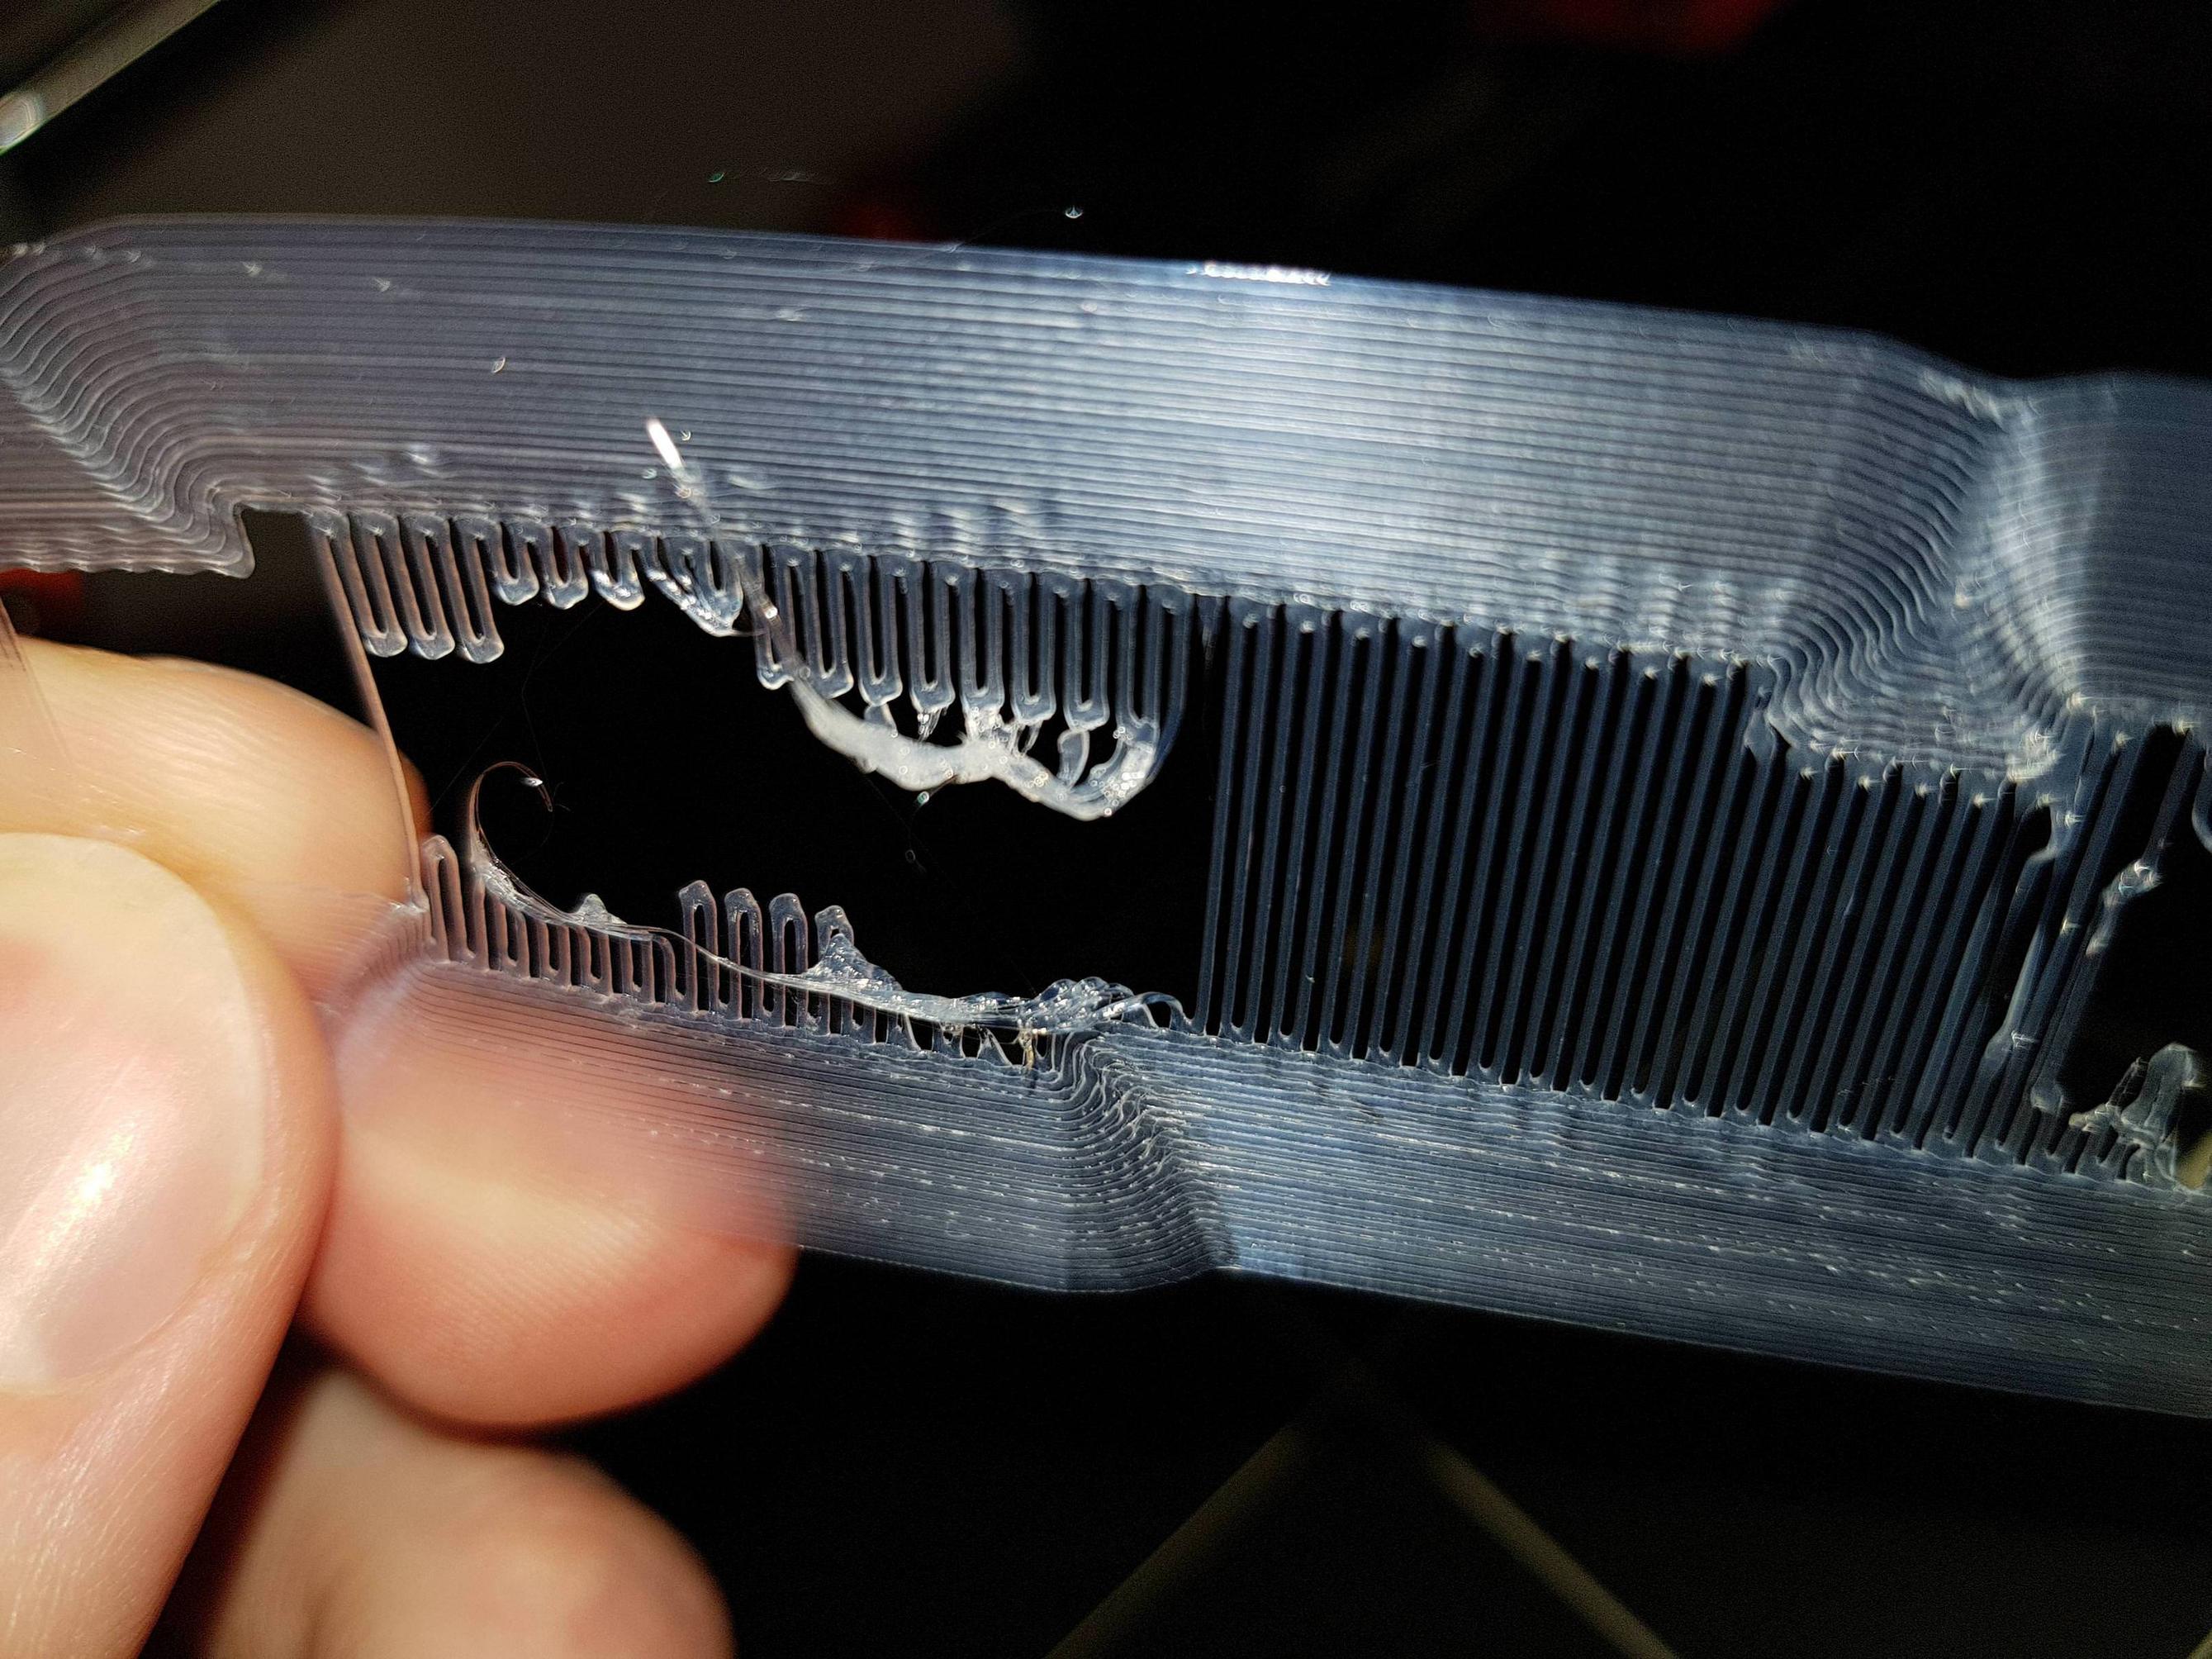
Then, it attempts to print the whole-of-base support structure (refer to pic 3 and 4 for details). Where these support layers touch the outer brim, they adhere well. When they touch the initial support layer sections, it tears them up, leaving a big mess.

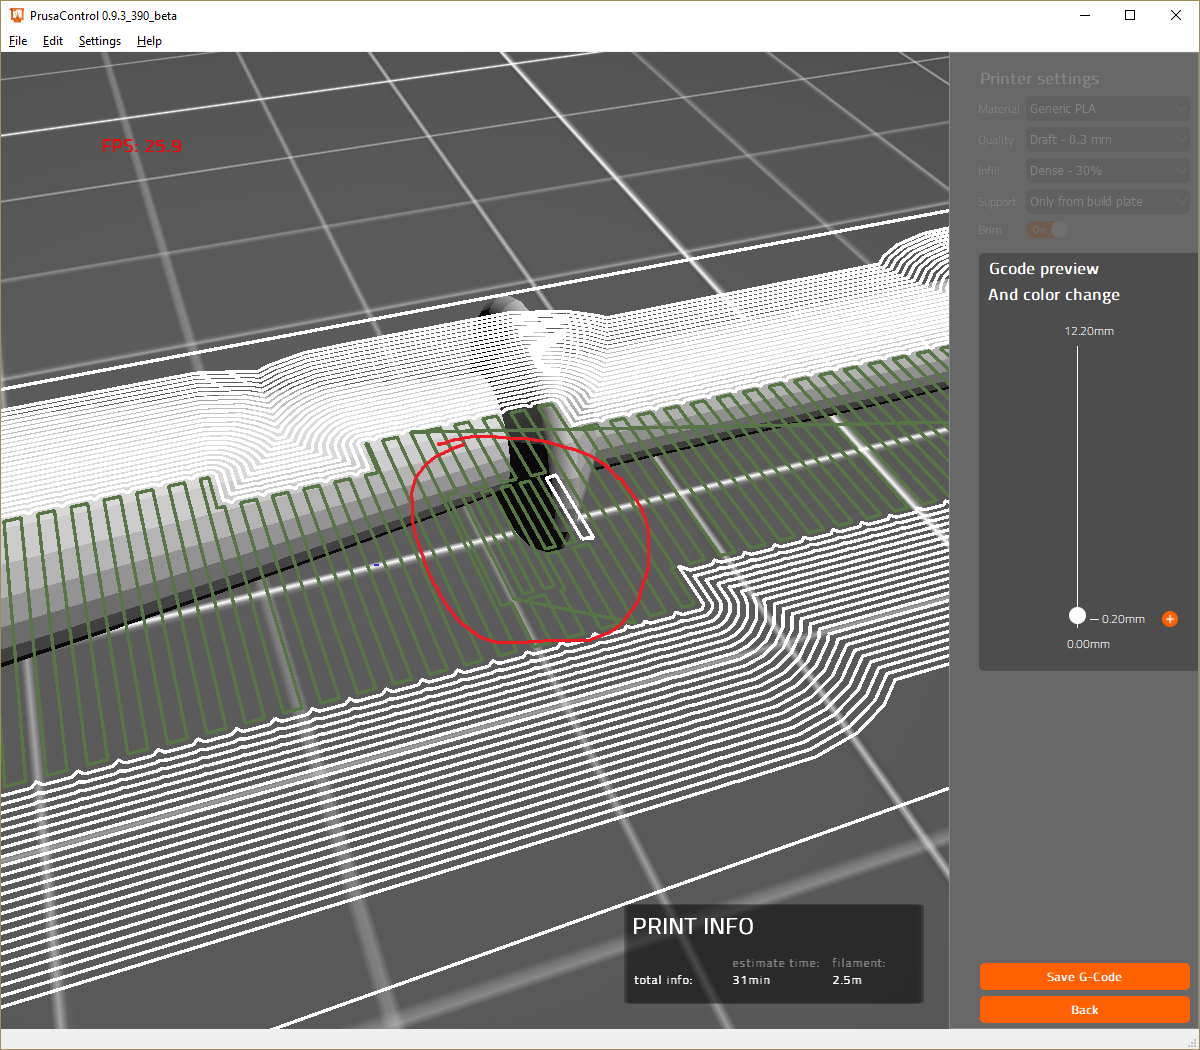
What appears to me to be happening, is the small sections that get printed first (circled in red) are either not adhering well enough, or somehow getting "ruffled up", or are printed too close to the subsequent, broader strokes of the rest of the support layer, such that when the rest of the support layer is printed, it is tearing up the initial small sections. Having 2 densities of support layer per layer seems to be causing issues.

Failed print, still on the bed. At the right, there is a section of "fine" support material that sort of survived.

failed first layer

Close up of the failed first layer. The broad strokes seem to adhere well except for when they meet where the fine layer was - after that it's just a big mess.

failed first layer close up

Slicing in Prusa control (part 1): shows the different support structures and very minimal contact of actual object to the bed (orange)

prusa control first layer 1

Close up of other problem area in PC slicing. No actual contact of object to bed here. Also, as a side note, why the funny diagonal line cutting through the rest of the support structure here?
Prusa control first layer 2

$\endgroup$
3
  • $\begingroup$ Looks more like your z-zero is too high, not too low, and thus the support structs are "unhappy" at short-run, sharp-turn points. $\endgroup$ Commented Mar 28, 2018 at 14:41
  • $\begingroup$ Looks like an adhesion problem. Also, 210 for PLA is pretty high, maybe it is too hot and does not cool fast enough so than is ripped from the bed while it is soft. $\endgroup$
    – 0scar
    Commented Mar 28, 2018 at 14:58
  • $\begingroup$ @0scar I am printing some spools of PLA at 230 on my printer as otherwise, layers are not adhering properly - so the temp is printer/material specific. Would rather play with bed leveling and temp in that particular case $\endgroup$
    – profesor79
    Commented Mar 28, 2018 at 15:14

4 Answers 4

1
$\begingroup$

Quick, low-tech solution:

There might be several issues in your question, but in relation to bed adhesion, I'll share one of the most useful tips I wish someone had told me when I started out: Spread some glue-stick over the area to be printed.

I used ordinary school/craft glue stick (which I stole from my daughter's school pencil case) - the kind for gluing paper. I use a purple one, so it's easy to see and easy to clean up. I apply a little glue then smear it around with a wet finger to make it a bit uniform.

I have a heated bed (FlashForge Creator Pro) and have used this little trick with a range of filaments. In almost every case, it helps adhesion enormously. Parts and supports stick like mad! But they still come off easily enough the usual way. It is a weak glue, so it won't lock the part to the bed. Once the part is off, the purple glue is visible when wet, so it is dead easy to clean up the part and the bed in a minute or two.

This trick is so easy that it is worth trying first for any adhesion issues, before digging deeper.

$\endgroup$
2
  • $\begingroup$ With a good bed surface (as I believe this printer has), this shouldn't be necessary - but you're right, it's a useful 'quick fix' whilst getting more familiar with the details. $\endgroup$ Commented Apr 9, 2018 at 6:58
  • $\begingroup$ @SeanHoulihane, In my early days with my Creator Pro the highly effective heated bed sometimes got ABS prints stuck so hard that I damaged the bed (gouged the aluminium below the surface coating) getting them off. The glue-stick helps to keep parts firmly in place while printing, but it also stops them from getting stuck on like concrete. It seems to be a Goldilocks Zone... not too weak, not too strong, but just right! $\endgroup$
    – gbe
    Commented Apr 9, 2018 at 12:06
0
$\begingroup$

It is hard to determine the exact source of the problem as there are few possibilities (I am assuming that you have a single nozzle and only one filament in use):

  1. One of the hardest issues for me to get on my printer was fact that my auto-level sensor was mounted about 0.5mm too high - so please check that as this will give you a bit higher Z than expected.

  2. Printing speed matters - for some prints I was slowing my printer to 20% of nominal speed to get adhesion

  3. a hair-spray layer or a masking tape on the bed could help with getting the grip

  4. also you could play with nozzle temperature de/increasing by 5 degrees and see how it is going

$\endgroup$
0
$\begingroup$

Increase the extrusion width for the first layer. This will ensure that more plastic is extruded and will help with adhesion tremendously. Check our this link for more information: https://www.simplify3d.com/support/print-quality-troubleshooting/#print-not-sticking-to-the-bed.

The prusa i3 mk2s provides an option to "live adjust" the Z height during a print. You can try raising/lowering your nozzle with this feature to see which way it will adhere better, and then reset the Z to that value once you are satisfied with the adhesion and quality.

$\endgroup$
0
$\begingroup$

I've seen this on my Prusa clone. It looks to me like the nozzle is a bit too close to the bed so not enough plastic is being extruded. I got a perfect PLA print at 215 °C and 0.2 mm for the first layer and 210 °C with 0.15 mm for the rest. When I tried 215 °C/0.3 mm first layer and 210 °C/0.2 mm on a large print I got poor adhesion and a warped corner. I used the same Z height offset. I didn't get a picture but it looks like the opposite problem to yours; not enough squish down on the first layer. I print with hairspray directly on aluminum and usually get great results. I'm going to retry with a more negative offset and will post pictures of the results.

$\endgroup$

You must log in to answer this question.

Not the answer you're looking for? Browse other questions tagged .