4
$\begingroup$

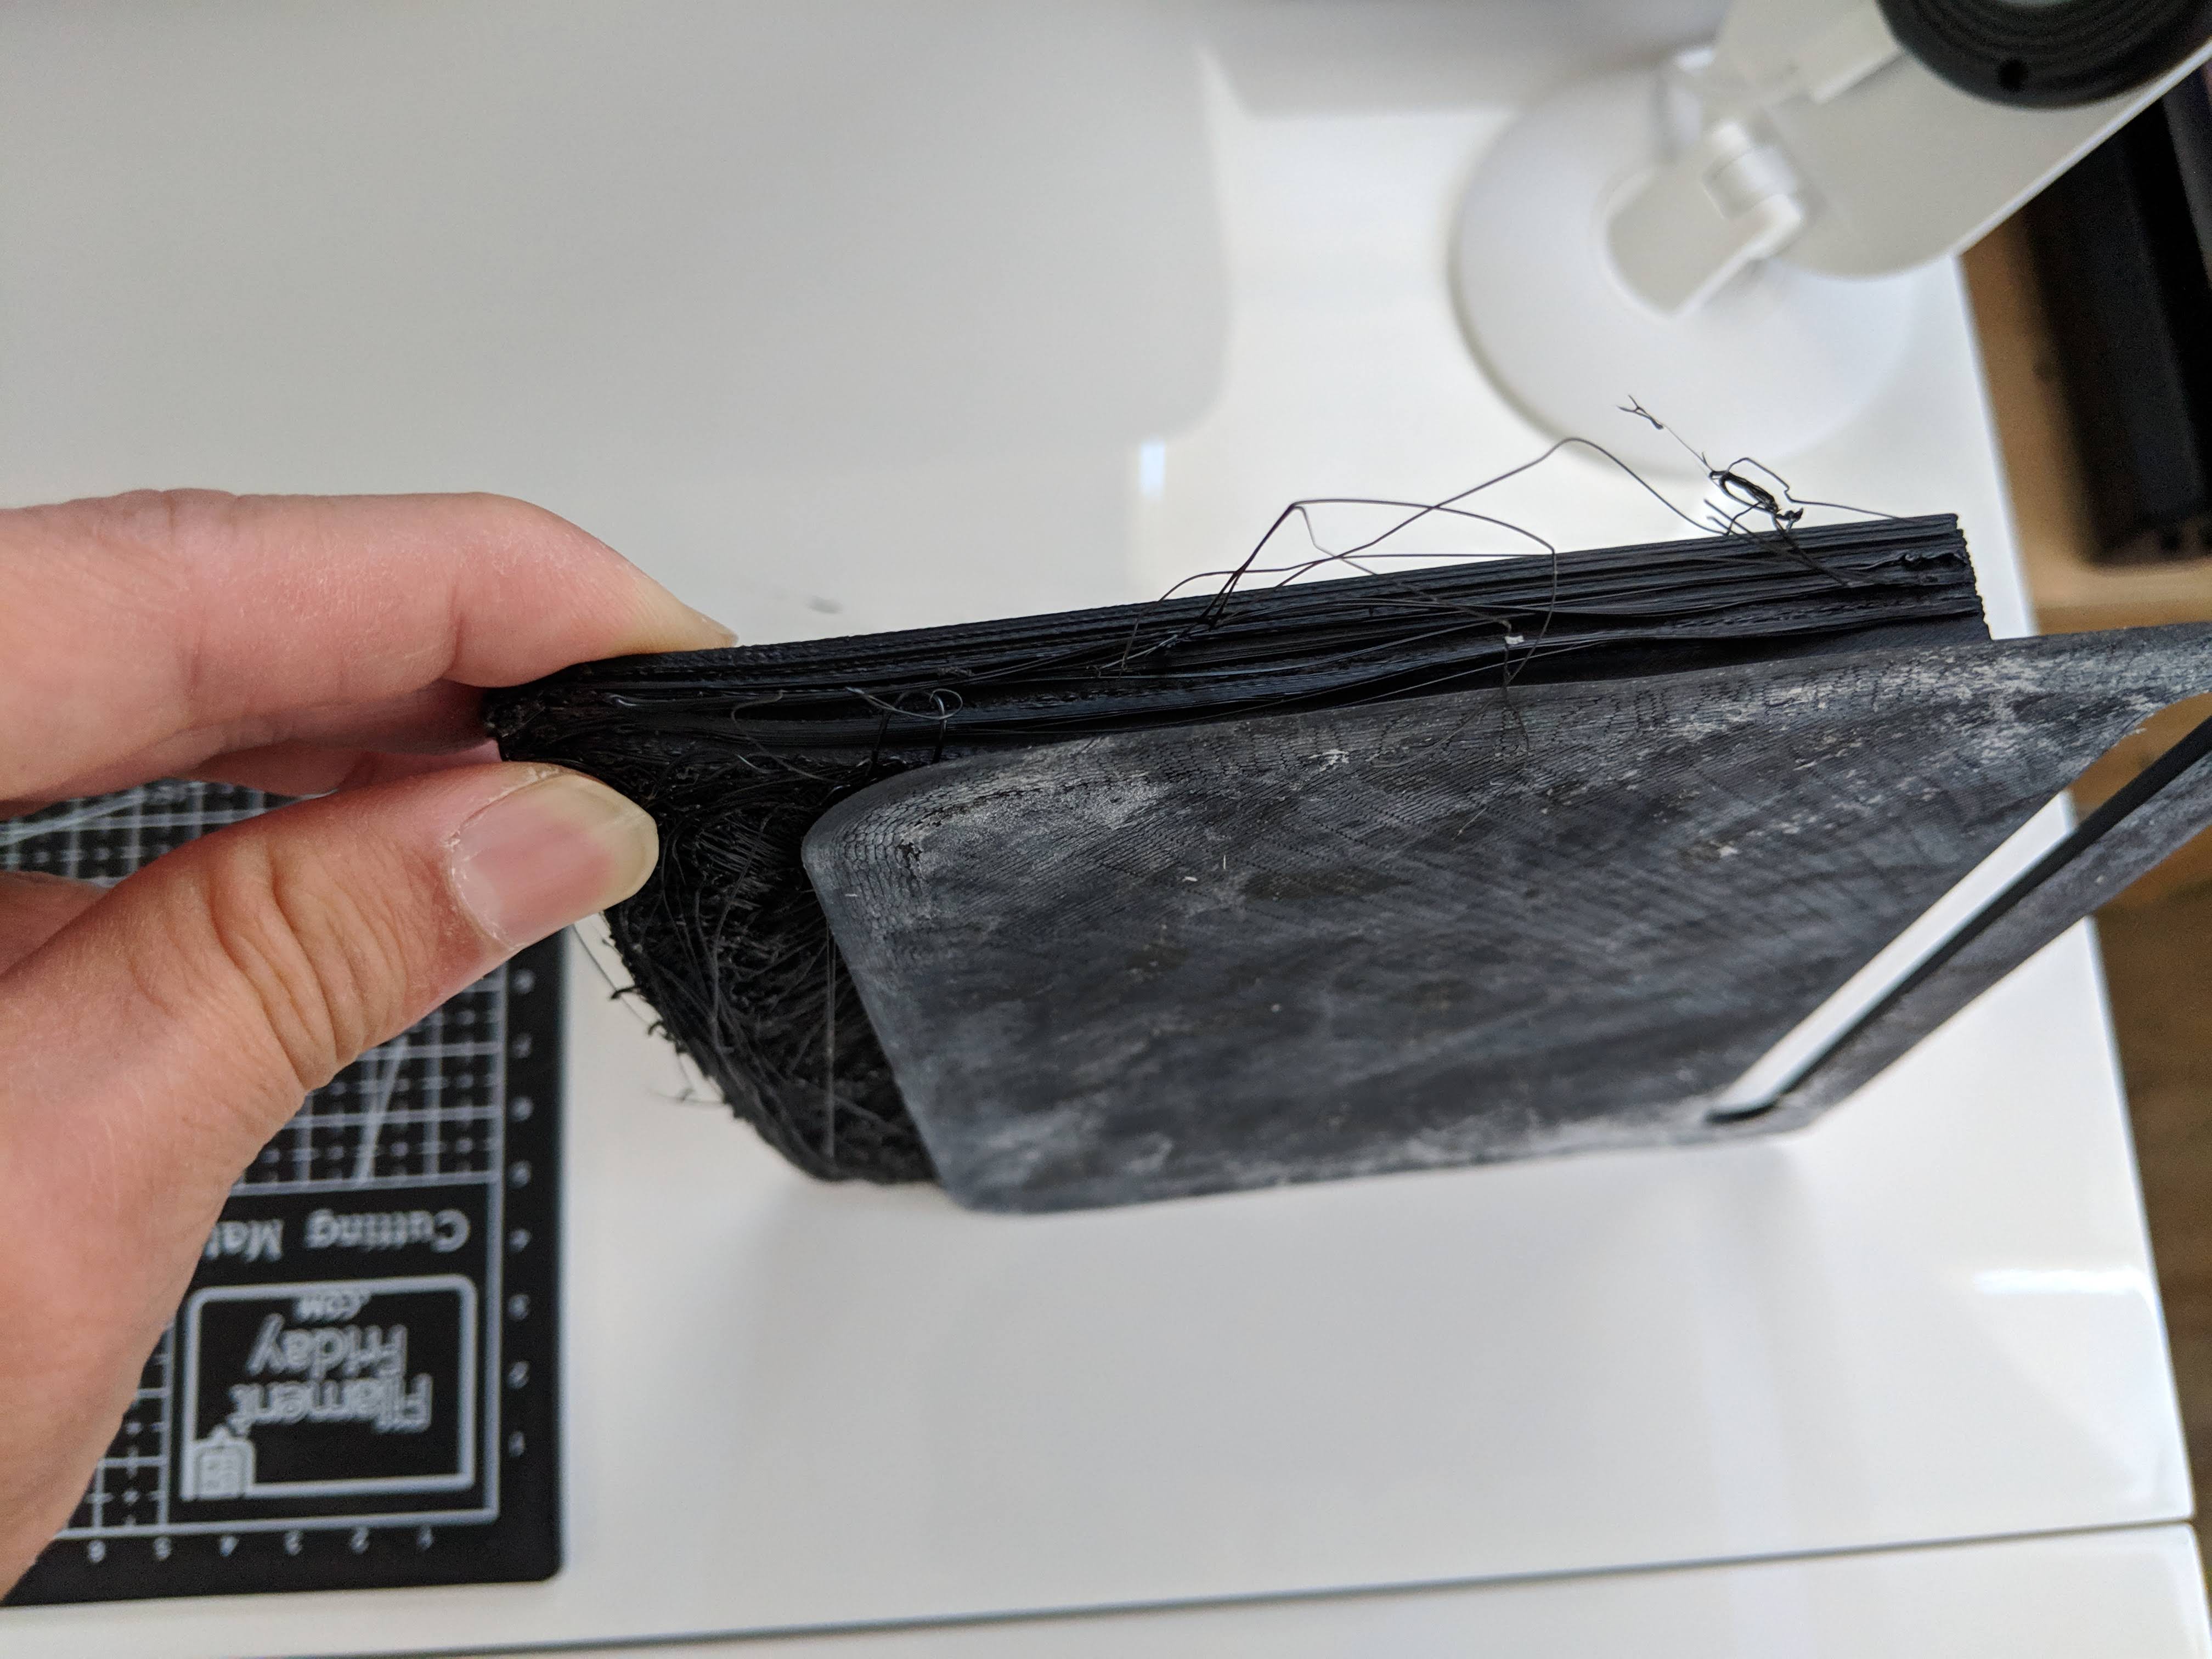
Here's what it looks like enter image description here

This is the model thingiverse linky

It looks like it couldn't print the edge, but this happened many many hours after printing the brim.

This did not happen with my 1st attempt at this print. The last print lost adhesion and I had to scrap it. This time, adhesion looks good so not sure why this happened.

Printing with Monoprice Select V2 with ABS, sliced with Cura. 100C bed / 250C extruder. 15mm/s initial layer speed. 60 mm/s print speed.

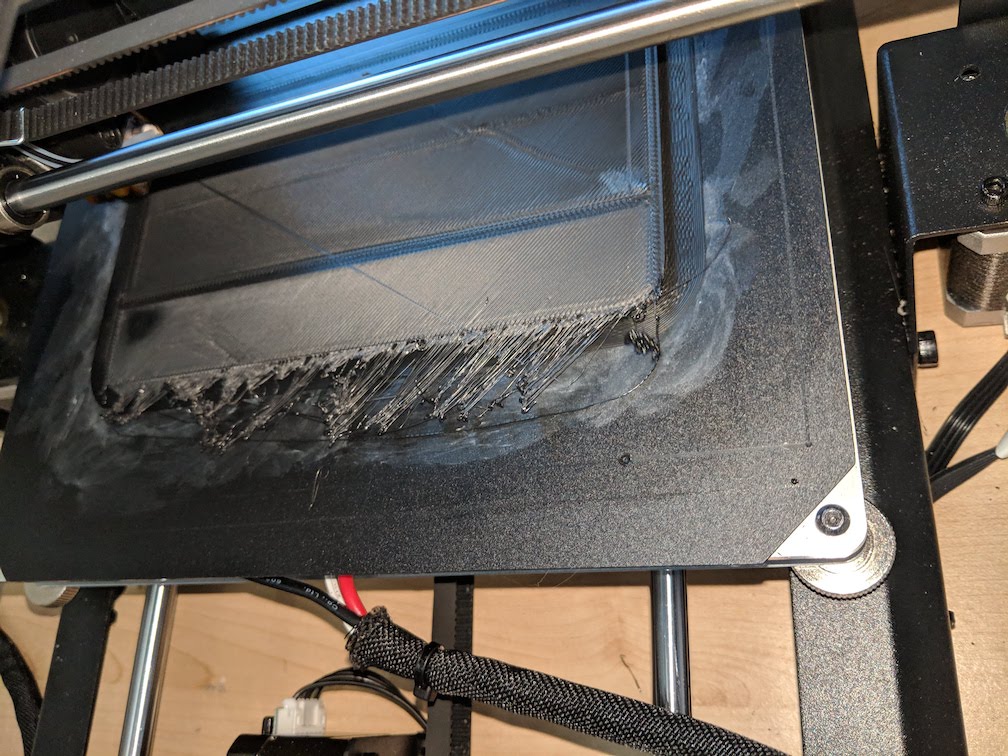
Update It looks like the printer is starting to smooth it out like so. Still not sure if this will lead to an ok print or will fail because of this layer. And it seems the stringing area does not have a brim underneath it. Did Cura just not calculate the brim size correctly? enter image description here
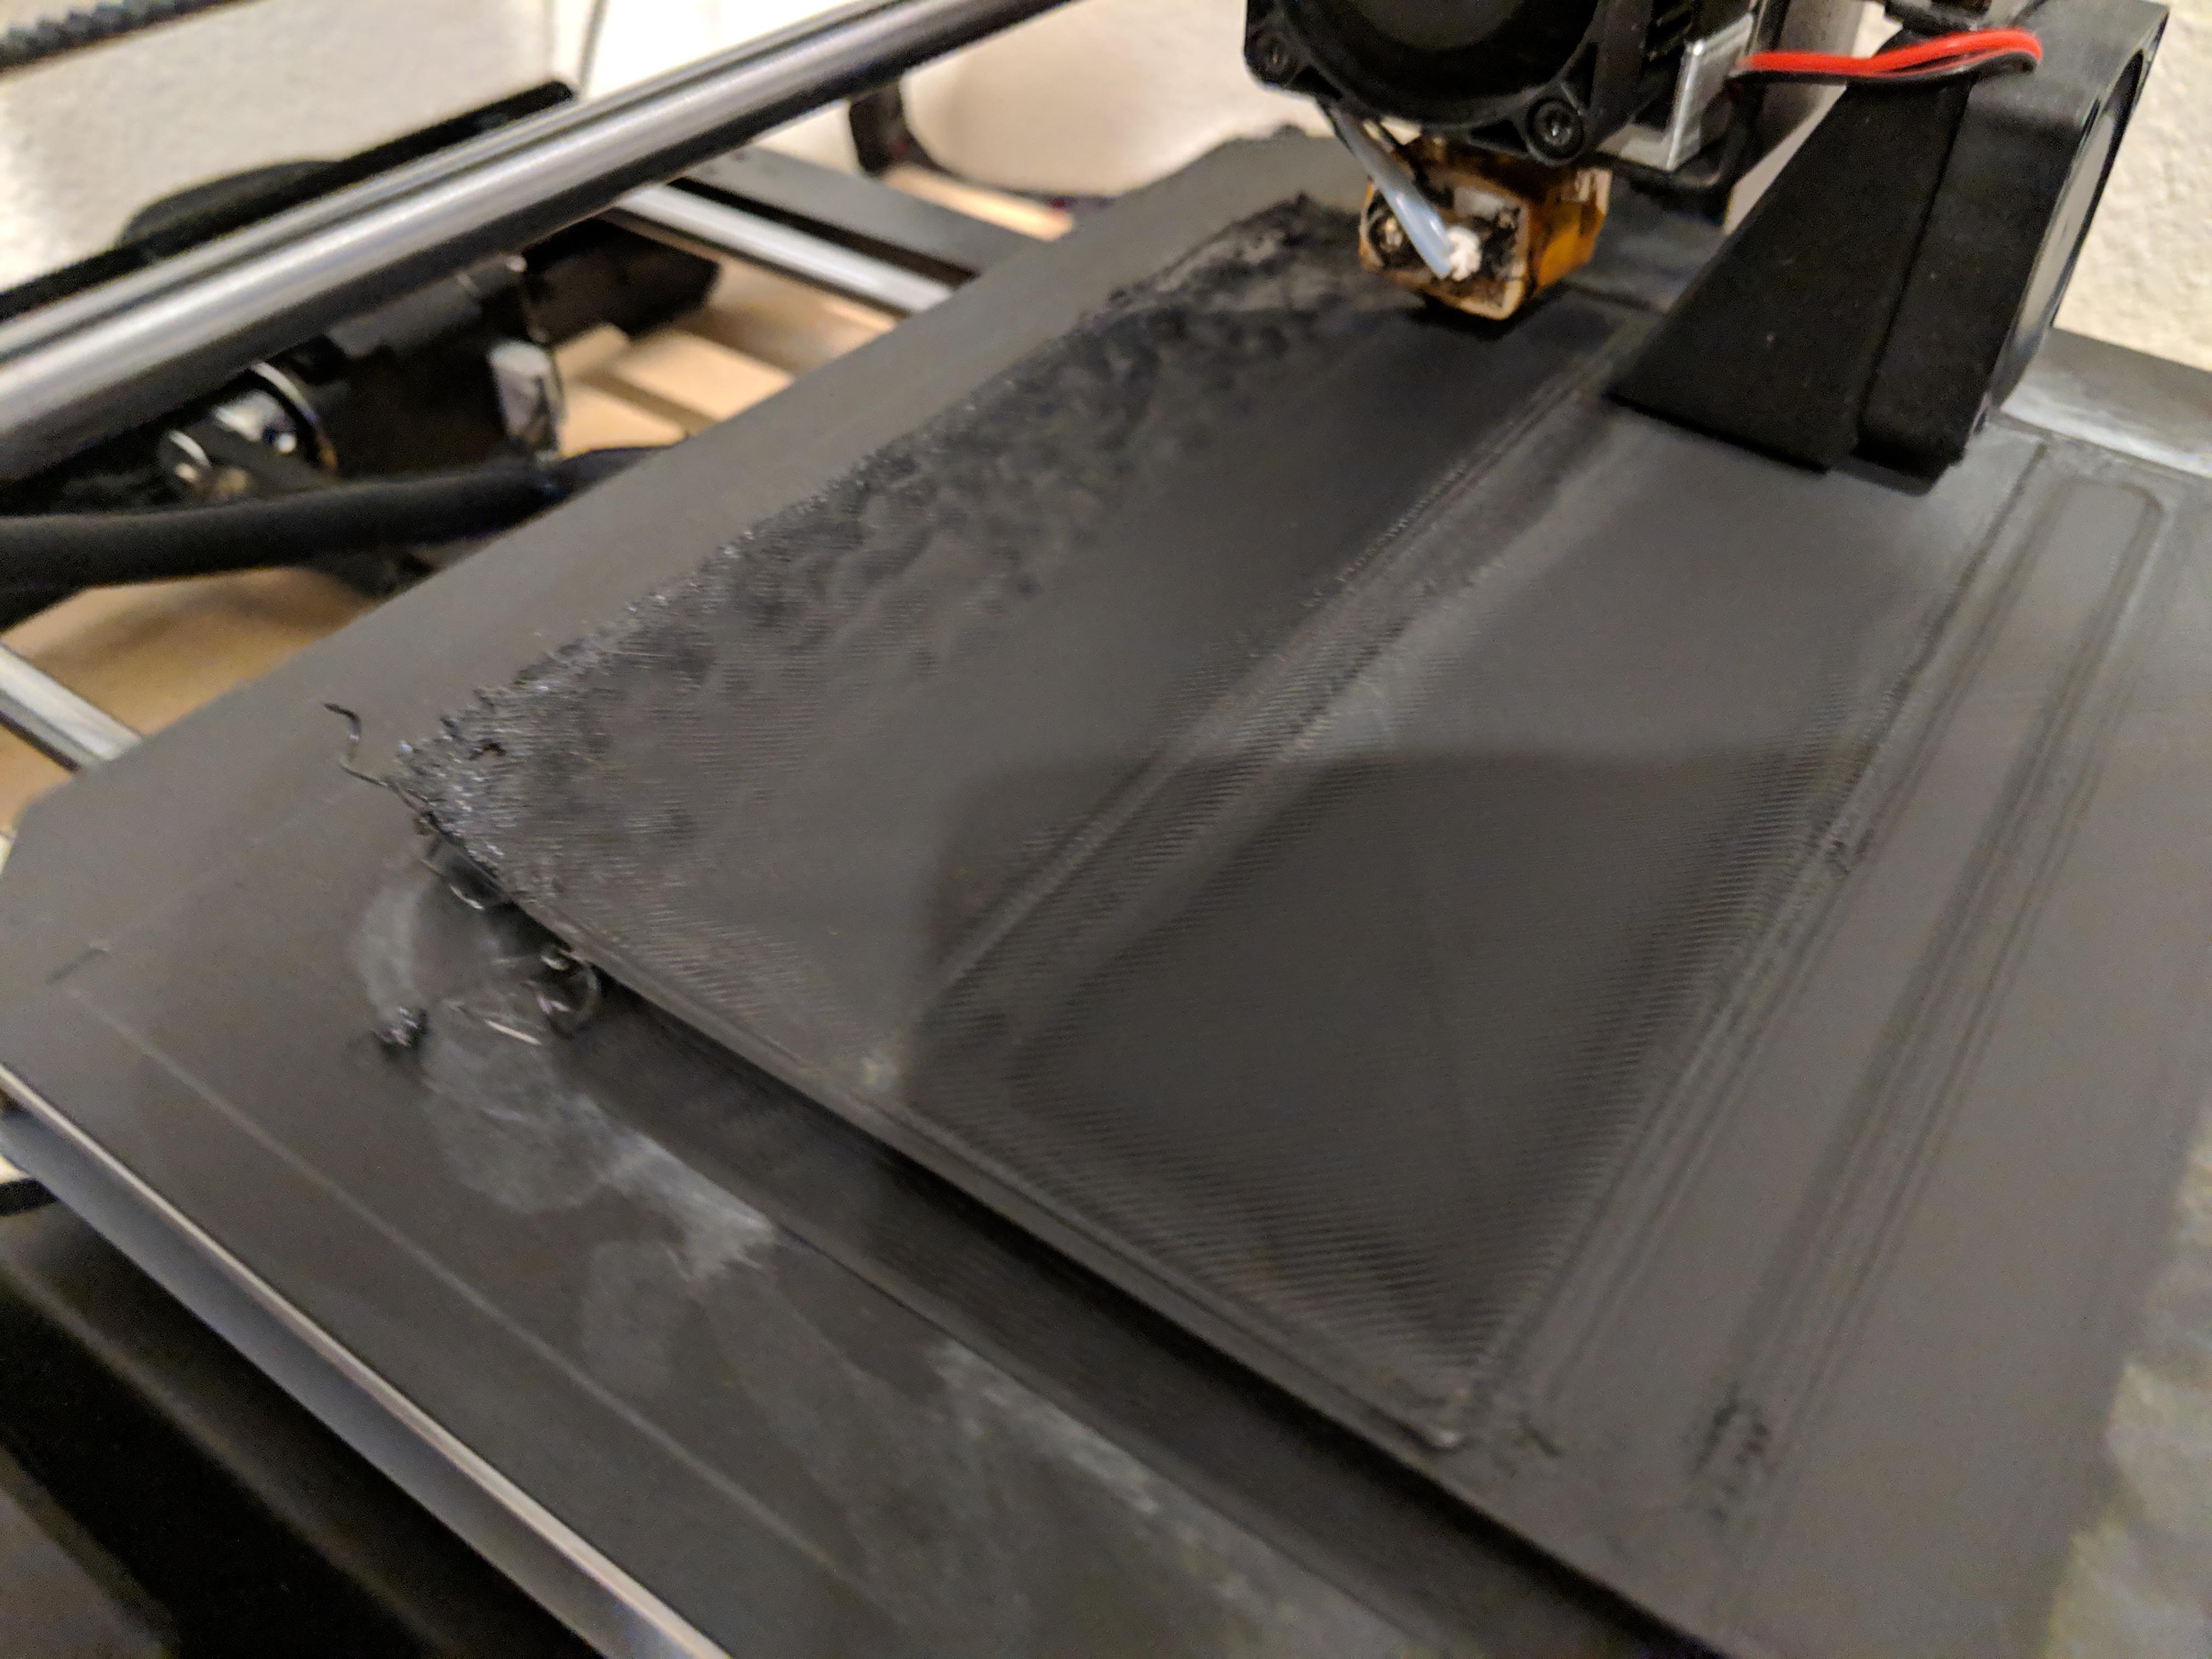
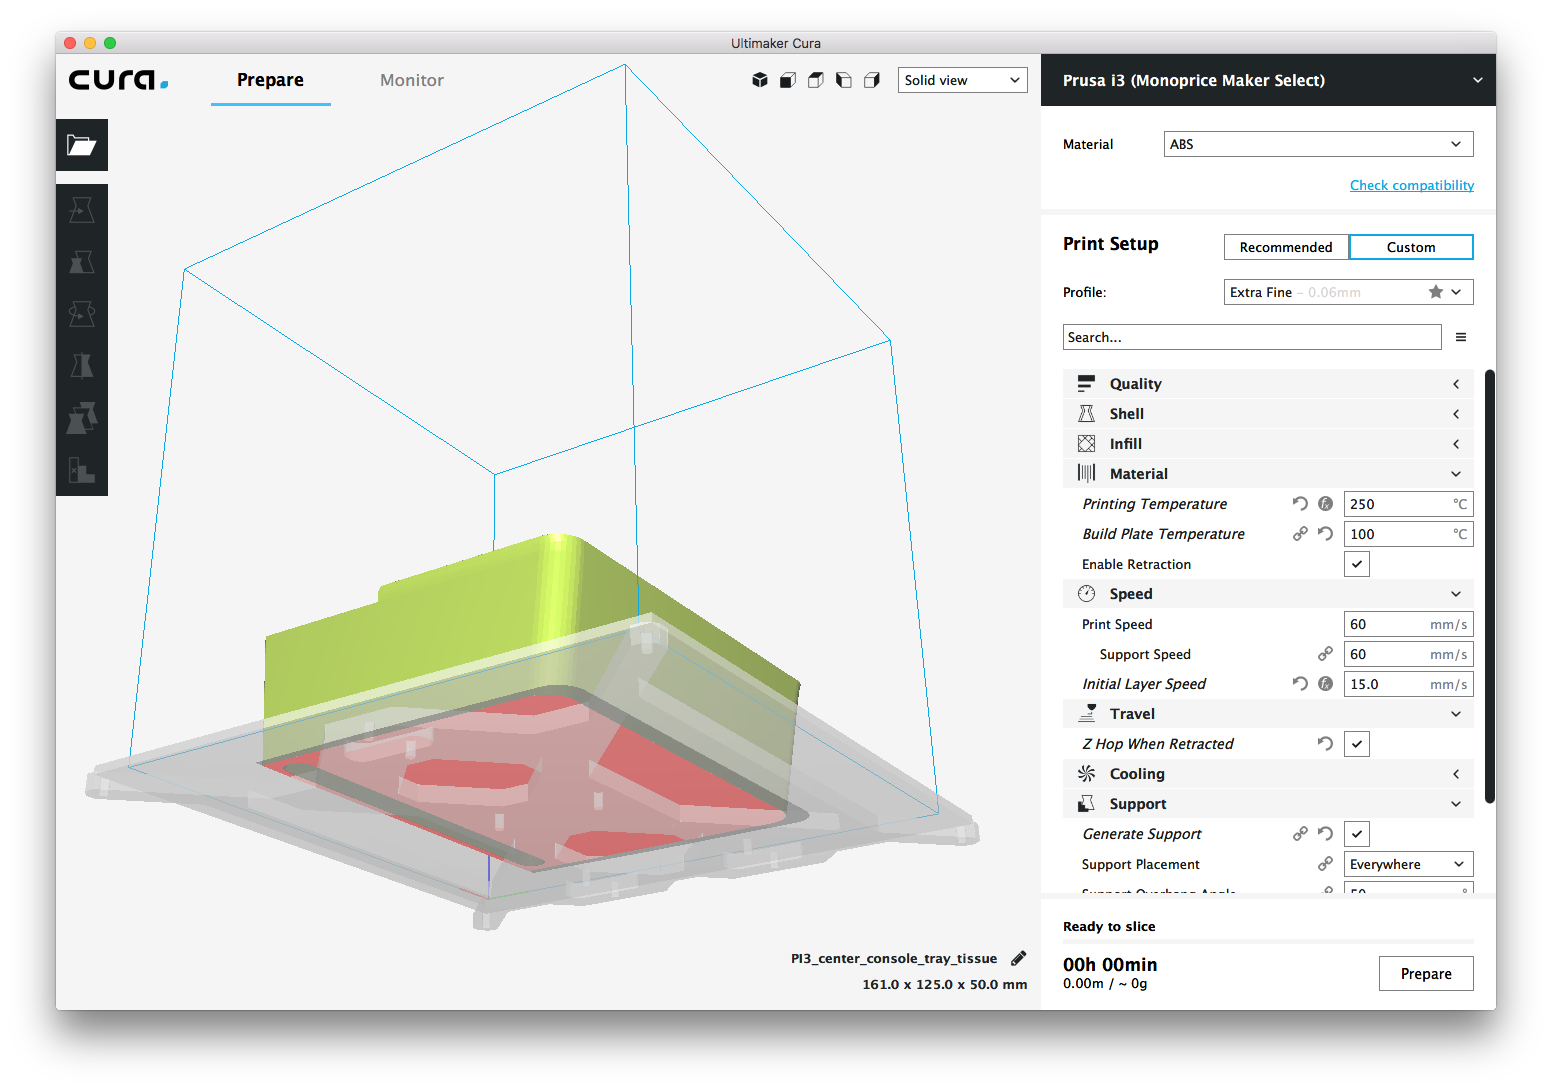
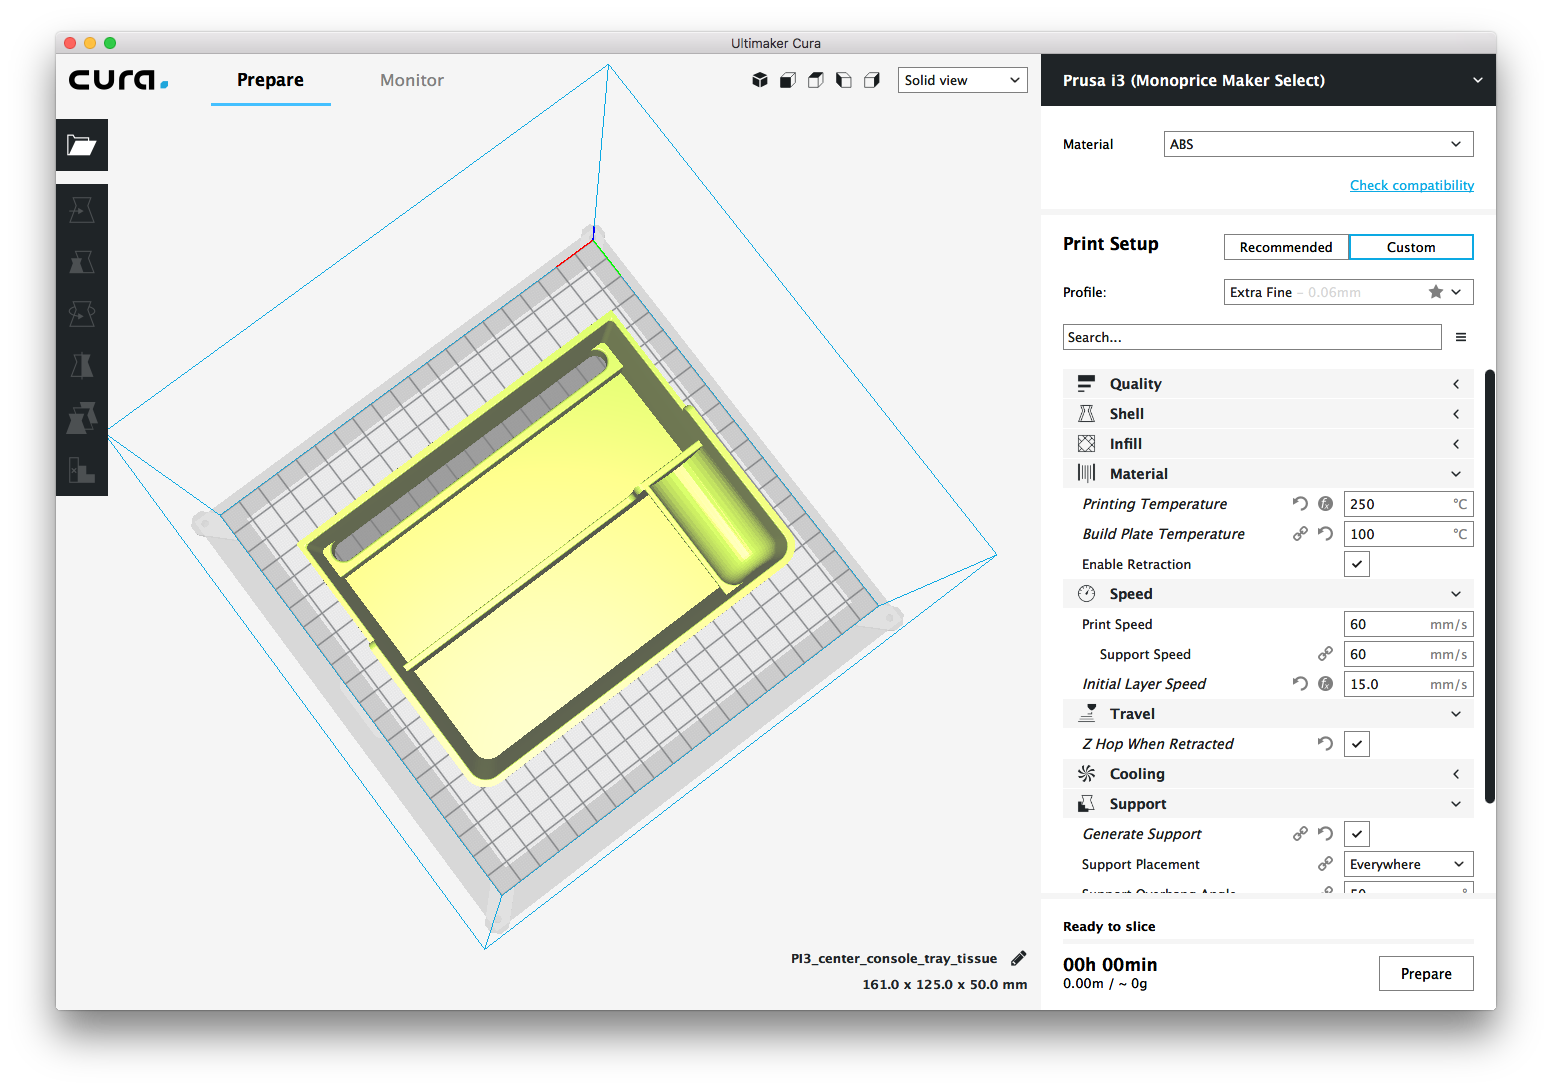
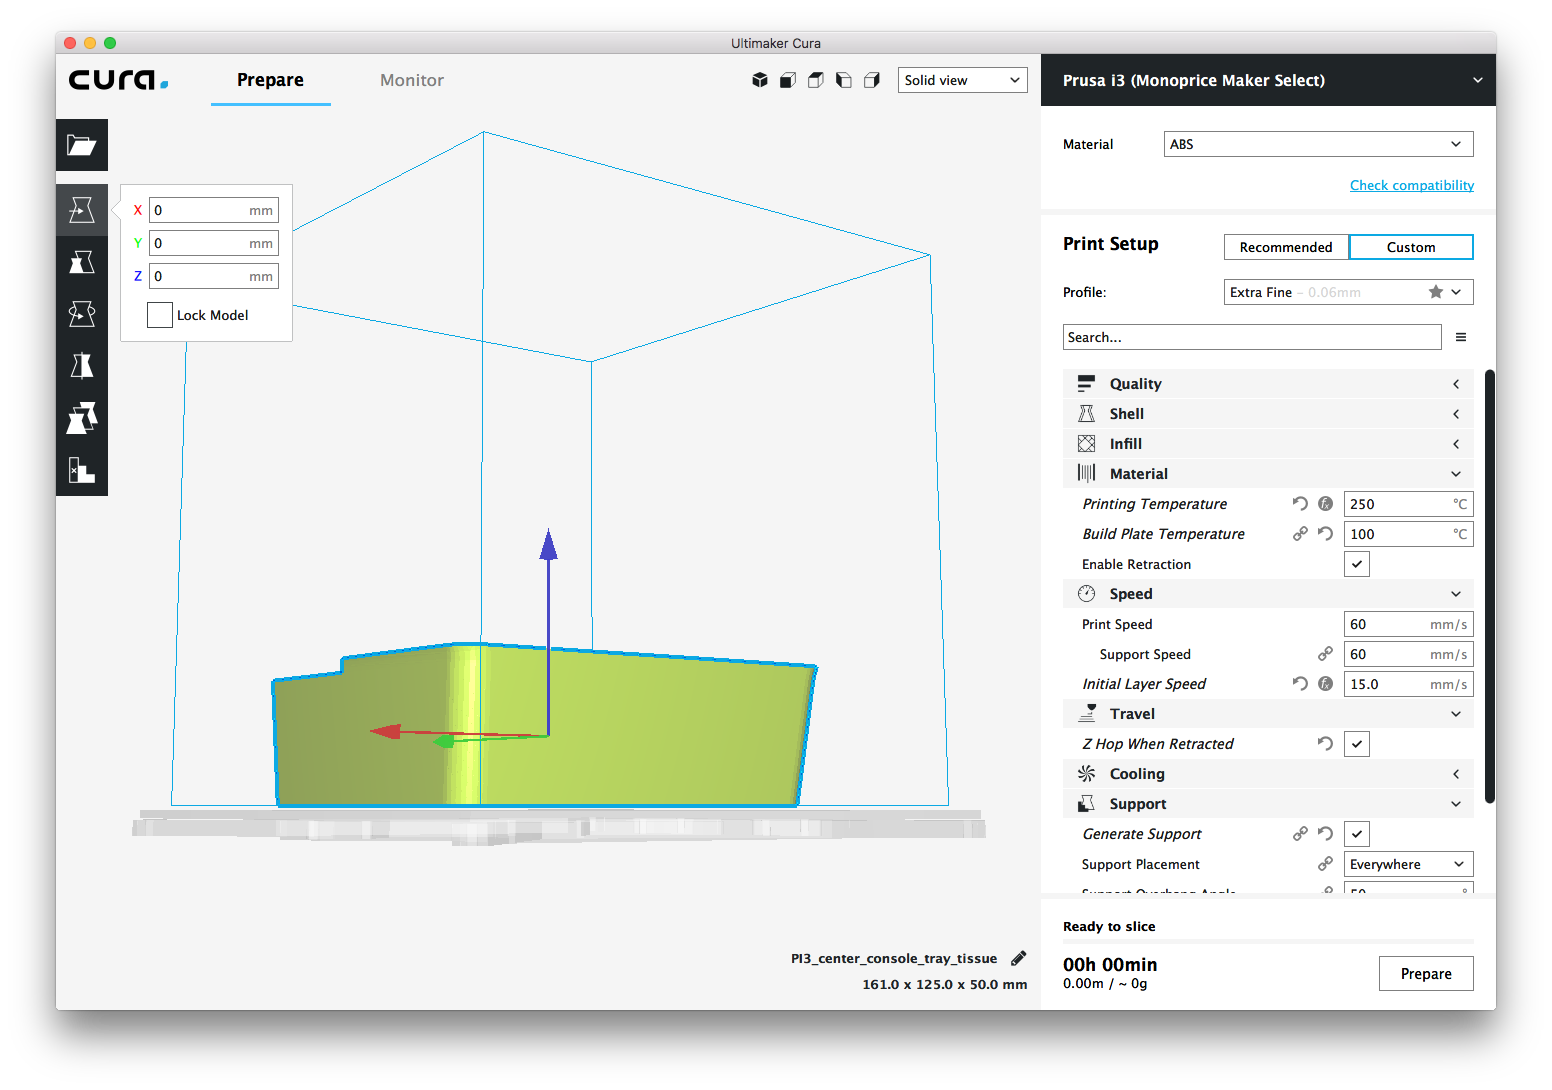
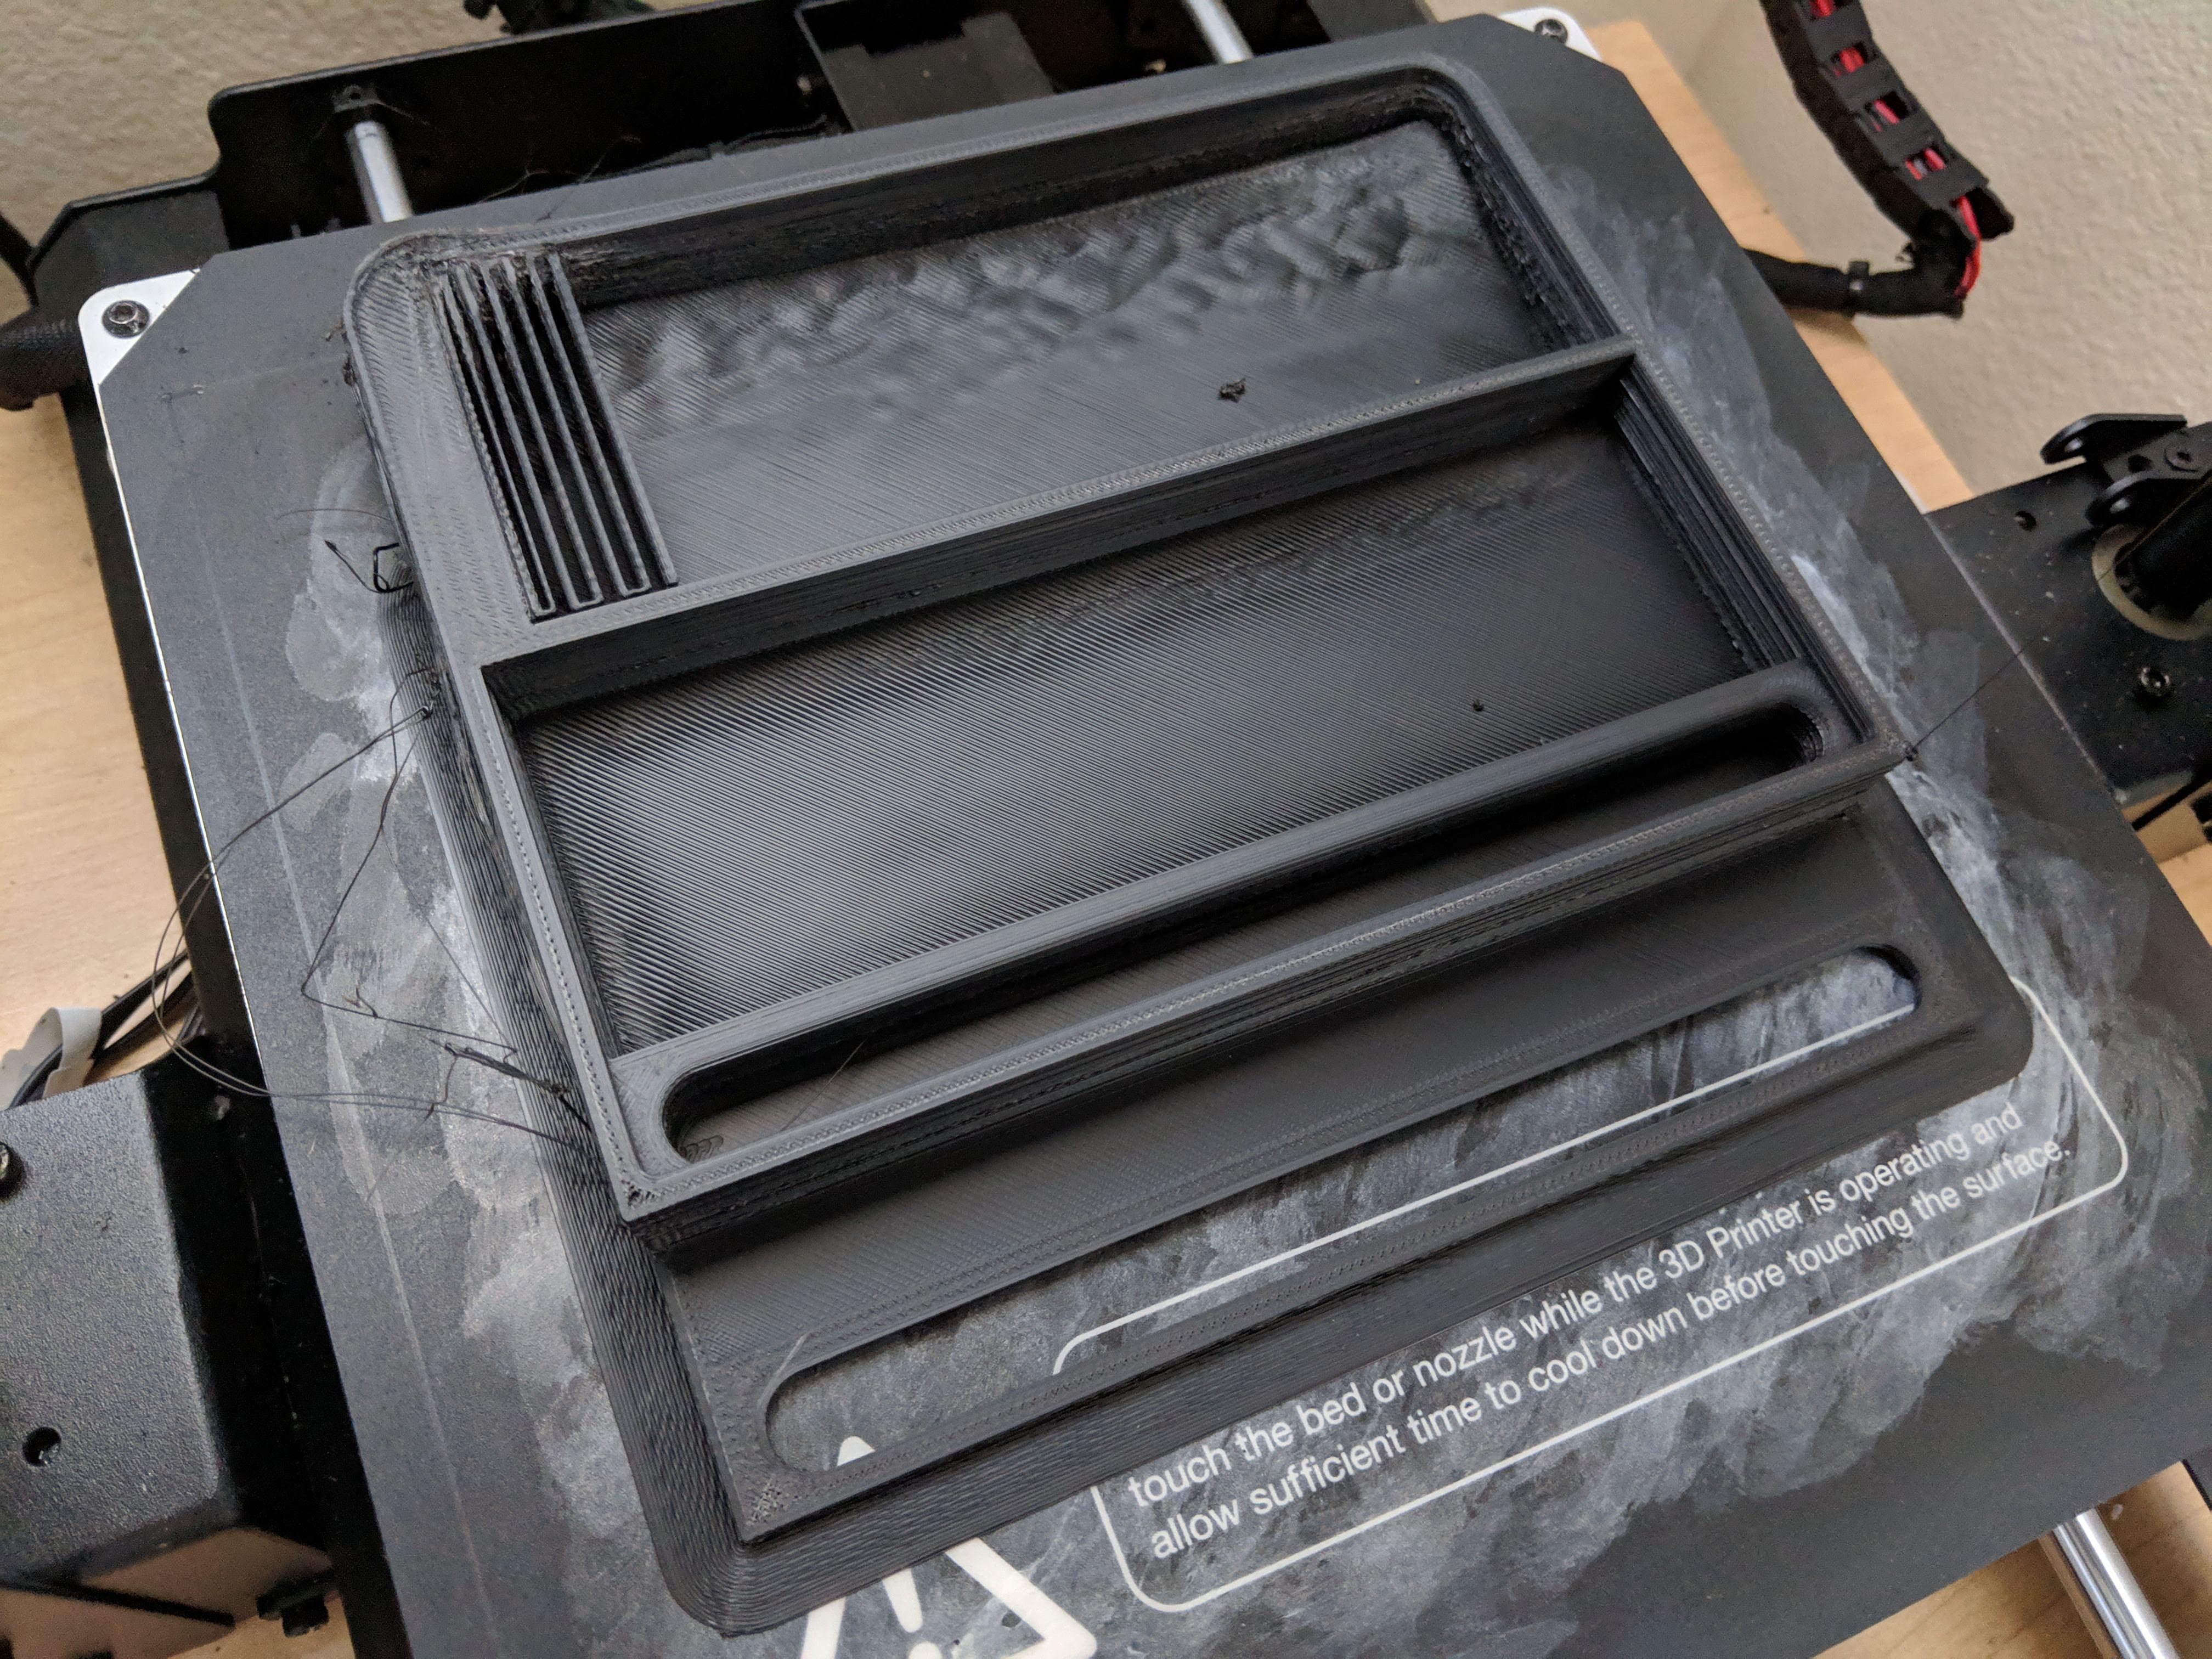
Update2 Here's a few screenshots from Cura to show that the model is lying completely flat. cura1 cura2 cura3 I let the print go on overnight and here's where I stopped it top view side view It almost seems like the print shifted completely after printing the initial layer. Have you ever seen anything like this or is there anything in my Cura model that would make it do this?
$\endgroup$
2
  • 1
    $\begingroup$ The strange thing is that all the models in the Thingiverse link have a perfect flat bottom, there should absolutely be no need for supports on that end. $\endgroup$
    – 0scar
    Commented Jan 4, 2019 at 14:22
  • $\begingroup$ good that you had the print run on for a couple more hours, resulting in identifying layer shift. $\endgroup$
    – Trish
    Commented Jan 4, 2019 at 20:07

4 Answers 4

5
$\begingroup$

No, your problem is not related to slicing, this is a hardware problem. Your complete print has shifted, this is called layer shift.

This could happen when the nozzle hits an obstruction while printing while the Y stepper continues. This could lead to skipping teeth on the belts, slipping of the pulley or missing steps. This results in printing over air as the print progresses. This manifests itself as stringing, but in fact is unsupported printing (in the air). In this case it is unrecoverable as the printer has lost the reference frame, it just continues to print with the new reference frame caused by the layer shift.

A Prusa MK3, or any printerboard using trinamic stepper drivers would be able to recover (if the belt and pulley are correctly attached, and steps are missed) as the skipping of steps is detected, in case of a Prusa MK3 the machine will re-home when it detects skipped steps and continue printing. See also this answer for more details.

Possible solutions are increasing the belt tension, increase the stepper torque by increasing the current through the stepper drivers or re-tighten the pulley on the stepper of the Y belt.

$\endgroup$
2
  • 1
    $\begingroup$ This seems like a reasonable explanation. To be honest, I don't understand everything you said, but I'm going to do some research on it $\endgroup$
    – kane
    Commented Jan 4, 2019 at 18:59
  • $\begingroup$ In my Case a missing Set screw on the bed stepper would cause it to shift when it did a high speed transition from the back to the front of the piece. the small set screws were not particularly visible and its loss went unnoticed. $\endgroup$
    – Kendrick
    Commented Dec 2, 2020 at 18:39
3
$\begingroup$

No, the print is lost.

First thoughts after Update 1

Your print will not perfectly recover from this stringing issue, which to me looks to be unsupported bridging. I postulate that your slicing seems to be made with the model not aligned flat on the bottom correctly.

The biggest indicator for this is, that the brim is passing right underneath the model, so in that area, the slicer did not detect the model touching the surface, which means it is considered floating.

Re-slice the model and check in layer view that you absolutely have the bottom touching to the sheet everywhere. Use the "lay flat" function (which should suffice) or enable at least 10% support to the build plate (which in this case should not be needed). Even though the model doesn't need this because the base is flat as to inspection, the last resort could be to move the item 0.1 mm into the sheet, cutting off any odd protrusion your slicer identifies that can result in parts of the object "floating" and demanding to bridge long ways into the unsupported nirvana.

New Thoughts/Revision after Update 2

After the new photos, it became apparent that it was not a slicing issue of a slightly angled print but a layer shift.

You will have to check the tension of your bed belt and if anything might have come into your bed movement. On my Ender 3 I had tried a cable chain, which did hinder Y-Axis movement - make sure that it has not even a movement of short snagging.

Make sure that your nozzle does not snatch on the print as it moves. Maybe activate Z-hopping.

$\endgroup$
5
  • $\begingroup$ All models are perfectly flat, there should be no need for support for the bottom (other than the coin dispenser). $\endgroup$
    – 0scar
    Commented Jan 4, 2019 at 14:25
  • $\begingroup$ @Trish this is a reasonable theory and something I'll look out for in the future. But please take a look at my updated photos. The model is laying flat and I even have supports enabled though I believe Oscar is right that it's not needed here. It almost looks like the print shifted y-axis after printing the initial layer $\endgroup$
    – kane
    Commented Jan 4, 2019 at 18:31
  • 1
    $\begingroup$ It was reasonable at the time we didn't had the new picture... layer shift can't be distinguished from bad slicing in the infancy at times. $\endgroup$
    – Trish
    Commented Jan 4, 2019 at 18:48
  • $\begingroup$ @kane updated with a couple ideas what might be the cause of layer shift. bad cable chains or improperly installed ones can be a huge problem.. $\endgroup$
    – Trish
    Commented Jan 4, 2019 at 20:11
  • $\begingroup$ @Trish I believe I identified the cause of the layer shift. I've posted it as a follow-up answer to this question $\endgroup$
    – kane
    Commented Jan 8, 2019 at 18:07
3
$\begingroup$

Both @Oscar and @Trish have identified the problem in their answers. Upon further investigation, I believe I found the root of the problem.

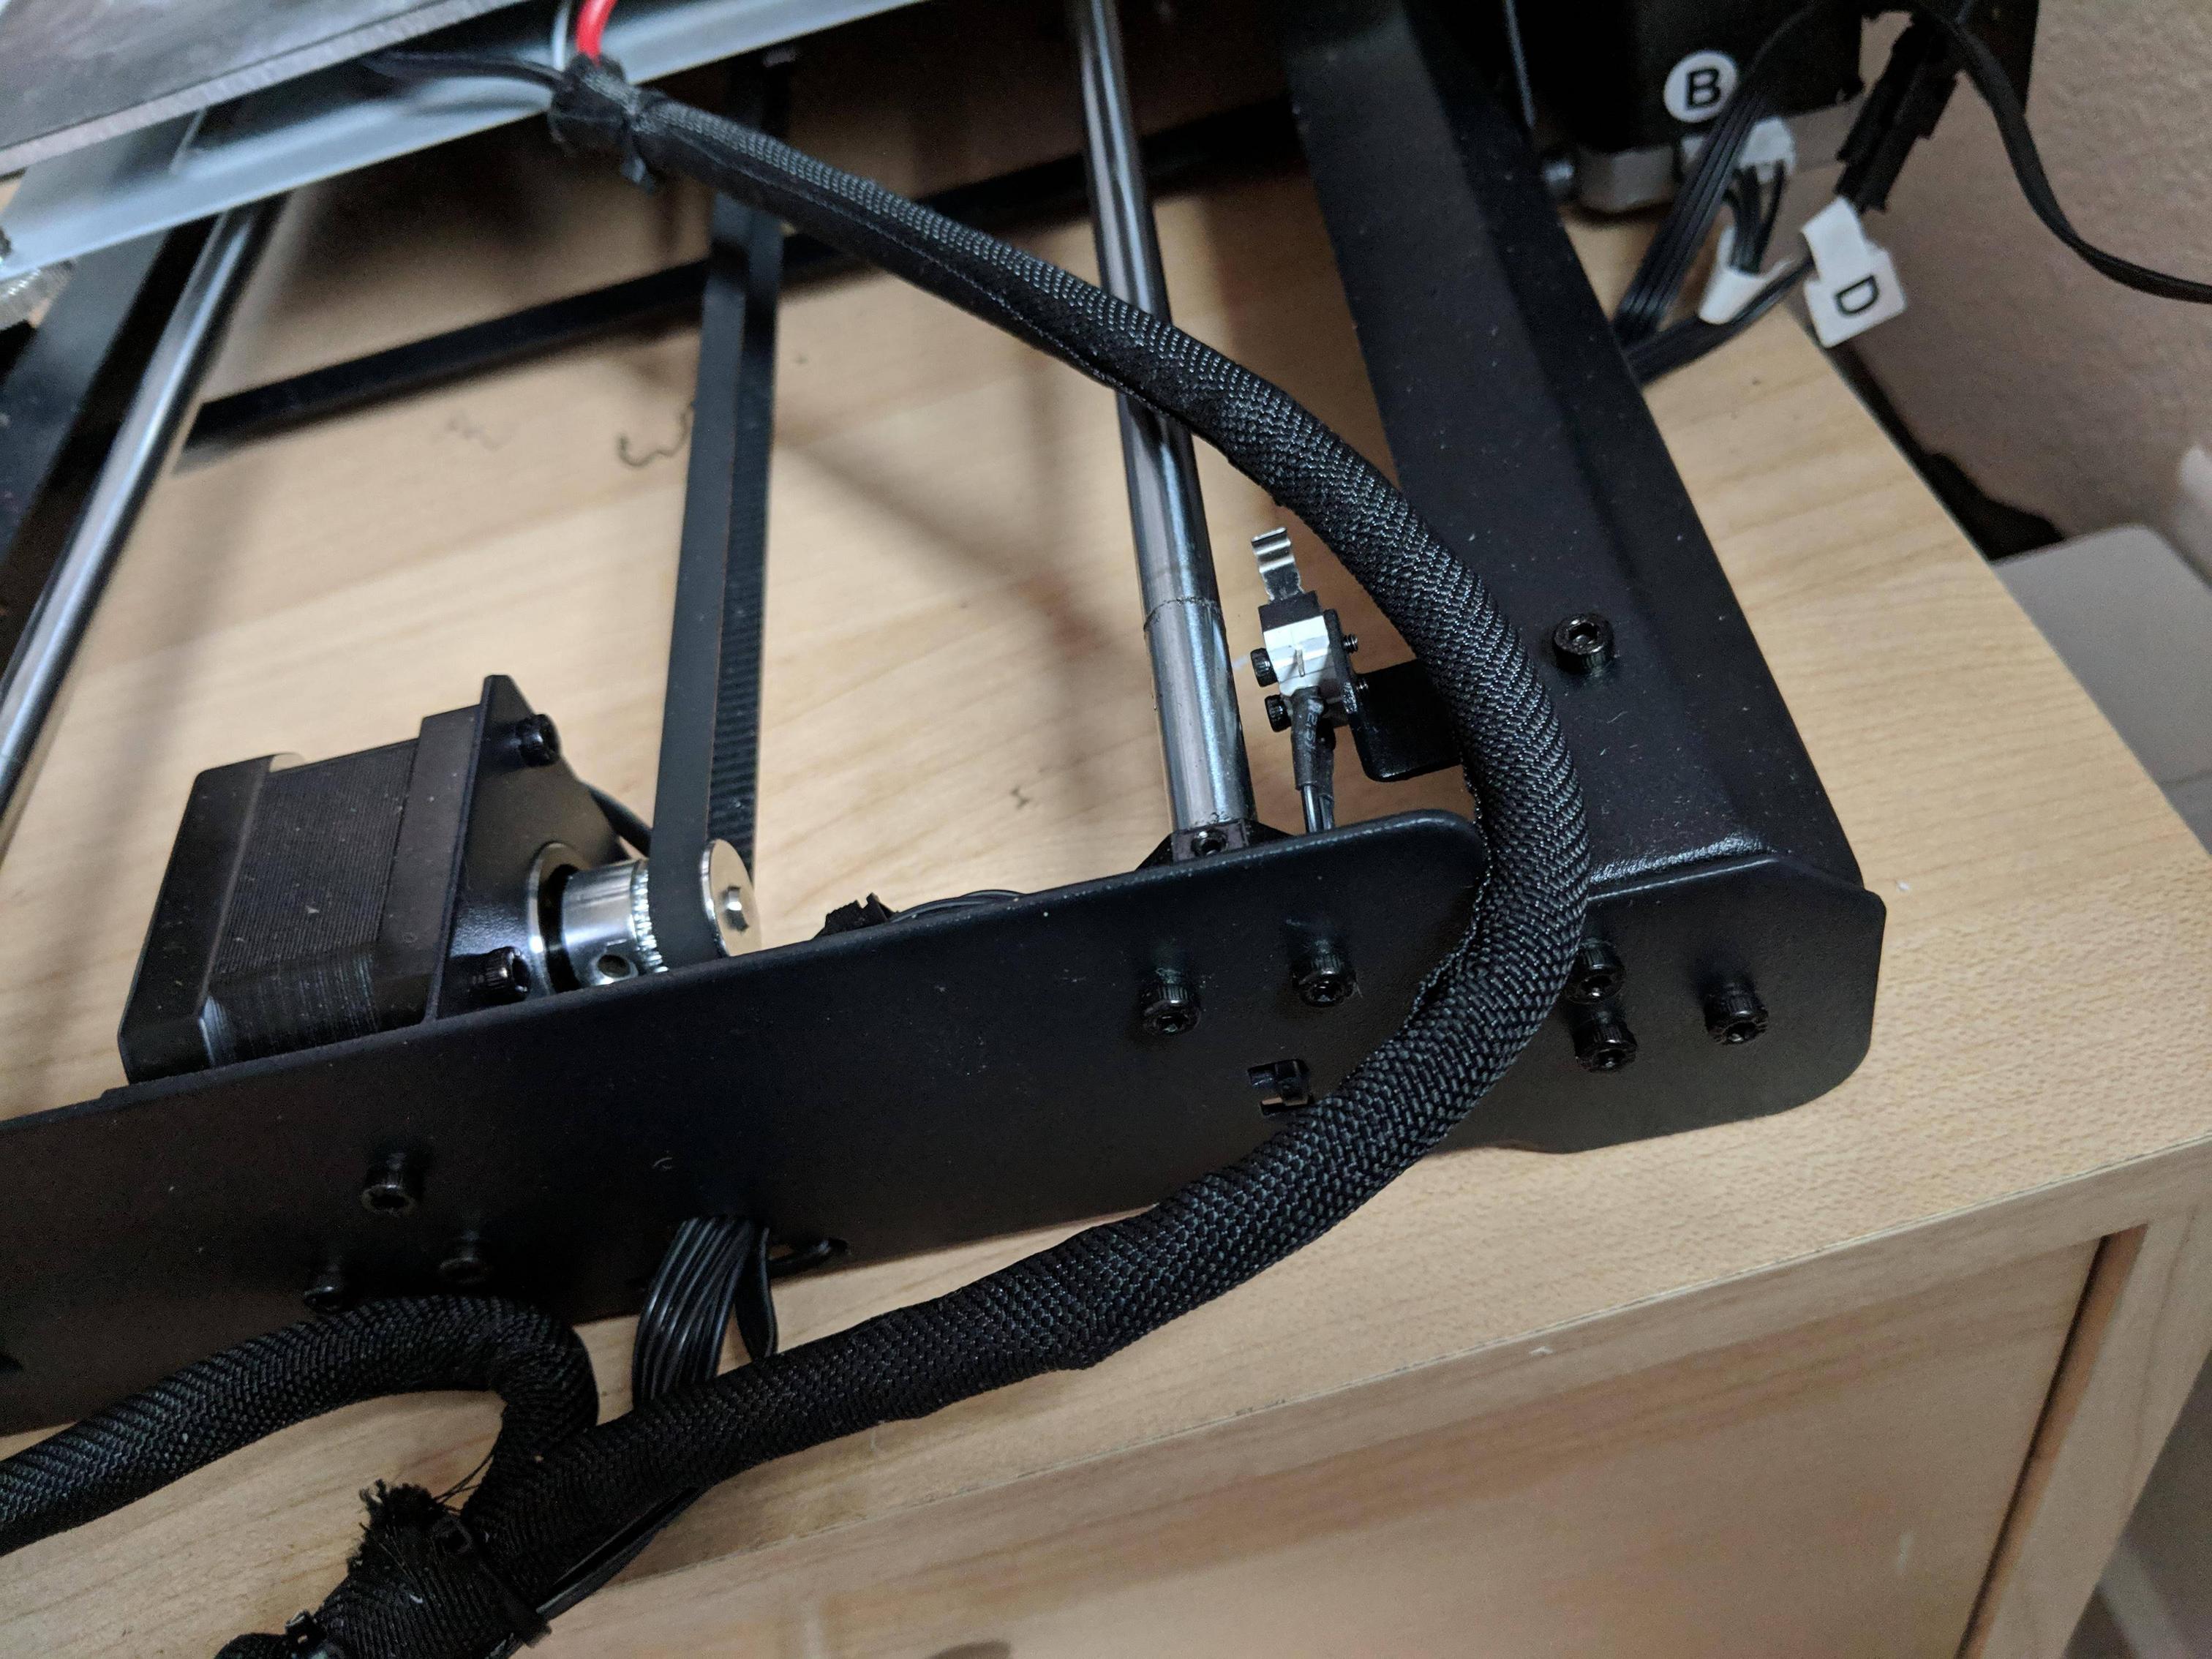
The Monoprice Select V2 has what I think is an inherent design flaw with how its wires are routed. The wire can sometimes

  1. get caught on the frame (when the y-axis is moving towards its maximum position)
  2. get caught between the frame and the print bed preventing the y-axis from reaching the minimum position
  3. it even hits the y-limit-switch sometimes

Here's a backside view of the printer where you can see problem (1) where the wire can get caught by the frame. You can also see the y-limit-switch and I saw first-hand when the wire bundle caught it, forcing another layer shift in my print.

Photo of Y limit switch

For problem (1) above, I found this solution seems to help Thingiverse link

To resolve all of the wiring issues, you have to unwrap the wires and reroute them. People online say this voids the warranty.

The wire jamming doesn't always happen. But when you printer moves back and forth along the y-axis hundreds of times for a large print, there's a high probability it snags at some point. This is very frustrating after many hours of printing. And I'm thinking of getting another printer for this reason.

I should note that it looks like Monoprice's next version printer, the Monoprice Select Plus, doesn't seem like it would have this problem since the control unit is integrated and the wires don't seem like they would be in the way.

$\endgroup$
8
  • $\begingroup$ Snagging cables are a PITA... but nailed it (well, I was looking at a chain, but...) $\endgroup$
    – Trish
    Commented Jan 8, 2019 at 18:08
  • $\begingroup$ hm, judging from the design... you don't need to remove the cable binders, if you are comfortable to unscrew all the screws... $\endgroup$
    – Trish
    Commented Jan 9, 2019 at 12:38
  • $\begingroup$ @Trish What are you proposing? $\endgroup$
    – kane
    Commented Jan 9, 2019 at 15:14
  • $\begingroup$ unscrew the backplate & rail on one side, then slip in the cable for the bed, then re-screw it. $\endgroup$
    – Trish
    Commented Jan 9, 2019 at 15:25
  • $\begingroup$ Are you suggesting routing the wires to the heat bed under the backframe? $\endgroup$
    – kane
    Commented Jan 9, 2019 at 15:28
-3
$\begingroup$

There are many problems caused with this. It could be a faulty motors, an unlevel bed, a dirty nozzle, or even something as simple as using the wrong filament settings. It would be best to go through a checklist of things that might be wrong with your printer. It could also just be caused by the wear and tear of a really old printer.

$\endgroup$
1
  • $\begingroup$ please be more specific. $\endgroup$
    – Trish
    Commented Jan 4, 2019 at 20:05

You must log in to answer this question.

Not the answer you're looking for? Browse other questions tagged .