10
$\begingroup$

Ok, I did it, I ordered myself an Ender-3, a genuine 24V e3D hotend, inductive sensor and some better tubing/clamps to cope with the problem the CR10/Ender line has occasionally.

But now I need to fix up my Cura for the machine coming in. The start is the CR10, and fixing the dimensions is easy.

But now comes the tricky part: Start and End G-code. For my TronXY I never bothered with changing it away from the "basic" settings that a "custom 3D printer" on Marlin gave, but this time I want to know what I type in there. The basic code, after I dragged out the G-code handbook from the RepRap wiki to add the missing comments is:

G28            ;Home
G1 Z15.0 F6000 ;Move the Gantry up 15mm going fast
;Prime the extruder
G92 E0         ; reset extrusion distance
G1 F200 E3     ; extrude 3mm of feed stock
G92 E0         ; reset extrusion distance

The RepRap Wiki suggests that there could be made so much more from this.

I would love to swipe the nozzle before starting to print, making sure that the curled up filament from this first extrusion doesn't get squished against the nozzle and make a bad first layer.

How does an example (commented) G-code for swiping the nozzle look like?

$\endgroup$
0

5 Answers 5

9
$\begingroup$

The lazy way: Skirt/Brim

With my TronXY X1 I learned pretty fast, that this first bit of extrusion on an unheated bed can totally mess up the first layer by being just in the way, as explained in the question.

To some degree, this behavior can be avoided by adding a skirt of a certain length. An equally good alternative that also increases bed adhesion for tricky parts is the brim. Both are not set via G-code but can be added by the slicer. In Ultimaker Cura both are found in the tab Build Plate Adhesion as type, as the following pictures show:

Skirt: 2 lines, minimum length 250mm

Skirt: 2 lines, minimum length 250mm

Brim: minimum length 250mm, 8mm width

Brim: minimum length 250mm, 8mm width

The Prusa Priming-line

Angus/MakersMuse introduced me to the Prusa Priming Line in one of his tutorial videos. For his Wanhao he used (for the video) just this start G-code script:

G28
G1 Y-3 F500 ; Move out of print volume
G1 X60 E9 F500 ; start purge line
G1 X100 E12.5 F500 ; finish purge line

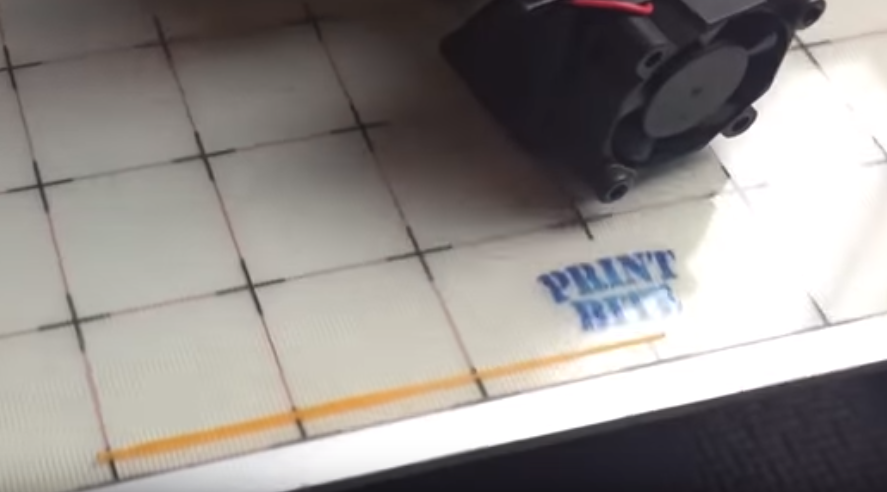
This resulted in a nice line like this: A printed "Prusa Priming Line"

In Ultimaker Cura, this piece of code is added via the preferences of a machine. In Cura 3, you usually had to add the starting G-code yourself. Since at least version 4.2.1, all preset machines contain some variant of a priming line, usually at the left side.

$\endgroup$
6
$\begingroup$

What code we have so far

The code already made by Ultimaker Cura 3 (and then commented on) can be explained a little more:

G28 ;Home
This homes your machine to hit end stop positions, from now on your printer knows the coordinates of the print volume. This place it knows as <0-0-0> - check where that is: above the print surface or next to it!
G1 Z15.0 F6000 ;Move the Gantry up 15mm going fast
Instruct the build plate to move down, or in your case lift the head up 15 mm at 6000 mm/min
;Prime the extruder
This is a comment that the nex code will deal with priming the nozzle
G92 E0 ; reset extrusion distance
G92 sets the position of the extruder by resetting the current position to the specified value of zero
G1 F200 E3 ; extrude 3mm of feed stock
This will extrude 3 mm of filament at a feedrate of 200 mm/min
G92 E0 ; reset extrusion distance
This will reset the extruder length again to zero

Result of the code

Basically you will have some filament dangling on your nozzle now, or falling of as the nozzle is hot creating a fine string. You now are facing the possibility that the primed material will be dragged along the build plate to the start of the print.

Nozzle Preparation: Priming sequences

Ultimaker 3: 'blob'&swipe

An alternative I really like is the priming sequence of the Ultimaker 3. The hot end is instructed near the origin of the printer at about a height of 2 mm above the build plate when it starts to extrude plastic, once the extruded plastic becomes a puddle of about 6 mm in diameter the build plate lowers a few mm's and keep extruding for a bit. It then moves in positive Y direction (to the back) and raises the platform (this is the swipe action), then retracts and starts to move to the print start. Now the puddle of filament stays near the origin and will not be dragged.

You can easily make a similar schematic for your printer, I've done so also for various printers. Try and experiment what works best for you. The swipe action is the movement where the nozzle will be instructed to move near the build plate while moving in a certain direction (Y or X), a height of a few tenths is enough to swipe.

I don't have my exact profile here, but you could add (skipping feedrates):

G1 Y15 Z0.2 ; moves the nozzle backwards and down from 15 mm to 0.2 mm
G1 Y20 Z0.2 ; swipes the nozzle, this should cut off the "worm"
G1 Z1     ; raise for movement to start of print to add a little space to travel
$\endgroup$
0
3
$\begingroup$

Blob & Cut

A different approach is to move to a position out off the print bed, then extrude a long piece of filament and then move forward, cutting the filament at the edge of the print surface. A sample G-code that needs to be adjusted to your bed:

G28
G1 Y-5 X5 Z0.1 F500    ; Move off the print surface, a bit above the 0
G92 E0                 ; reset extrusion distance
G1 F200 E10            ; extrude 10mm of feed stock
G92 E0                 ; reset extrusion distance
G1 Y2 F500             ; Move into the print platform
$\endgroup$
3
$\begingroup$

This is my code:

START CODE:

M117 Preparing....    ; Nozzle clean message

M140 S{material_bed_temperature_layer_0}   ; set bed temp

M107                  ; Turn layer fan off
G21                   ; Metric
G28                   ; Home X/Y/Z axis
G0 X0 Y0 Z20 F9000    ; Move up 20mm for heating

M104 S{material_print_temperature_layer_0} ; set extruder temp
M190 S{material_bed_temperature_layer_0}   ; wait for bed temp
M109 S{material_print_temperature_layer_0} ; wait for extruder temp

G92 E0                ; Zero extruder

G28                   ; Home X/Y/Z axis
G0 X1 Z0.1 F9000      ; Move up 0.1mm
G0 Y10 F500           ; Move 10mm to get rid of material
G0 Z1 F9000           ; Move up
G0 Y110 F9000         ; Move to line start
G0 Z0.2 F9000         ; Move down

G1 Y20 E25 F500       ; Extrude 25mm filament over 90mm Y axis
G1 Y10 F500           ; Move 10mm without extracting
G92 E0                ; Reset extruder
G1 E-7 F1400          ; Retract 7mm filament

M117 Printing....     ; Printing message

END CODE:

G91                   ; Incremental coordinates
G1 E-3 F1800          ; Retract
G1 Z10 F9000          ; Move up
G90                   ; Absolute cooridinates
M106 S0               ; Turn off cooling fan
M104 S0               ; Turn off extruder
M140 S0               ; Turn off bed
G1 X0 Y220 F9000      ; Move back
M84                   ; Disable motors
M117 Finished!.       ; Printing message

It's almost working perfectly. I can start prints without checking if the first layer is good (requires a leveled bed).

I am open for improvements

$\endgroup$
2
  • 1
    $\begingroup$ This works well, only thing I would note is that in Slic3R I had to swap the curly braces for square brackets. $\endgroup$ Commented Feb 13, 2020 at 3:38
  • 1
    $\begingroup$ How does retracting work? Doesn't it mean that 7mm needs now to be extracted (pushed) again before it starts flowing from the nozzle? $\endgroup$
    – IttayD
    Commented Aug 2, 2021 at 13:17
3
$\begingroup$

I've experimented a lot with priming/swiping in the G-code prologue, as a result of realizing from this question and answer how important it is to get it right. The key points are:

  • Don't go back and forth; you risk picking back up material you already got rid of. Just swipe in one direction.
  • Don't overextrude. This can lead to ending with pressure remaining (especially for printers with bowden extruders) after the swipe/prime line is finished. It's fine if your extrusion rate is so low that adhesion doesn't start til halfway down the line.
  • Slow movement with fan on is good.

And with that said, here's what I use with my Ender 3:

M106 ; Max fan to discourage ooze sticking to nozzle
G28 ; Home all axes
G92 E0 ; Reset Extruder
G1 Z2.0 F3000 ; Move Z Axis up little to prevent scratching
G1 X0.1 Y20 Z0.3 F5000.0 ; Move to start position
G1 X0.1 Y200.0 Z0.3 F750.0 E18 ; Draw priming line
G92 E0 ; Reset Extruder
G1 Z2.0 F3000 ; Move Z Axis up little to prevent scratching

I also undo all but 1mm of the filament retraction at the end of my epilogue (custom end) G-code, to leave the printer in a state comparable to having freshly loaded filament. If you don't undo the retraction here, the low extrusion rate in the prologue might not be enough to prime the next time you print, but increasing it would over-prime in the case where you're dealing with freshly loaded filament.

$\endgroup$

You must log in to answer this question.

Not the answer you're looking for? Browse other questions tagged .