2
$\begingroup$

NEW UPDATE BELOW


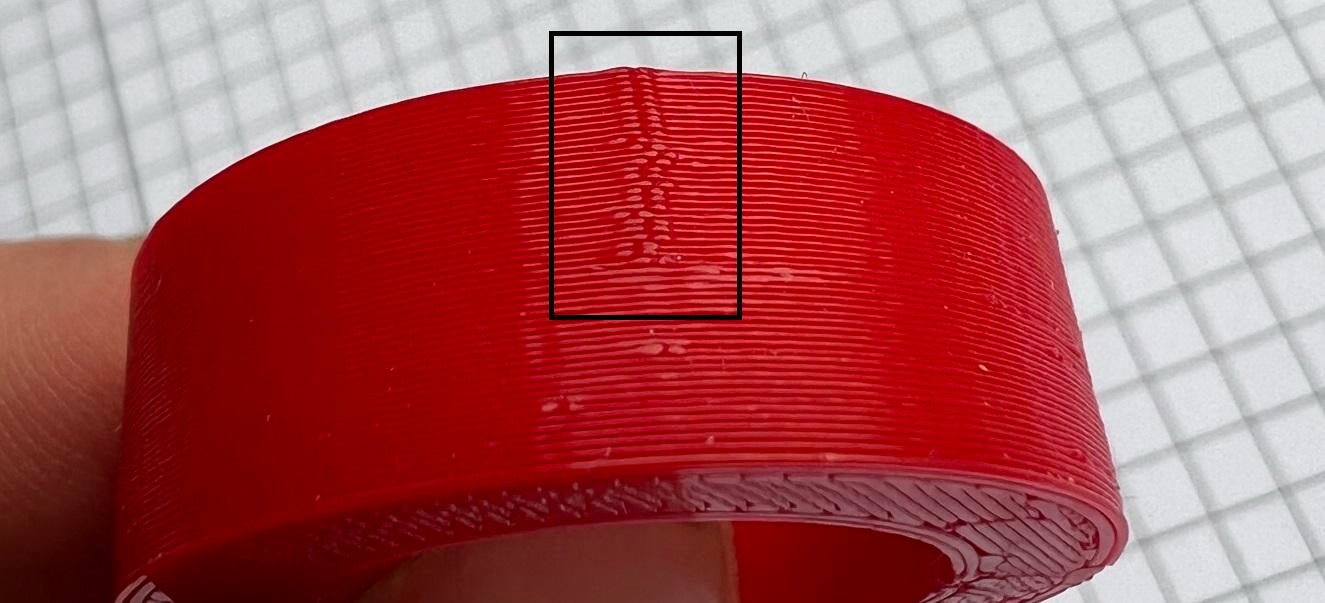
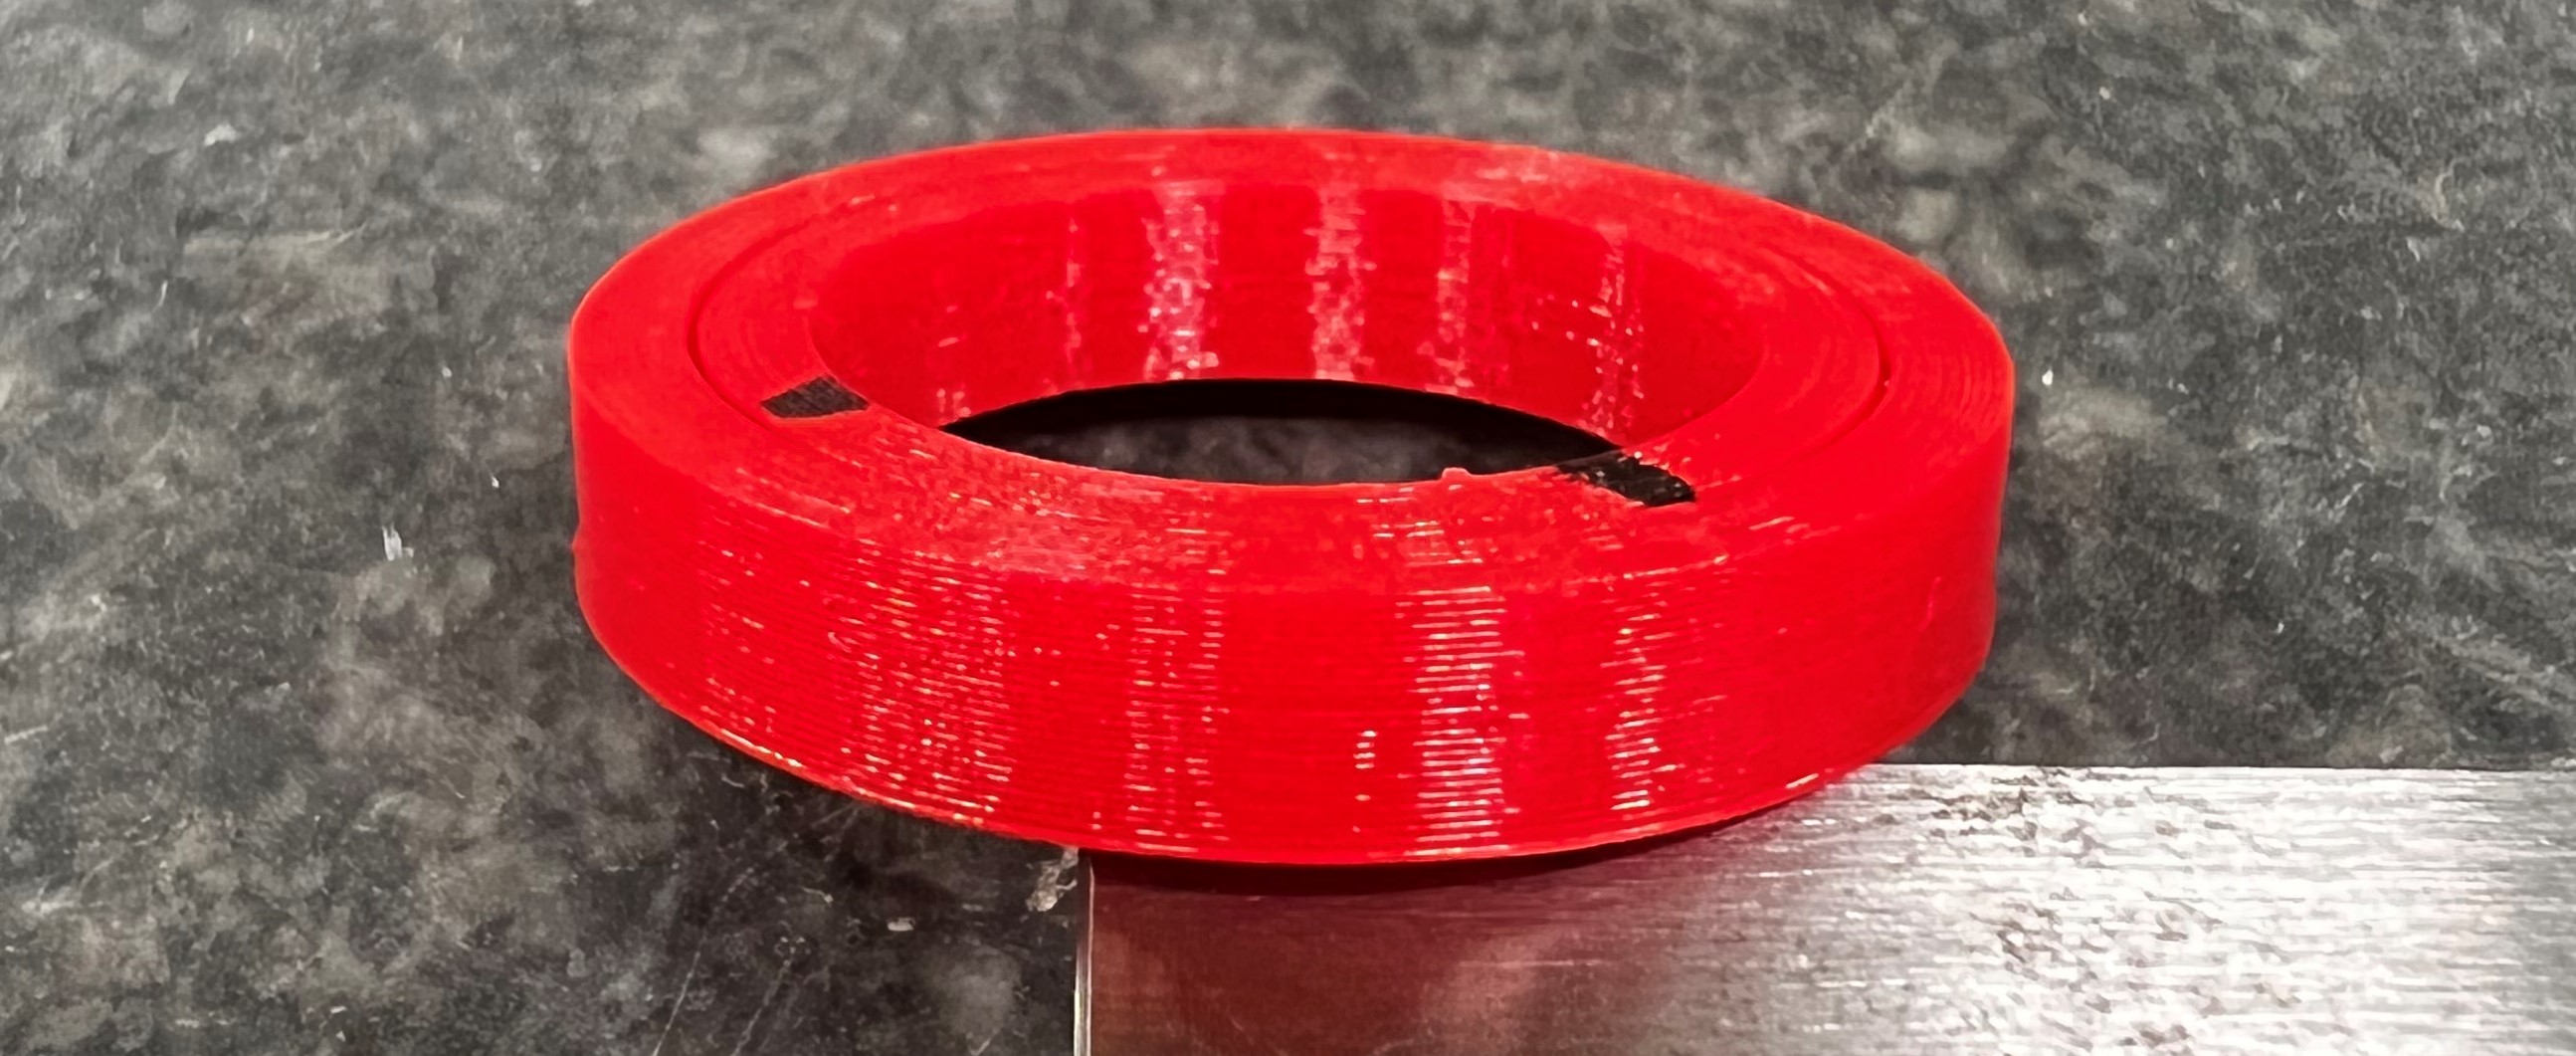
I am having trouble finding the cause for this under-extrusion at start/end of each layer. Something changes halfway into the print creating a visible seam at some specific layer height.

This also creates dimensional inaccuracy making my parts unusable.
The first layers are just fine - roundness deviation around 0.03 mm!

Any ideas on which settings I should look into?

Settings
Printer: Dremel 3D45 (newest firmware)
Slicer: Dremel DigiLab (also tried Cura Ultimaker 5.0)
Filament: PET-G

Printing Temperature: 250 °C
Initial Temperature: 240 °C
Final Temperature: 235 °C
Flow: 105 %
Retraction Distance: 1 mm (tried 3 - 1 mm)
Retraction Speed: 40 mm/s (tried 60 - 20 mm/s)
Prime Amount: 0.6 mm³ (tried 0 - 0.6) Retraction Minimum Travel: 0 Retract at Layer Change: Off
Maximum Retraction Count: 90 (could this be a problem?)
Minimun Extrusion Distance Window: 1 mm
Print Speed: 35 mm/s
Wall Sprint Speed: 30 mm/s
Combing Mode: All
Fan Speed: 50 %
Seam: Shortest

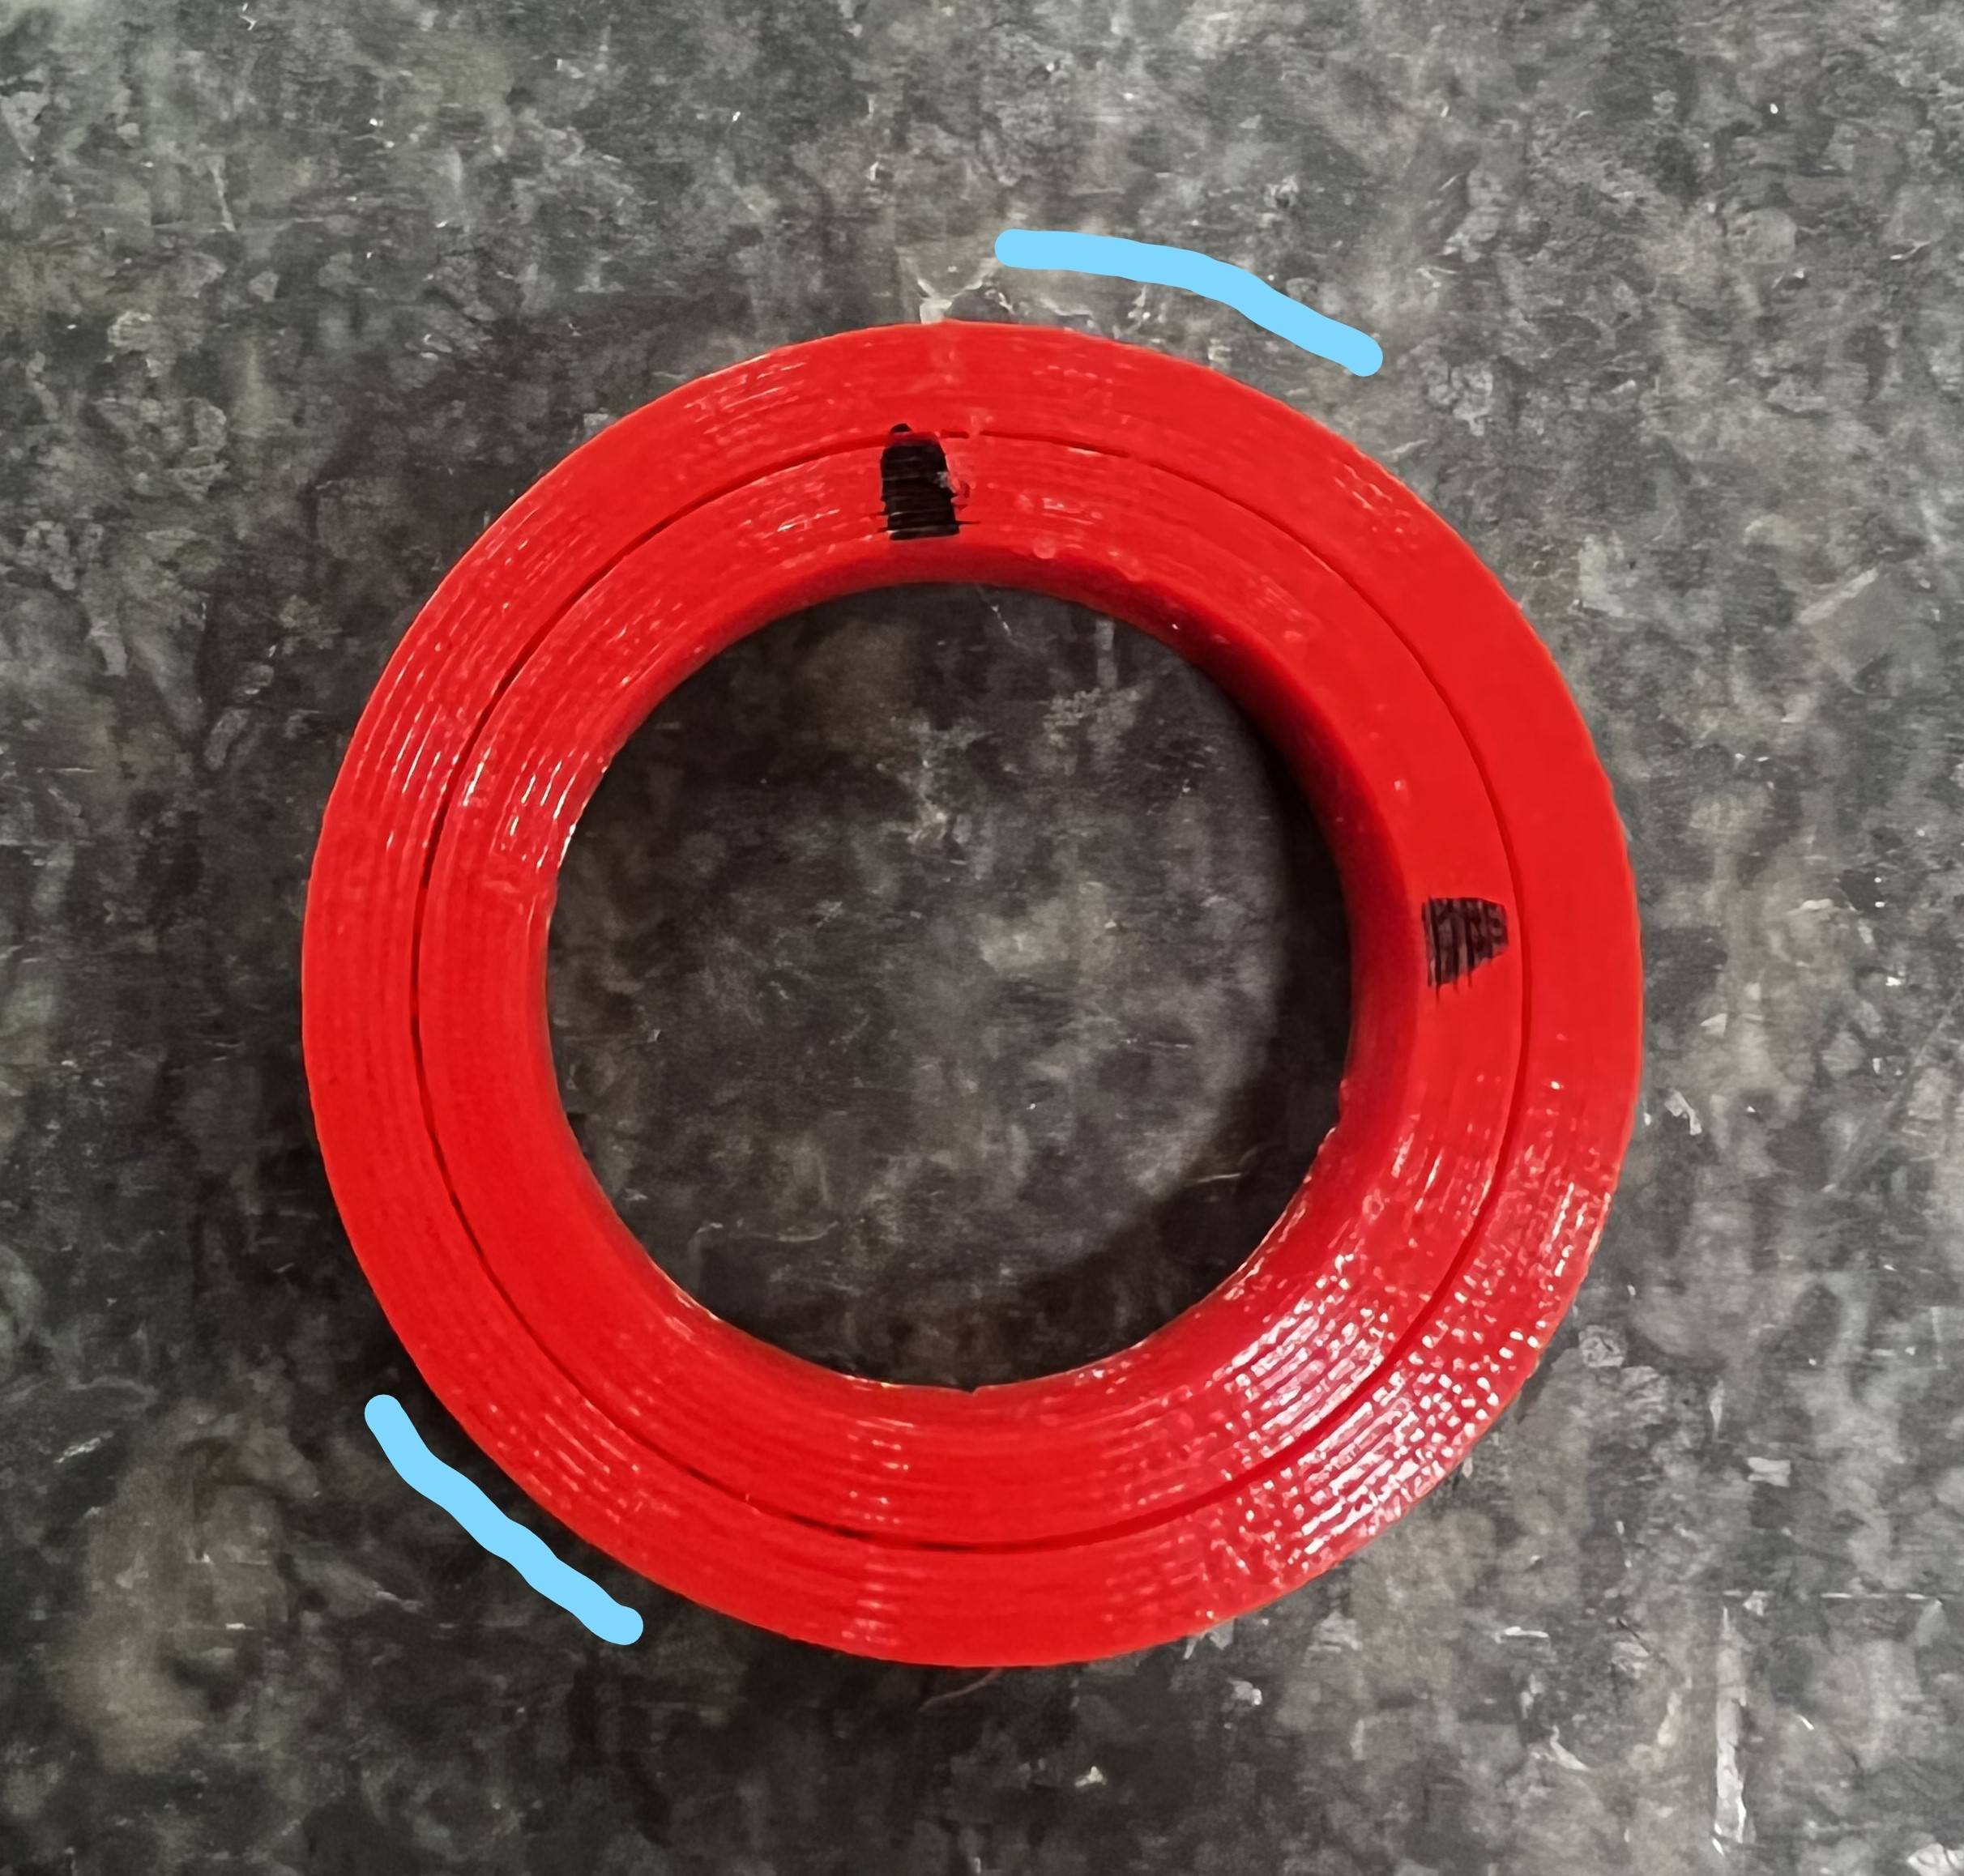
Photo of the top of a 3D printed model showing printing errors Photo of the side of a 3D printed model showing printing errors


Update 18/05

Fixed the seam by setting the alignment to random and changing retraction settings.
Remaining problem is the inaccuracy right next to the Y axis (see marked area on the pictures). Besides a hardware issue I cant think about any slicer setting which would adress this deviation.

Diameter X: 30.02 mm
Diameter Y: 30.04 mm
Diameter Marked: 29.90 mm
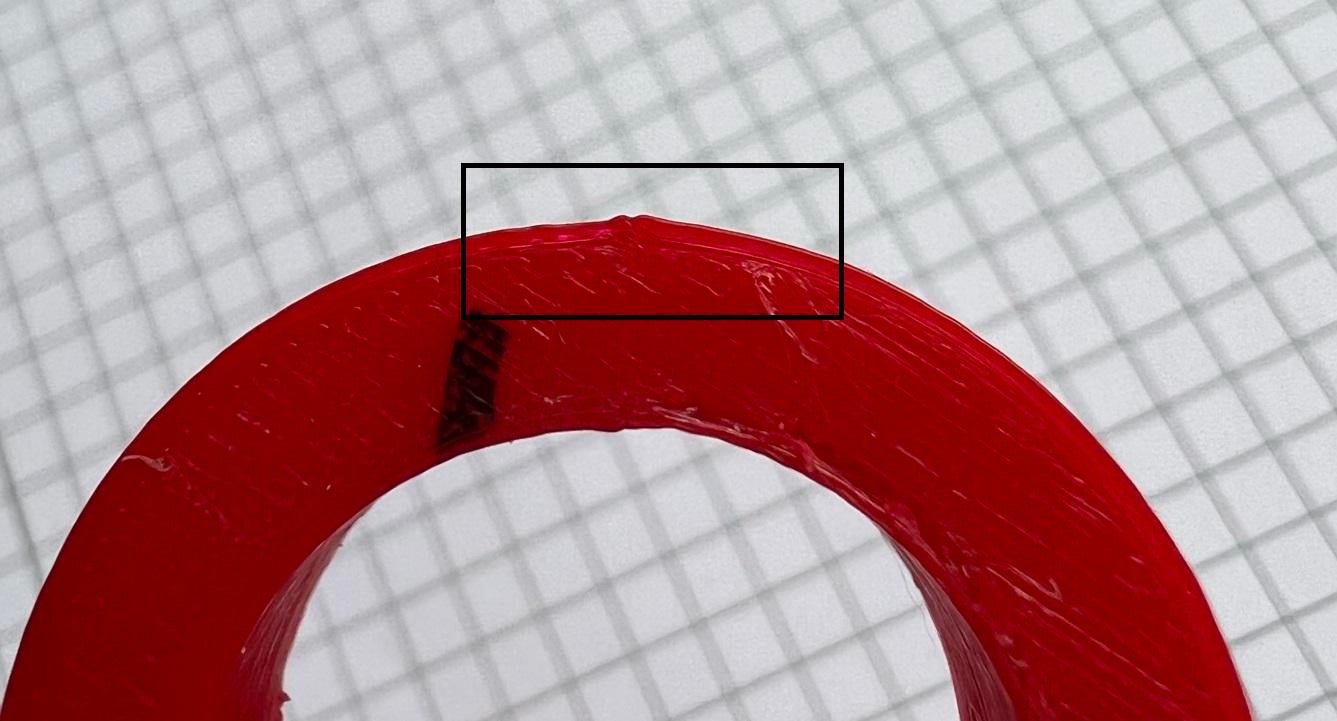
0.13 deviation in this area Fixed seam

$\endgroup$
1
  • $\begingroup$ I wouldn't worry about 0.15 mm. Printing isn't very accurate, this isn't an accurate CNC machine, 0.03 mm is actually very good. The deposition, the flow and the shrinkage all add to the inaccuracies. $\endgroup$
    – 0scar
    Commented May 18, 2022 at 7:35

2 Answers 2

3
$\begingroup$

That's not under extrusion

That is the seam, and technically it is over extruding around it. You will find that if you turn the item, you have such a spot on every layer, actually with an inner and outer perimeter, you'll have two visible seams. The seam is where the extrusion line meets itself, and thus the extrusion has to stop.

$\endgroup$
2
  • $\begingroup$ I "removed" the seam by setting it to random and did some calibration parts for flow and retraction - everything is looking good now. But there are still problems with the dimensional accuracy between the X and Y axis - around 0.15 deviation. Just like the dent before the seam on the pictures above. Do you have any suggestions? Already checked belt tension... $\endgroup$
    – rosi97
    Commented May 18, 2022 at 0:55
  • $\begingroup$ you can't not have a seam in a layer, but you can have them not aligned to one another as you realised. $\endgroup$
    – Trish
    Commented May 18, 2022 at 6:59
2
$\begingroup$

"Prime Amount" sounds like "extra prime on unretract", which necessarily deposits a blob of extra material at the location of unretract, including the Z seam. Setting this to zero should help reduce the problem. This setting is a hack to compensate for material loss to oozing during travel, but if you have oozing you should just fix that instead rather than chucking out a blob to make up for it.

$\endgroup$
2
  • $\begingroup$ Prime Amount to 0 and seam location to random fixed the big seam. But I'm still having problems with inaccuracy between the X and Y axis - which was located right next to the seam on the parts printed above. $\endgroup$
    – rosi97
    Commented May 18, 2022 at 1:21
  • 1
    $\begingroup$ @rosi97 - you might try doing a print with the seam at a different orientation to more clearly distinguish the two. $\endgroup$
    – TLW
    Commented May 18, 2022 at 2:43

You must log in to answer this question.

Not the answer you're looking for? Browse other questions tagged .